
Introduction
This feature gives you the option to update the enrollment date of the student registered for a class. This option is useful when any class schedule is updated and hence it becomes essential to update the enrollment dates for the student registered for that particular class. Also, the invoice is regenerated after the update.
Step 1
- Go to the Classes from the left-hand side menu of the Flavor System.
- Click on the a particular class to view the Class Detail page.
Step 2
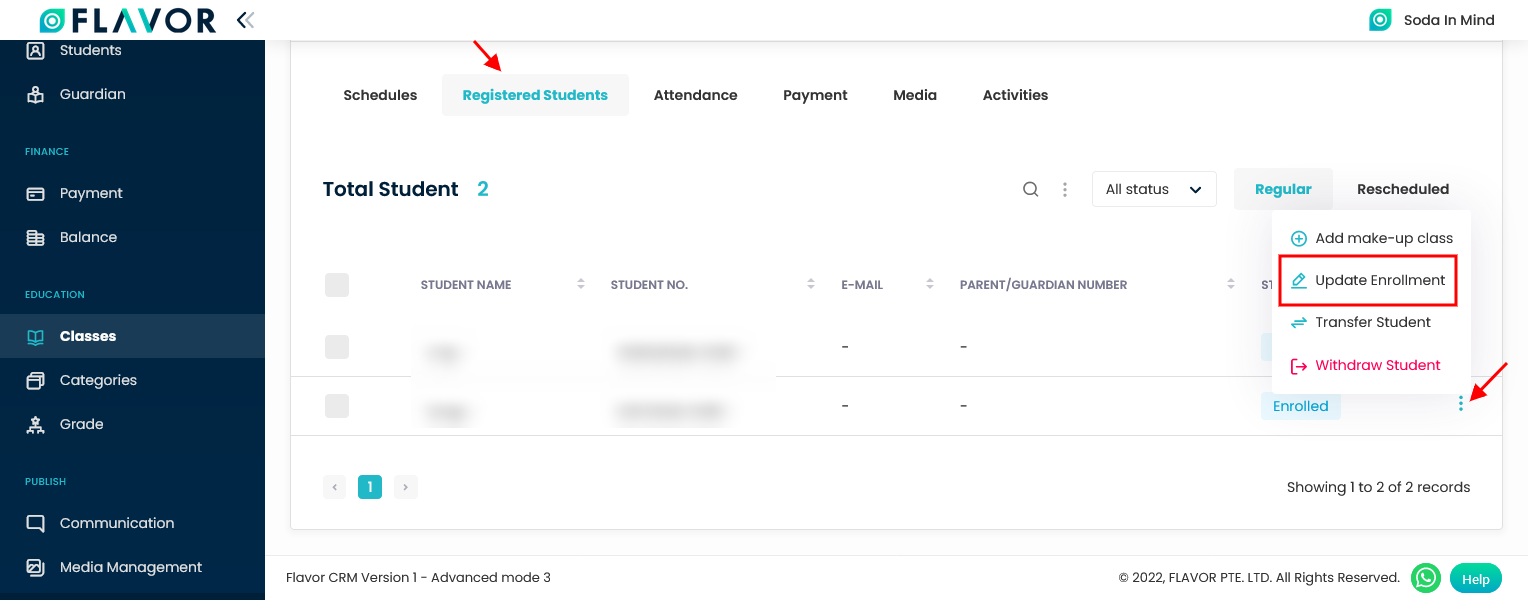
Update Enrollment for a Single Student
- Scroll down and click on Registered Students Tab.
- For a particular student, click on the action button and then click on Update Enrollment.
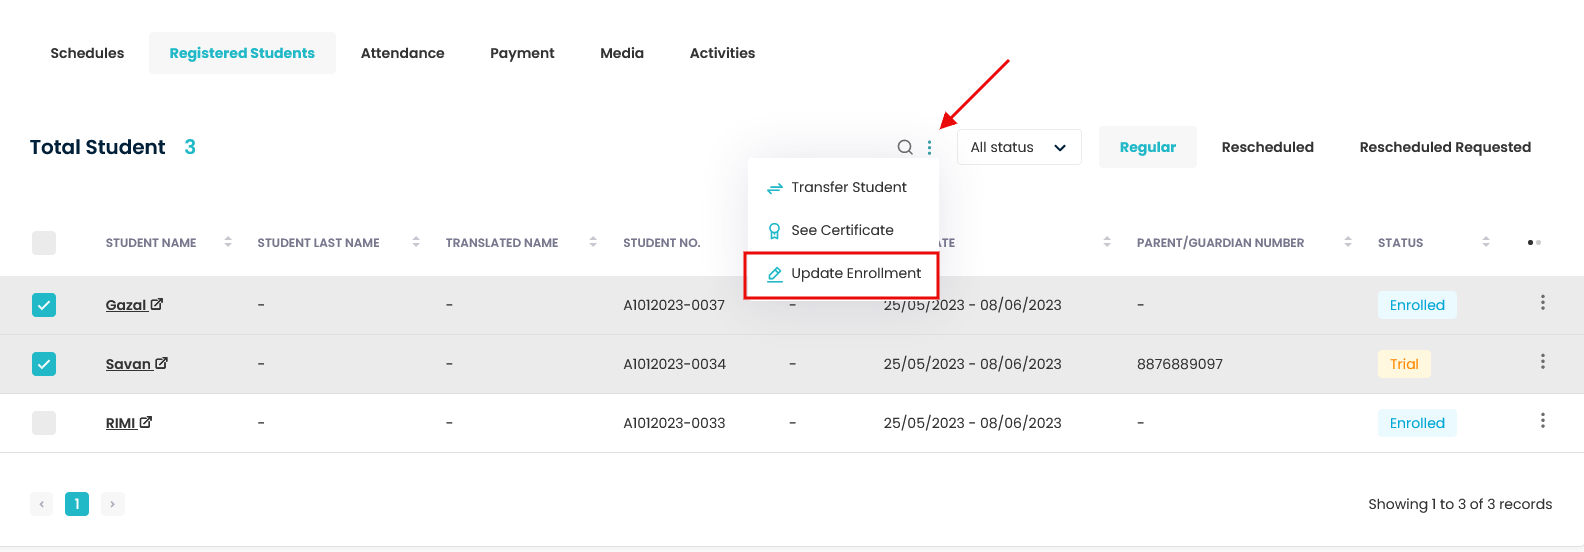
Update Enrollment in bulk
- Scroll down and click on Registered Students Tab.
- Select the students by clicking on the check-boxes, click on the bulk action icon button and then click on Update Enrollment.
Step 3
- Once you click on Update Enrollment, a pop up named Update Enrollment will appear.
- You can select dates under Choose New Enrollment Date.
- By default, the updated class dates will be selected under Choose New Enrollment Date.
- You need to choose the Start Date and the End Date and the accordingly the Total session will get updated.
- Click on Save button.
- The invoice generated will also get updated as per the changes made.
Note : Start Date and End Date should be a lesson date that are already added as lesson dates within the schedule that the student has been enrolled to. If you want to add a new lesson date then go to this link How to Update Lesson Date to Schedule and then set the start date and end date accordingly.
For Single Update Enrollment

For Bulk Update Enrollment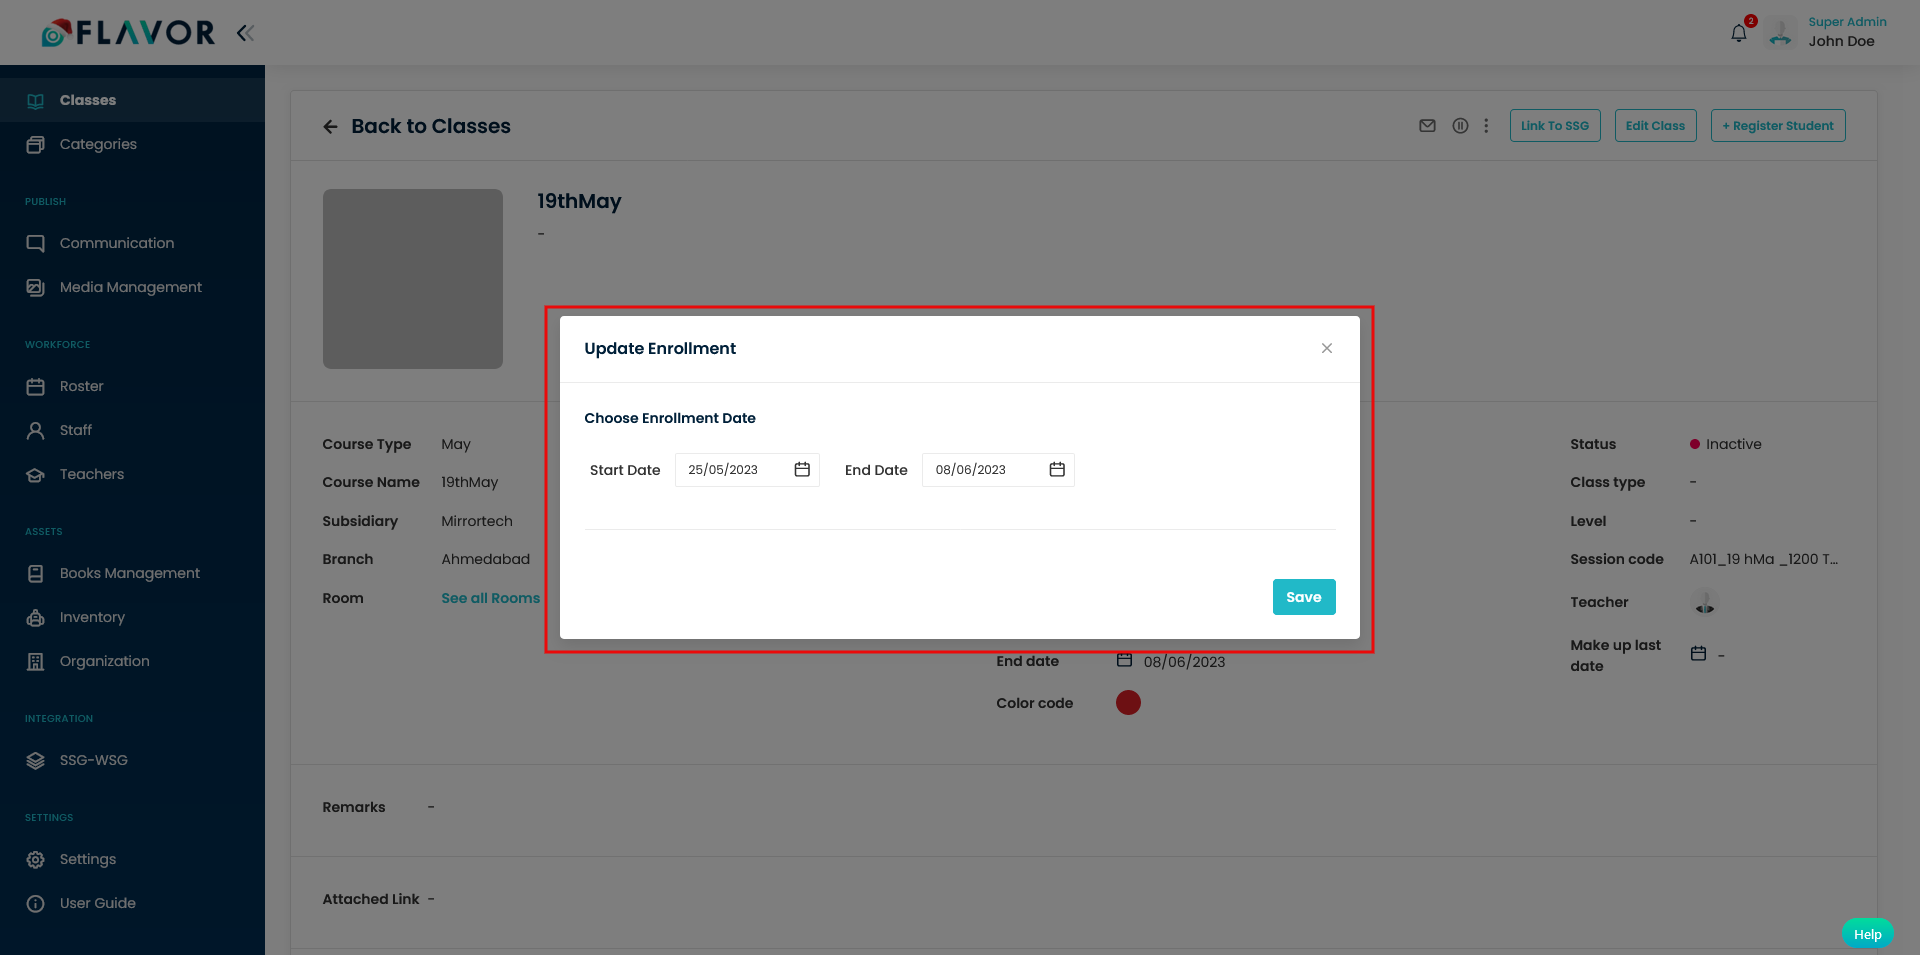
Update Issue Date / Due Date For Invoice :
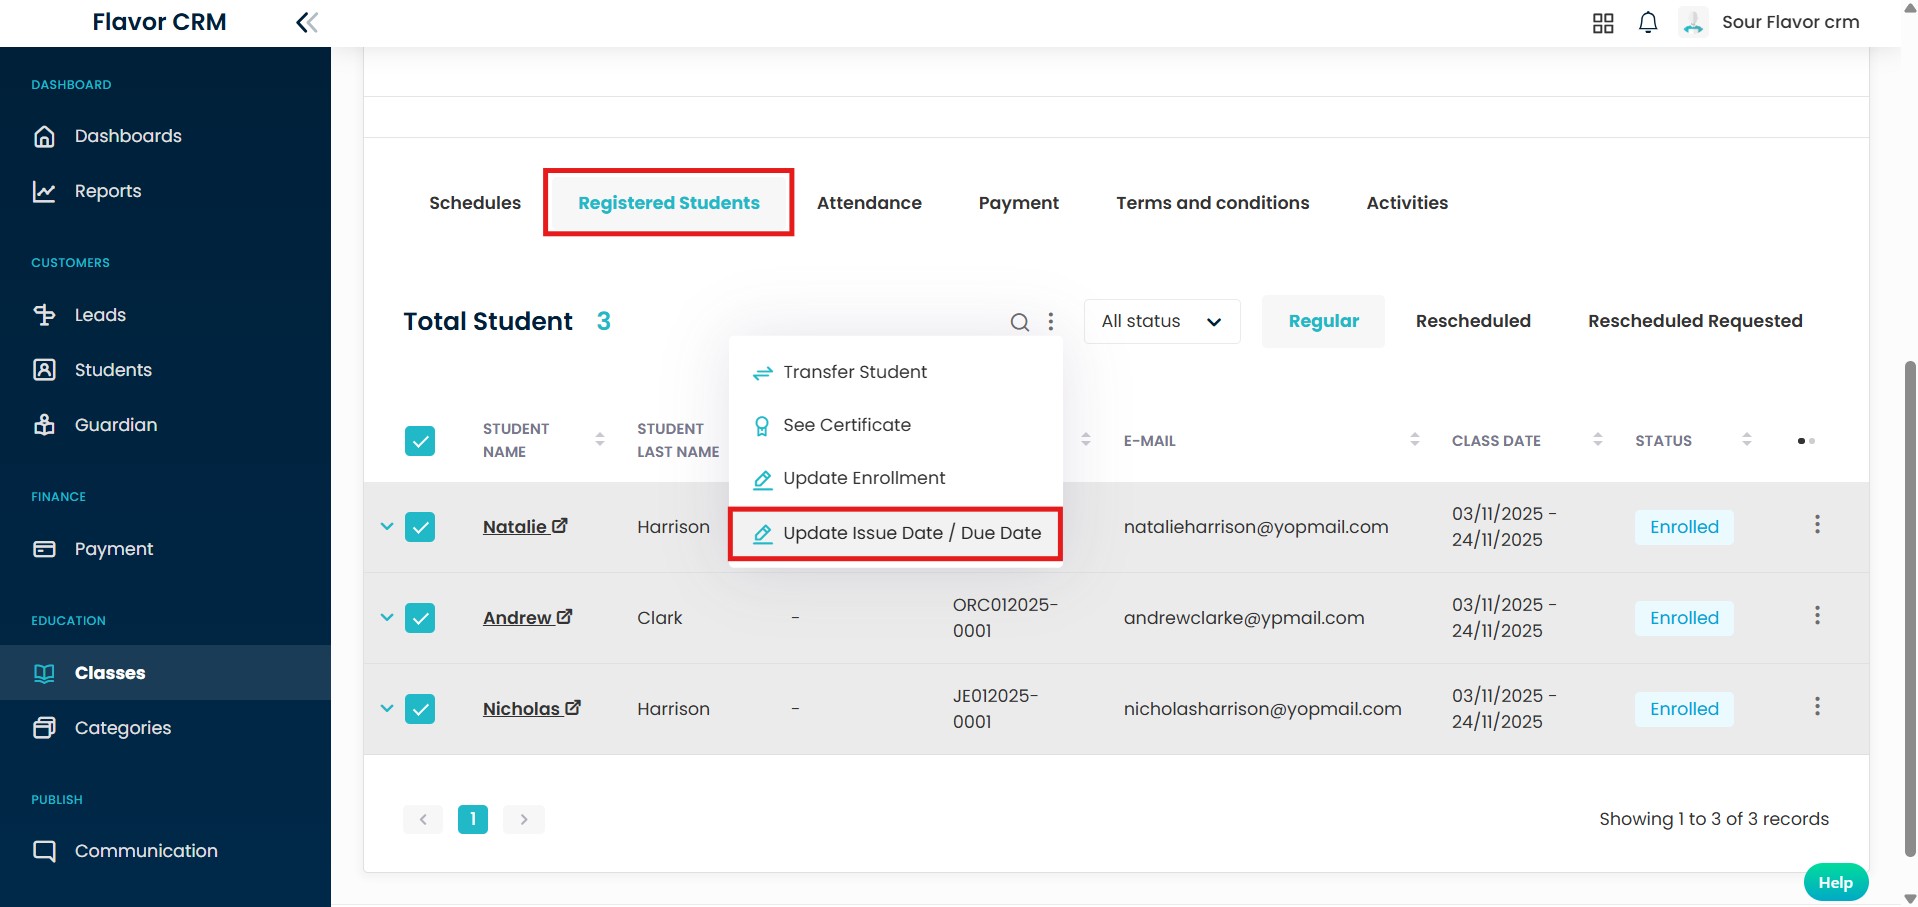
Step 1 : Registered Students
- Go to Classes Module. Open the Class you want update the dates in.
- Select the Registered Students section. Select the students whose invoice dates you want to update.
- Click on three dotes (⋮) and select Update Issue Date / Due Date.
Step 2 : Enter Issue Date & Due Date
- When you select Update Issue Date / Due Date. It will open a pop-up to enter dates.
- Choose to Issue Date and Due Date.
- Click on Save.

Invoice Date Update Success
When you click on Save the Invoice Issue Date and Due Date will be updated. A confirmation message will appear on screen.

Need more help? Ask us a question
Please let us know more of your details and our team will reach out to you very shortly.