
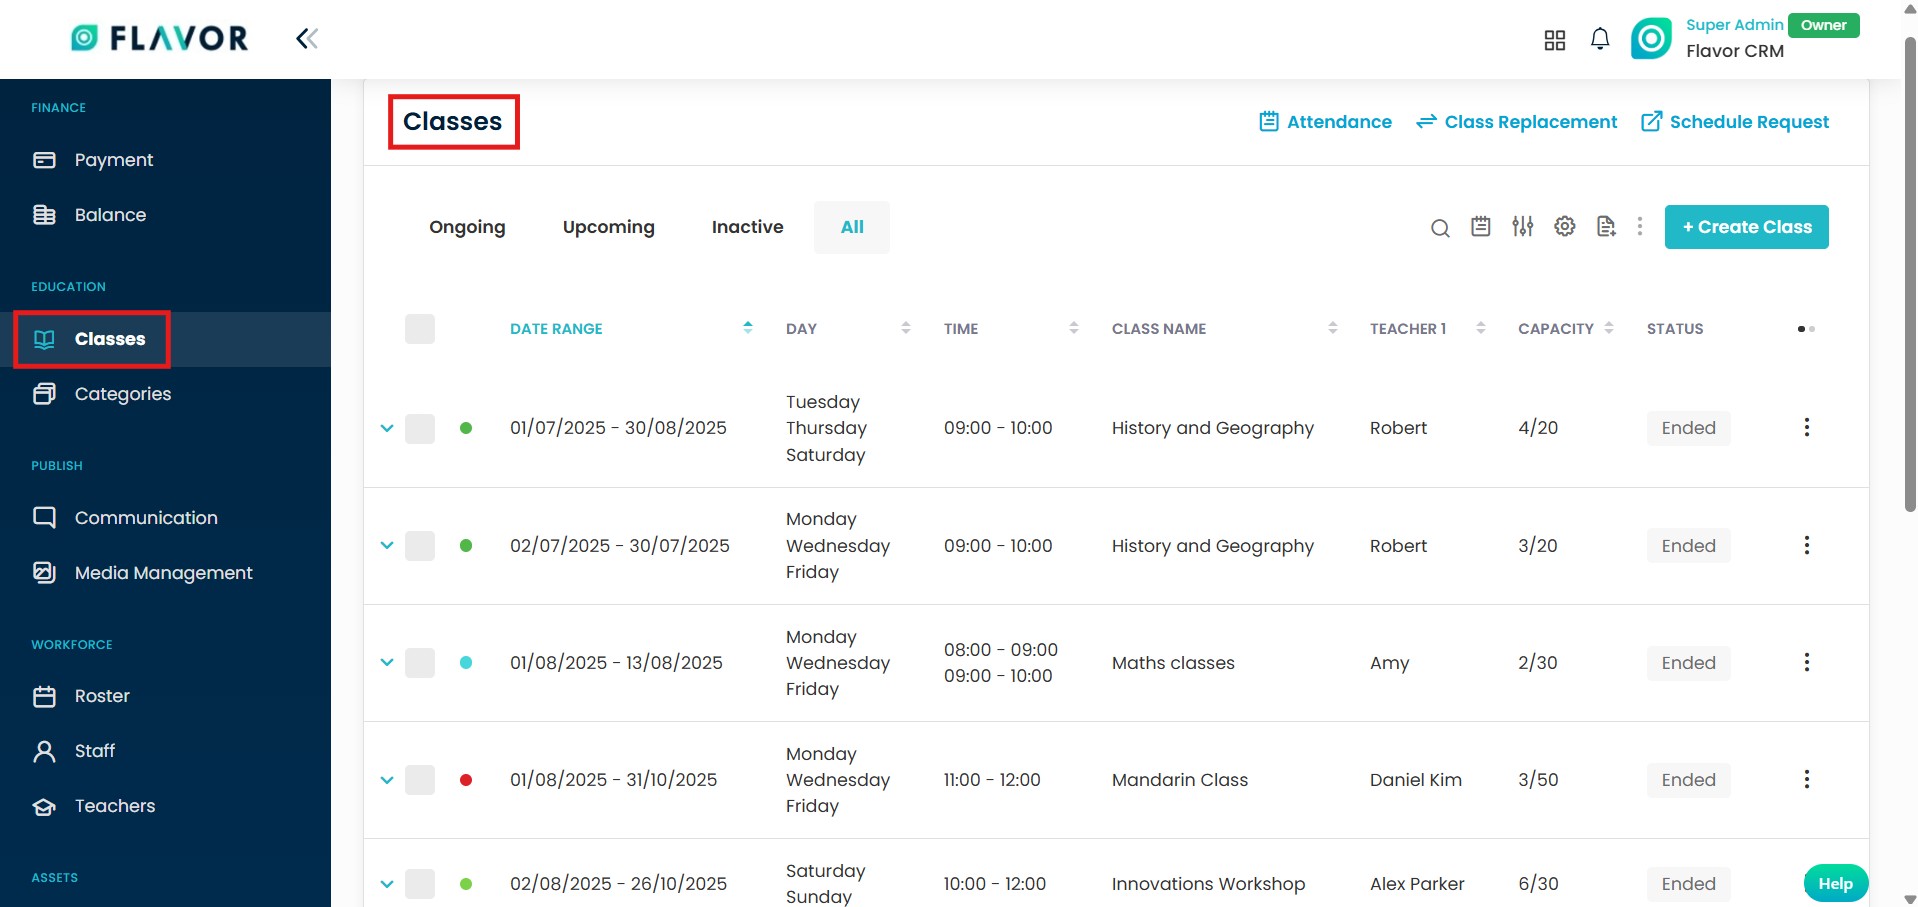
Step 1 : Access the Classes Module from the Dashboard
- Locate the navigation menu in Dashboard : On the left side of your screen, you’ll see a vertical menu bar. This is the primary navigation panel used to access different modules.
- Click on Classes :
-
- Scroll through the menu and click on the option labelled Classes.
- This will open the Classes module, where all ongoing, upcoming and inactive classes are listed.
Step 2 : Select the Class You Want to Export to Google Calendar
Once you’ve accessed the Classes section, the next step is to select the specific class you want to add to your Google Calendar.
- Review the Classes list : In the Classes module, you’ll see a list displaying all scheduled classes. This may include: Ongoing, Upcoming and Inactive classes.
- Locate the class you want to export : Scroll through the list or use the filter/search bar to find the specific class.
- Click on the class : Once you’ve identified the correct class, click on it. This will open a detailed view of that class.

Step 3 : Add to Google Calendar Feature
Once you’ve opened the specific class you want to export, Flavor CRM makes it easy to add it directly to your Google Calendar using the built-in integration.
- Locate the Add to Google Calendar button.
After opening the class details page, look toward the top-right corner of the screen. You’ll see a button labelled Add to Google Calendar accompanied by a calendar logo for easy identification. - Click on Add to Google Calendar to initiate export.

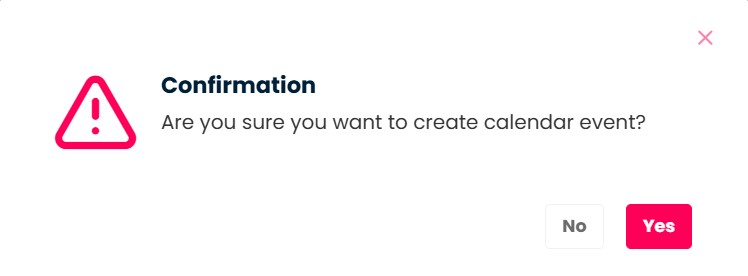
Respond to the Confirmation Tab
Upon clicking the button, a confirmation dialog box will appear on the screen. This is a safety measure to ensure you’re exporting the correct class.
Calendar Event Creation
After confirming your intent to export the class to Google Calendar, Flavor CRM completes the process by sending the event and notifying all relevant participants.
- Once you confirm by clicking Yes in the previous step, Flavor CRM will process the request.
Within a few seconds, a message will appear on your screen that reads :

Step 4 : Email with the Synced Calendar Link
Once you select the Add to Google Calendar option, the system will automatically generate a link to the synced Google Calendar event. This link is then emailed to the following recipients : Super Admin, Branch Manager, Assigned Teachers, All Registered Students (with valid email addresses).
- These recipients will receive an email notification containing the link to the class event added to the Google Calendar. By clicking on the link, they can view and save the event directly to their personal calendars.
The Scheduled Class in Google Calendar
Once the class has been successfully added to Google Calendar, the event will appear with all the relevant details clearly displayed.
- The calendar entry will include information like Class name, Scheduled Date and Time, Location, Teachers name and any necessary detail.
This seamless integration ensures that all necessary information is provided in one central location, allowing teachers, students, and staff to stay organized and informed with minimal effort.
Need more help? Ask us a question
Please let us know more of your details and our team will reach out to you very shortly.