
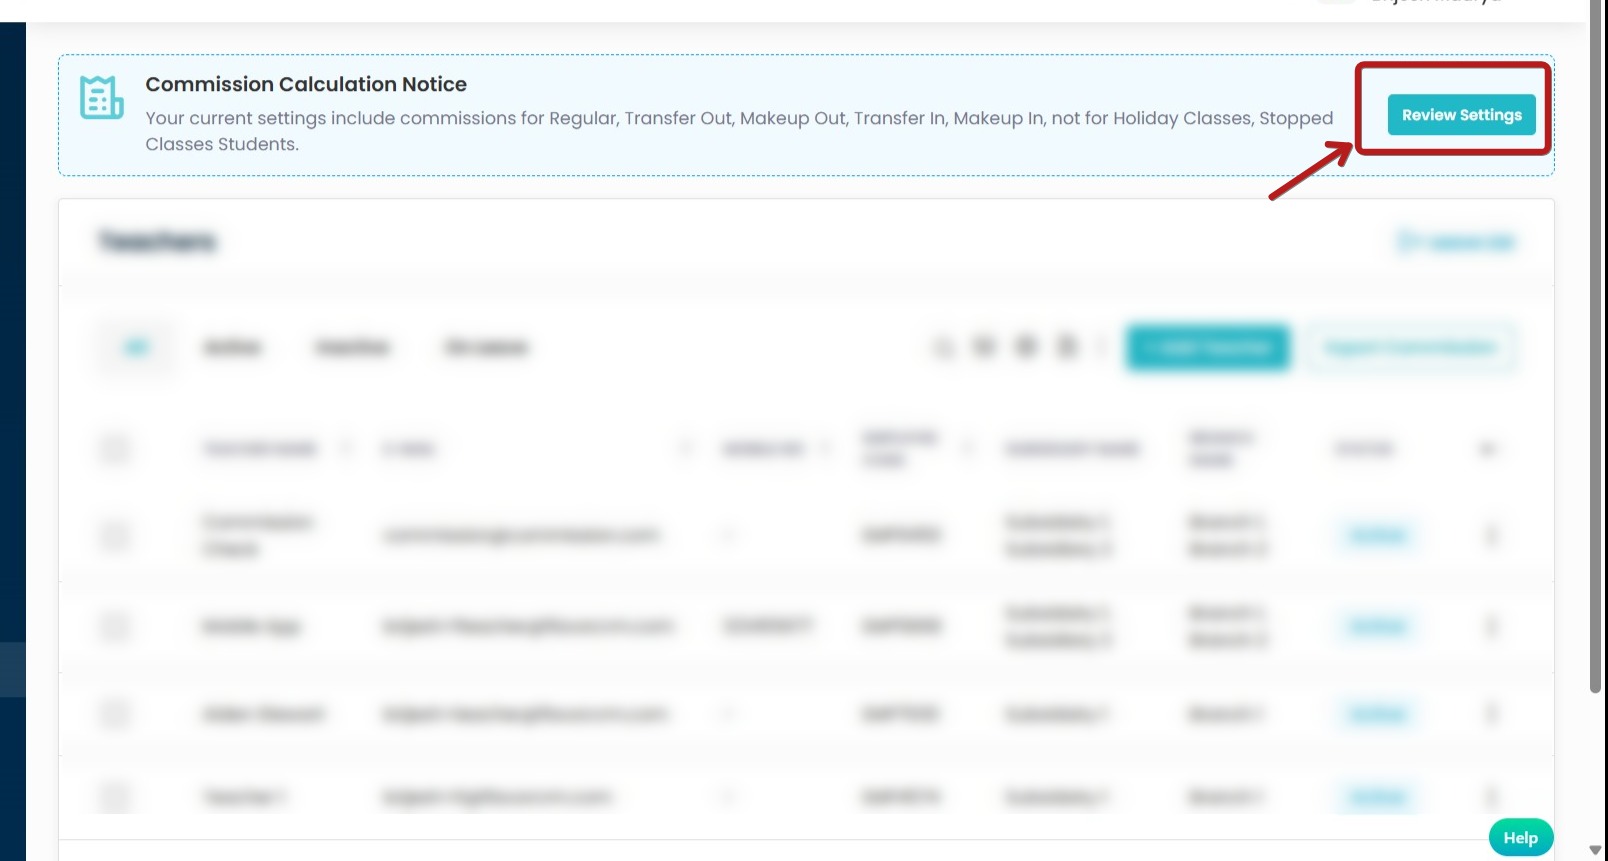
Commission Settings
Commission Setting: Go the teachers section from left side panel and click on Settings Icon.
Go to Commission Settings.
You can also open the settings by navigating to the Teacher’s Section in the left panel, then clicking the Review Settings box at the top.
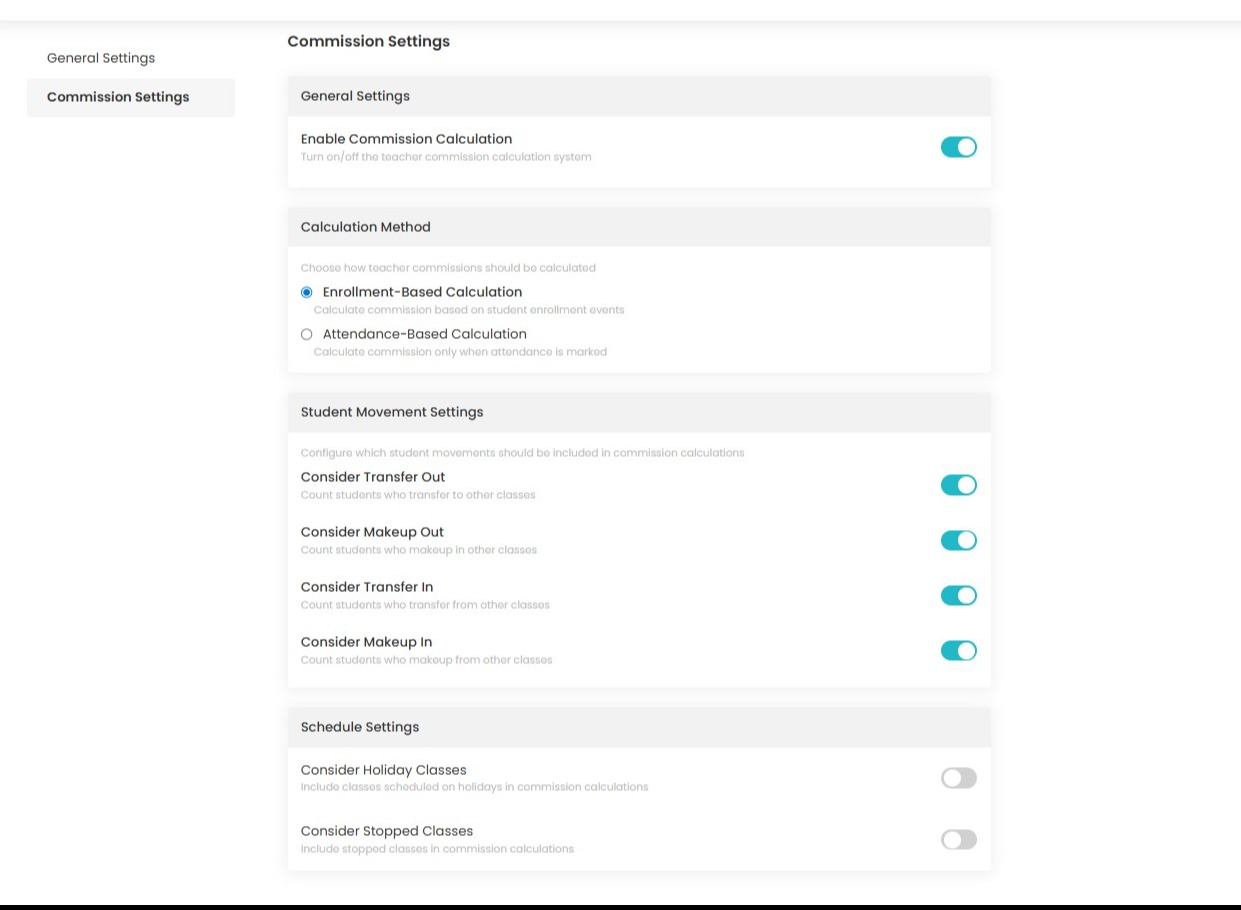
Firstly Enable the Enable Commission Calculation.
Select the Calculation Method according to your preference.
- Enrolment Based – Calculation
- Attendance Based – Calculation
Toggle this setting to decide whether it should be included in the commission report. When enabled, it will be included; when disabled, it will not.
-
Transfer Out: Turn on to count students who move out of a class against that class’s commission; turn off to exclude them.
-
Makeup Out: Turn on to count students who attend makeup sessions in other classes as deductions from the original class; turn off to ignore.
-
Transfer In: Turn on to include students who transfer into the class toward commission; turn off to exclude them.
-
Makeup In: Turn on to include students who attend makeup sessions from other classes toward the class’s commission; turn off to ignore.
-
Holiday Classes: Turn on to include sessions held on holidays in commission; turn off to exclude them.
-
Stopped Classes: Turn on to include sessions from classes that stopped, up to the stop date; turn off to exclude them.
Tip :
To prevent staff from seeing each other’s commissions, ask support to enable the Owner role, then adjust admin roles and permissions so only selected roles can view commission pages or amounts.
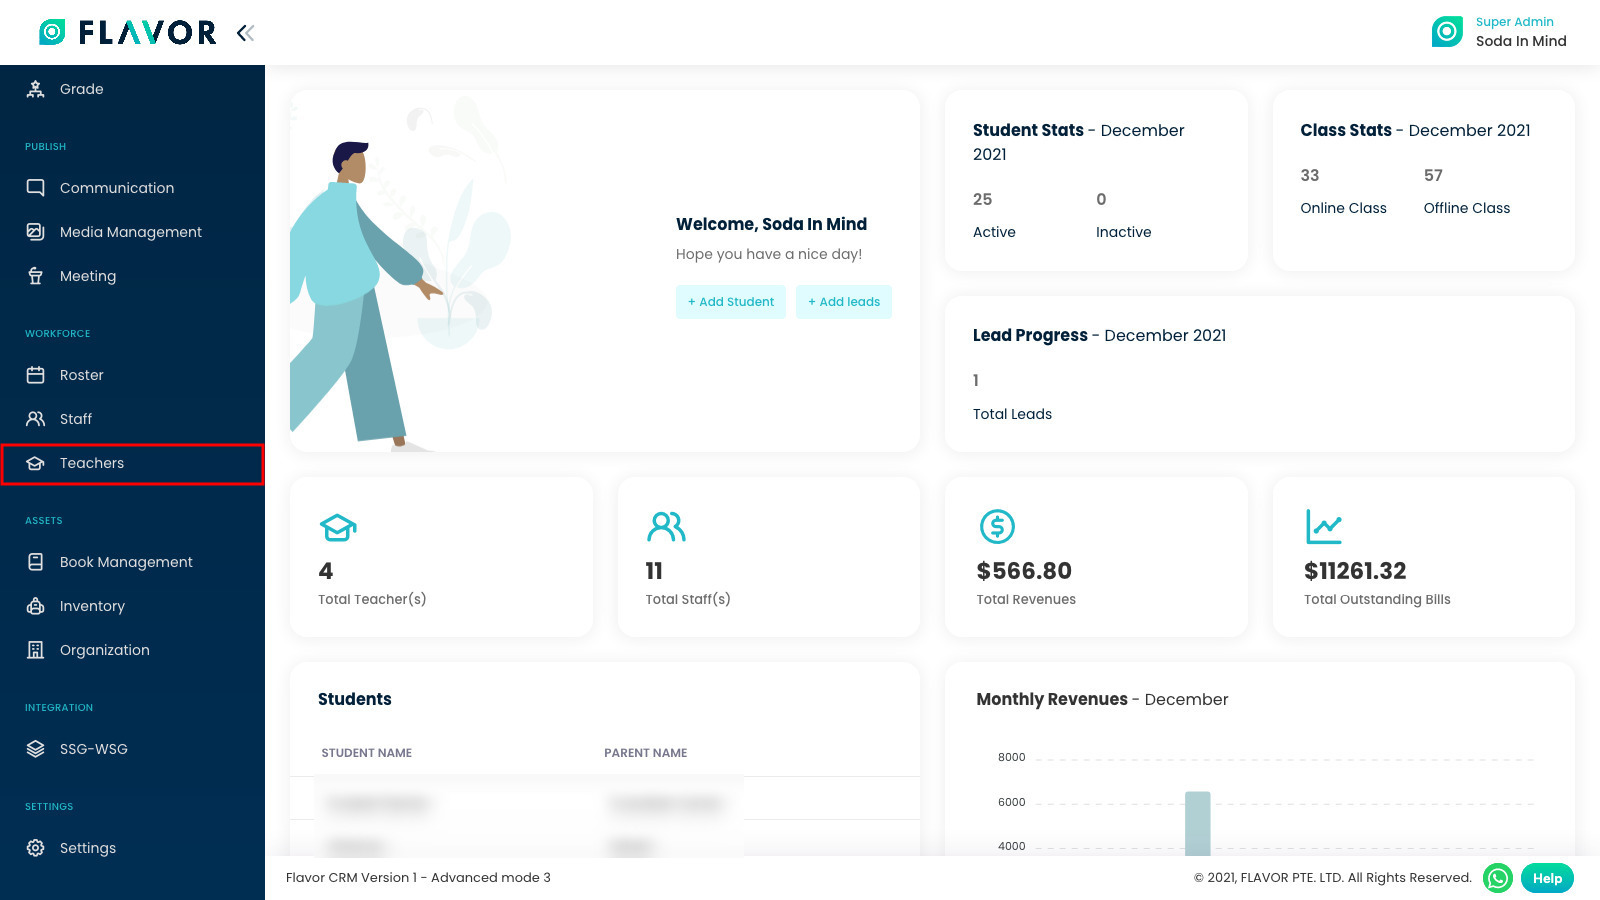
Step 1
After logging in, the system redirects to the dashboard. In the left menu, click Teachers to go to Teacher’s list.
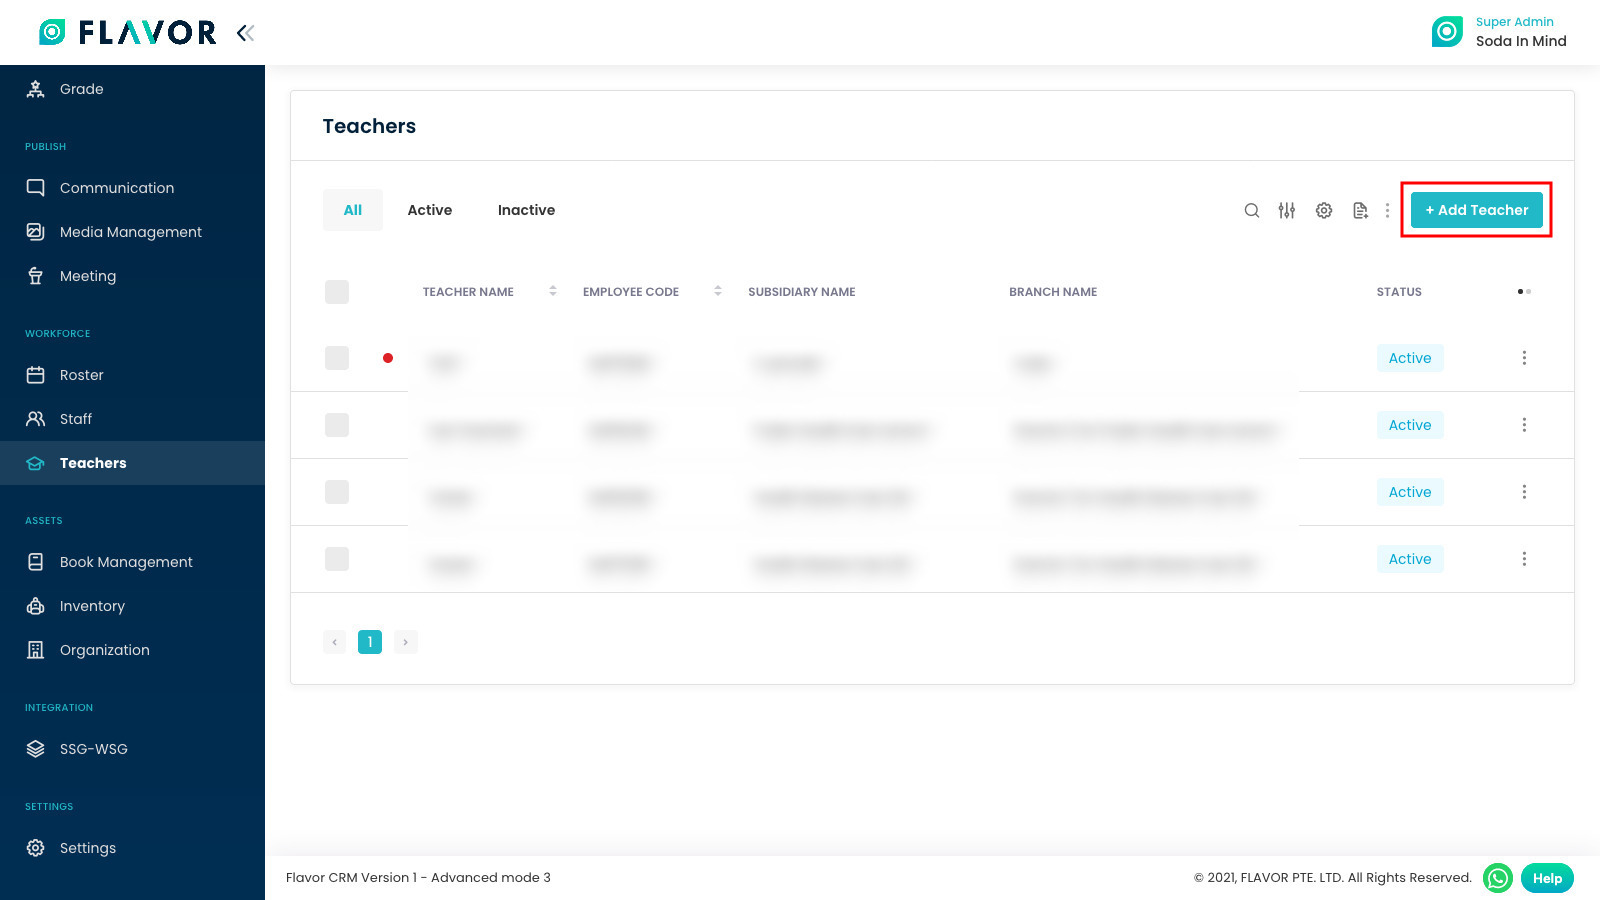
Step 2
After selecting Teachers, the system opens the Teachers page, system will direct you to teacher page. To add new teacher, click Add Teacher.
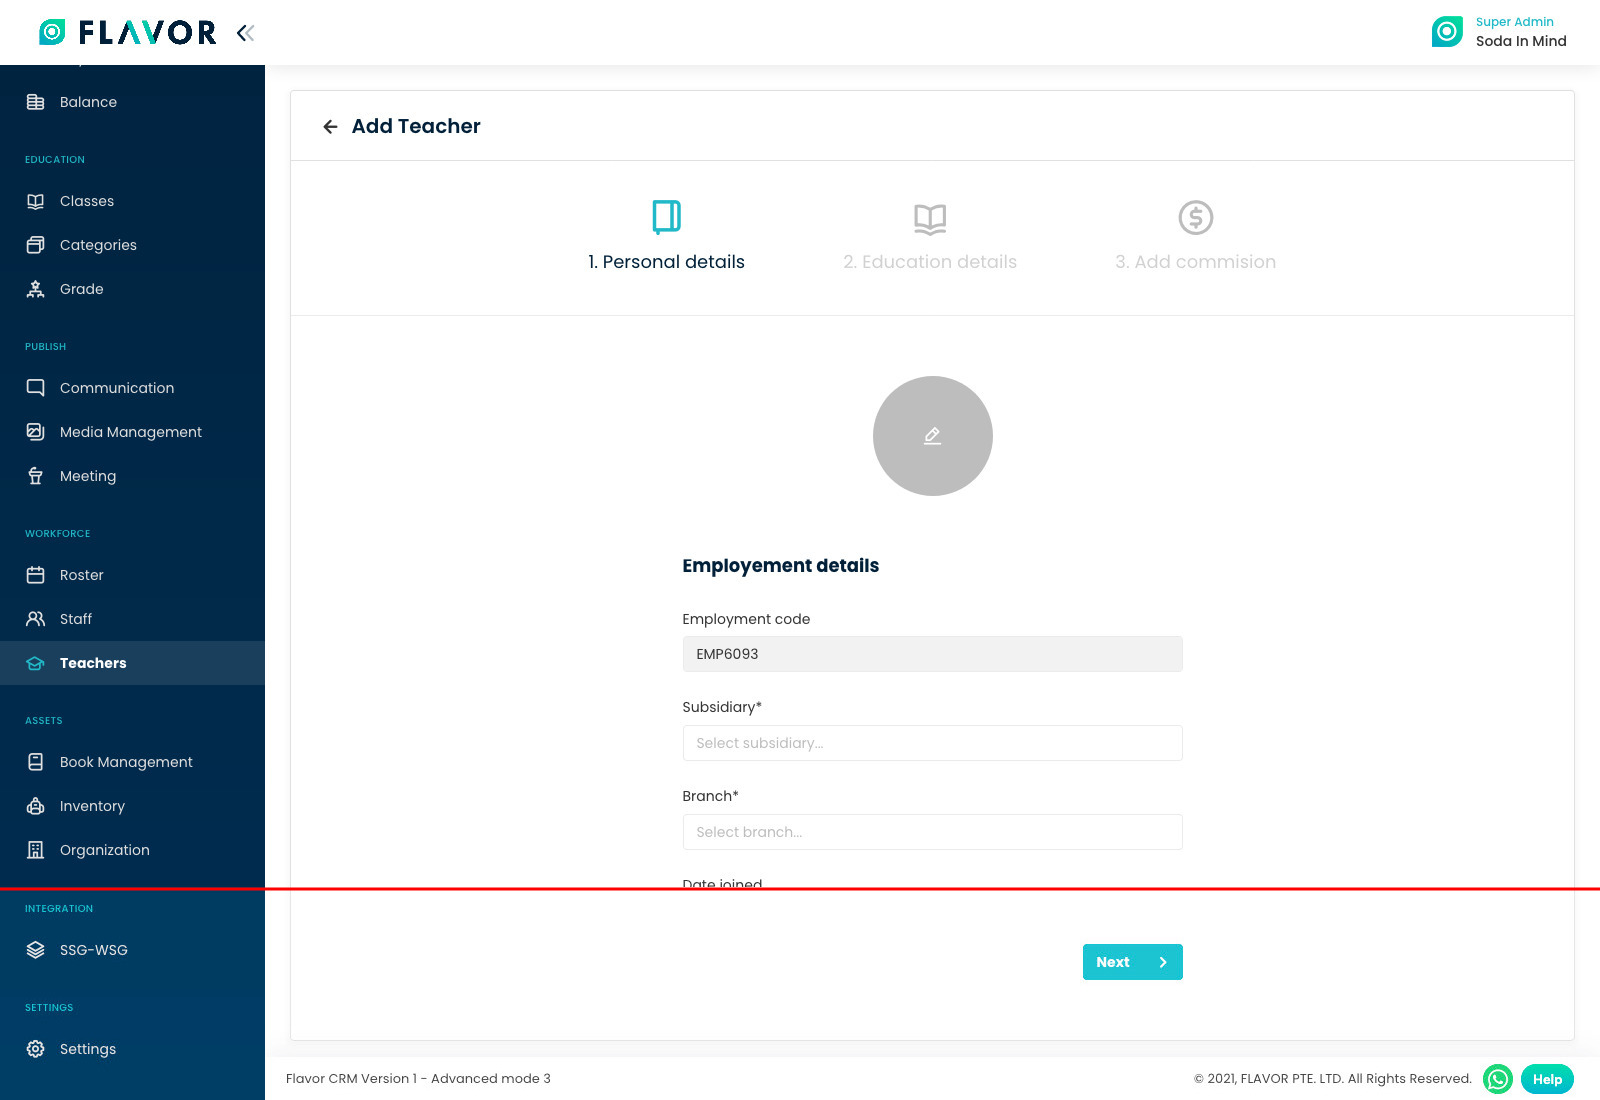
Step 3
Here, you need to fill out all mandatory Personal details included username and password for Teacher to login by using their account.
After all data has been fully filled, click on Next button.
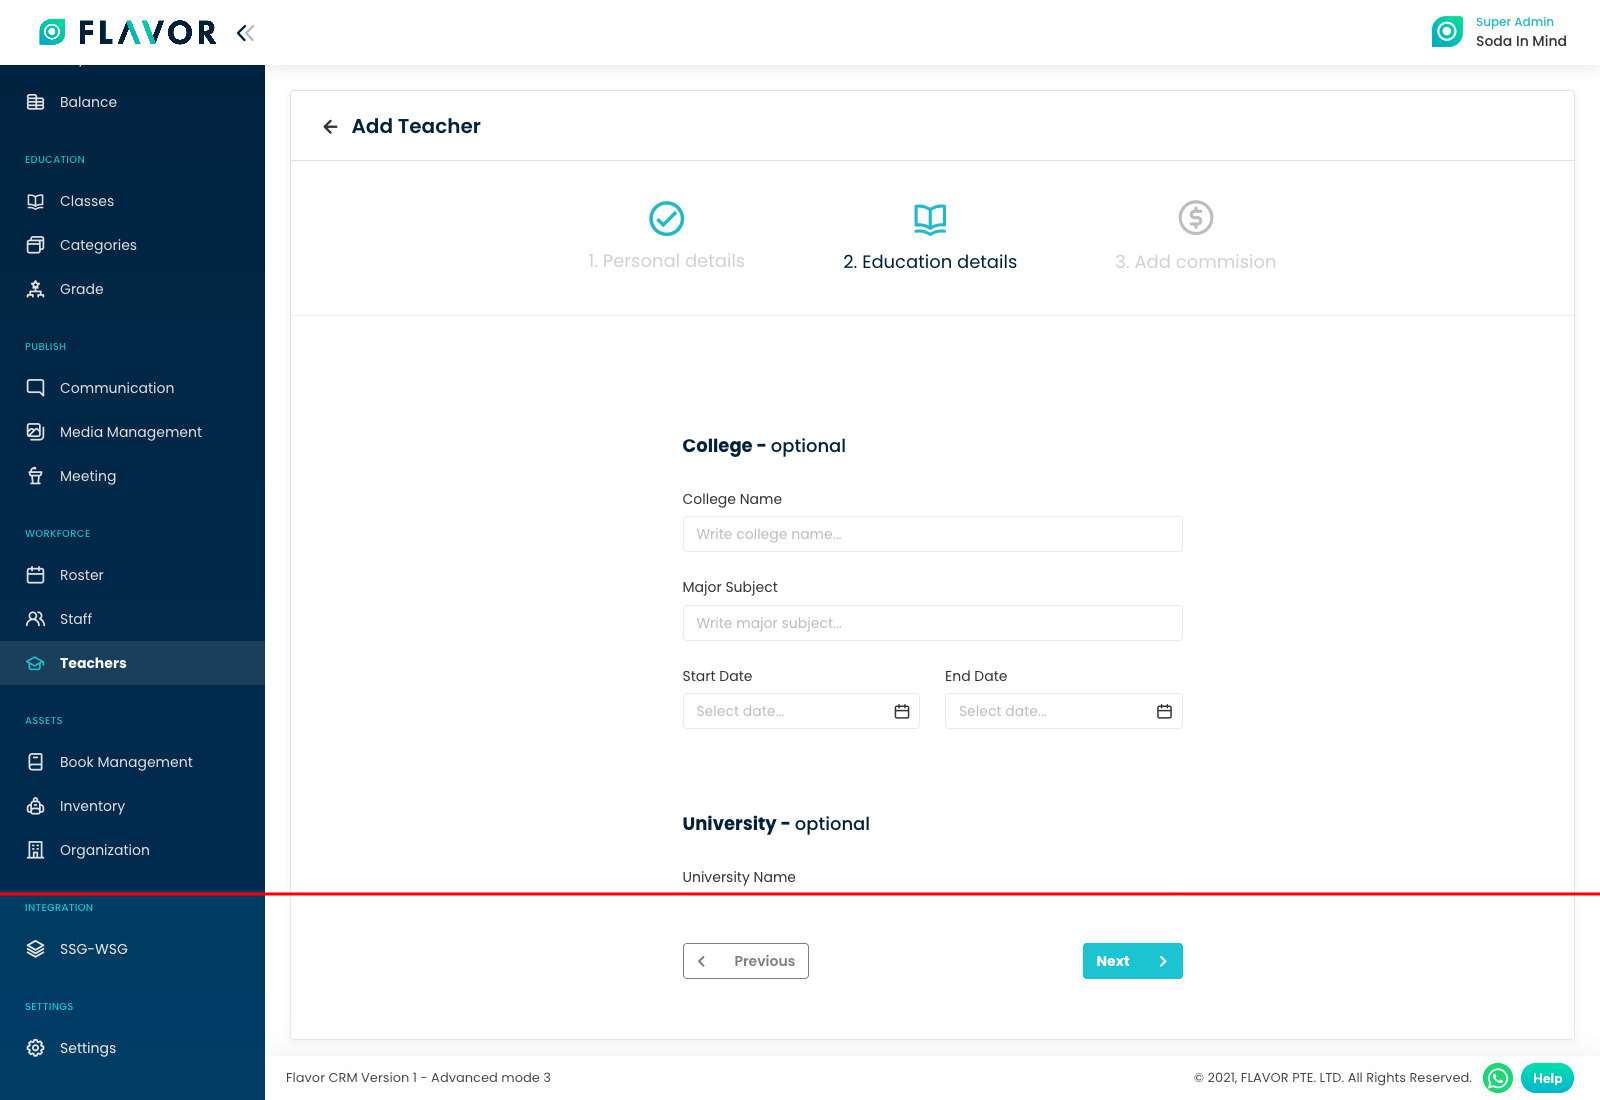
Step 4
Here, fill out Teacher’s Personal details. After all data has been fully filled, click on Next button.
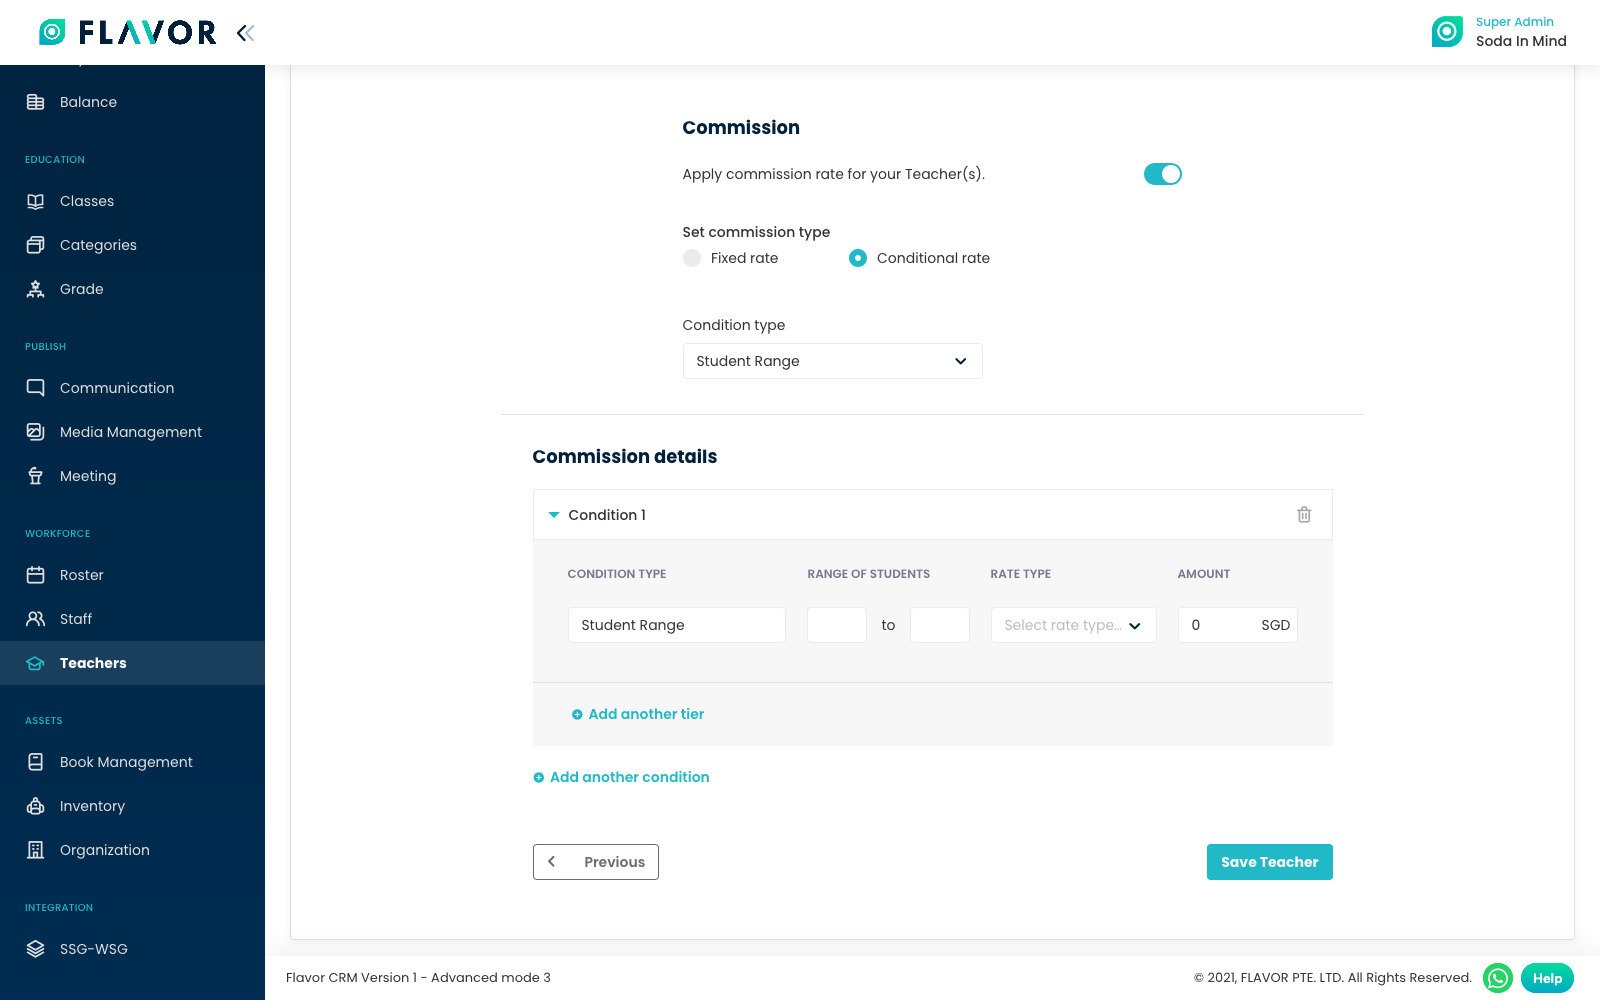
Step 5
If teacher’s Commission System is enabled, only then you can set commission while adding a teacher. If this step is not showing up, contact the administrator.

Step 6
Student range of commission type is when you want to add teacher commission based on student attendance in the class.
You will found three rate types there, which are:
- Flat rate : the commission amount will be flat.
- Hourly : the commission calculation will be based on hours.
- Revenue-based : the commission will be a percentage of class revenue.
Fill out commission data and click on Save Teacher button.
Step 7
Hour range of commission type is when you want to add teacher commission based on their work-hours.
You will found three rate type there, which are:
- Flat rate: the commission amount will be flat.
- Hourly: the commission calculation will be based on hour.
- Revenue-based: the commission will be percentage of the revenue.
Fill out commission data and click on Save Teacher button.
Note: The teacher commission is not calculated for the day when the teacher is on leave.

Step 8 - Add commission to the existing teacher
To add commission of teacher,
- Go to Teachers from the left menu, and
- Search the desired teacher.
- Then click on the desired teacher row.
Step 8.1
Click on the Commission. This will redirect you to the Commission page.
Step 8.2
Here click on Set Commission button. This will open an Set Commission modal.
Step 8.3
Here, you can enable teacher commission if not enabled and set the commission. After setting the commission, click on the Save button to save the commission.
Note: The teacher commission is not calculated for the day when the teacher is on leave.
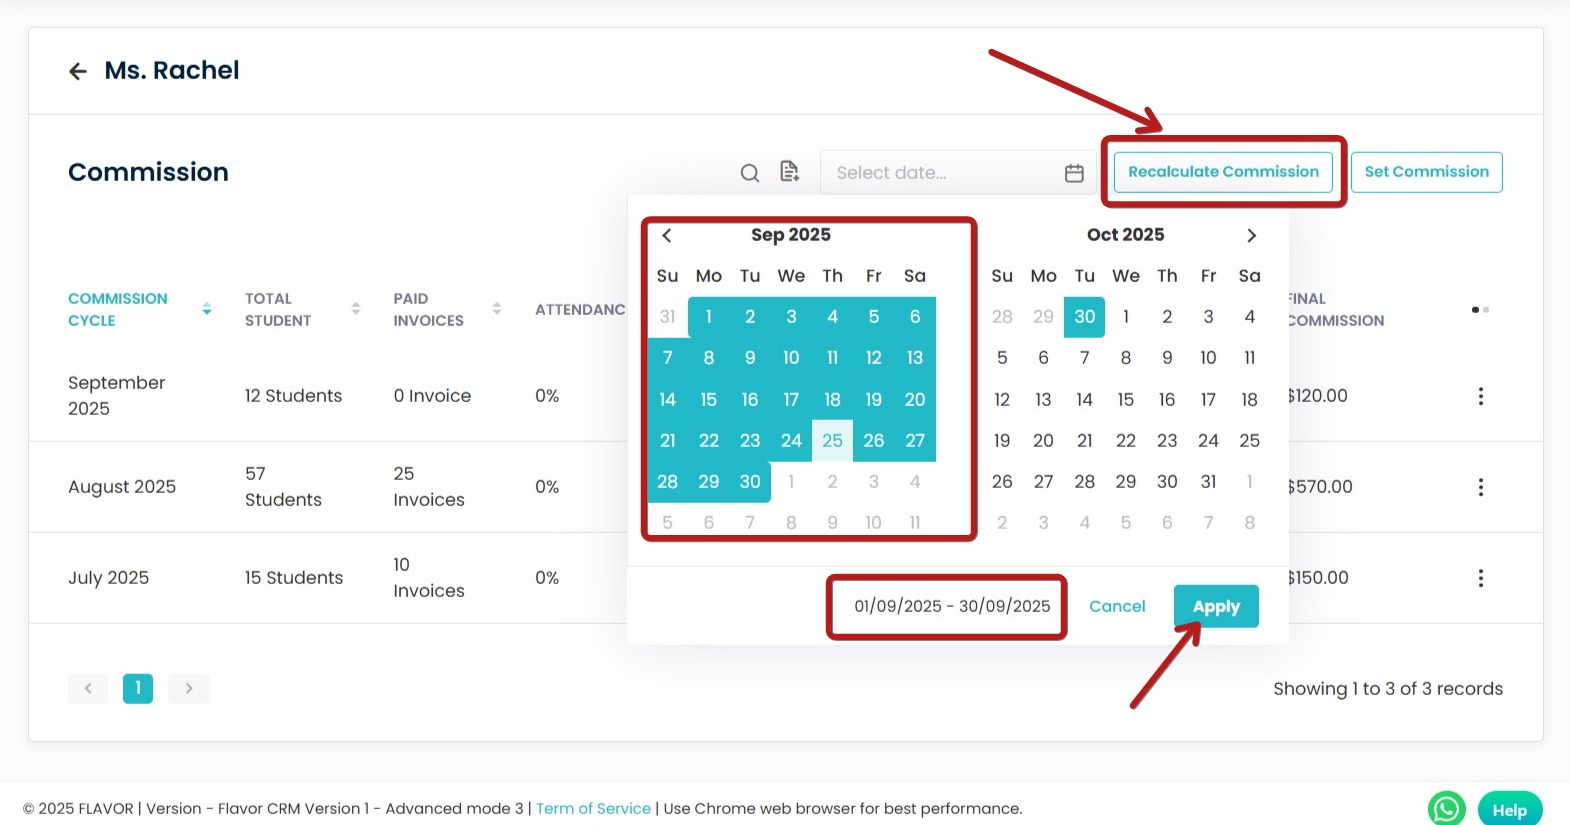
Step 8.4 - Recalculate Commission
-
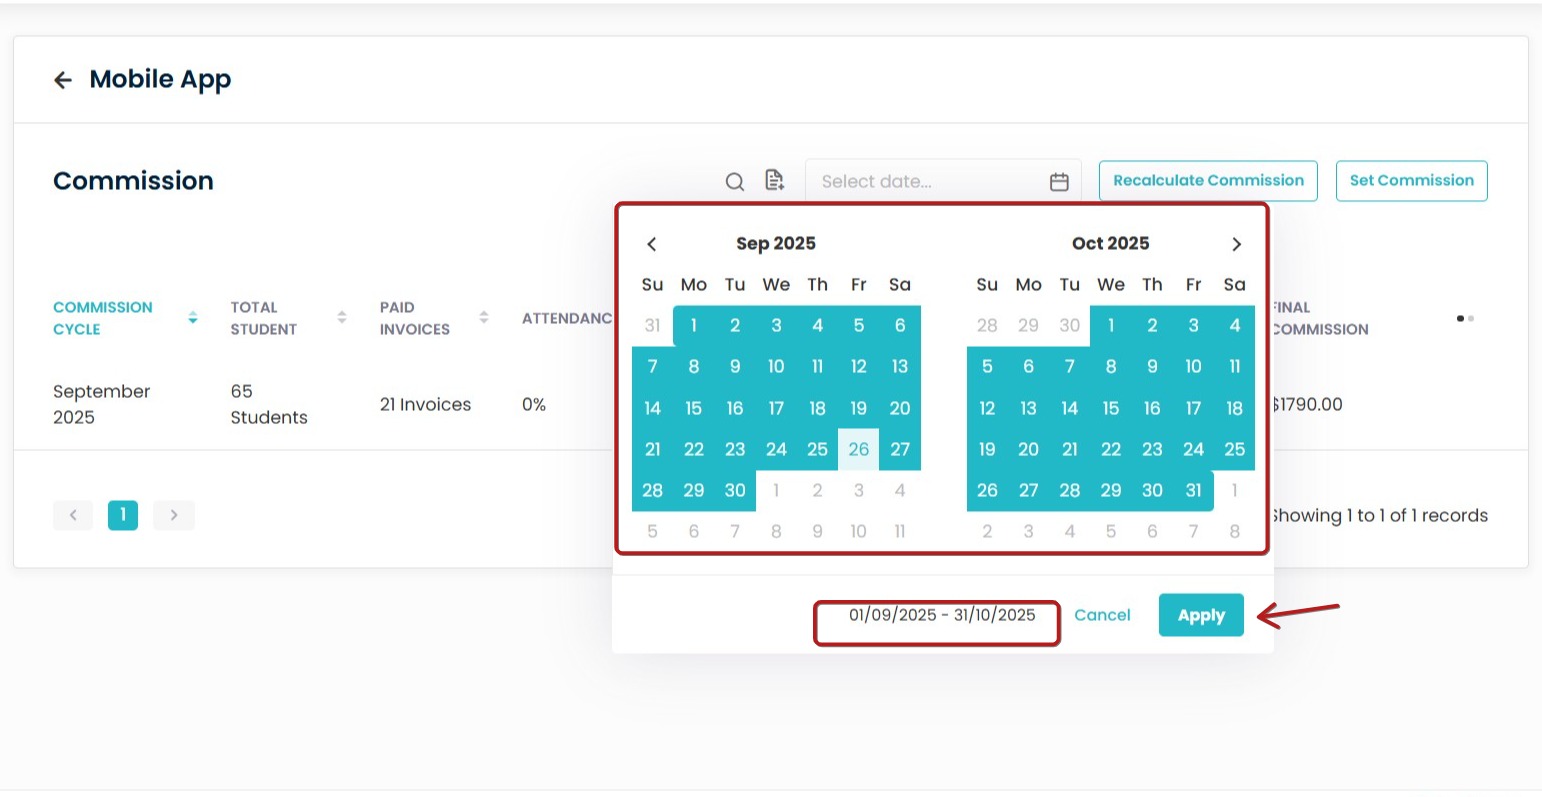
Select Date Range
-
Click on the calendar icon to open the date picker.
-
Choose the required start and end dates (e.g., 01/09/2025 – 30/09/2025).
-
Apply Date Range
-
After selecting dates, click Apply to confirm the period.
-
Click the Recalculate Commission button to generate updated commission details for the selected date range.
You can select for Multiple months as well .
Click on Recalculate Commission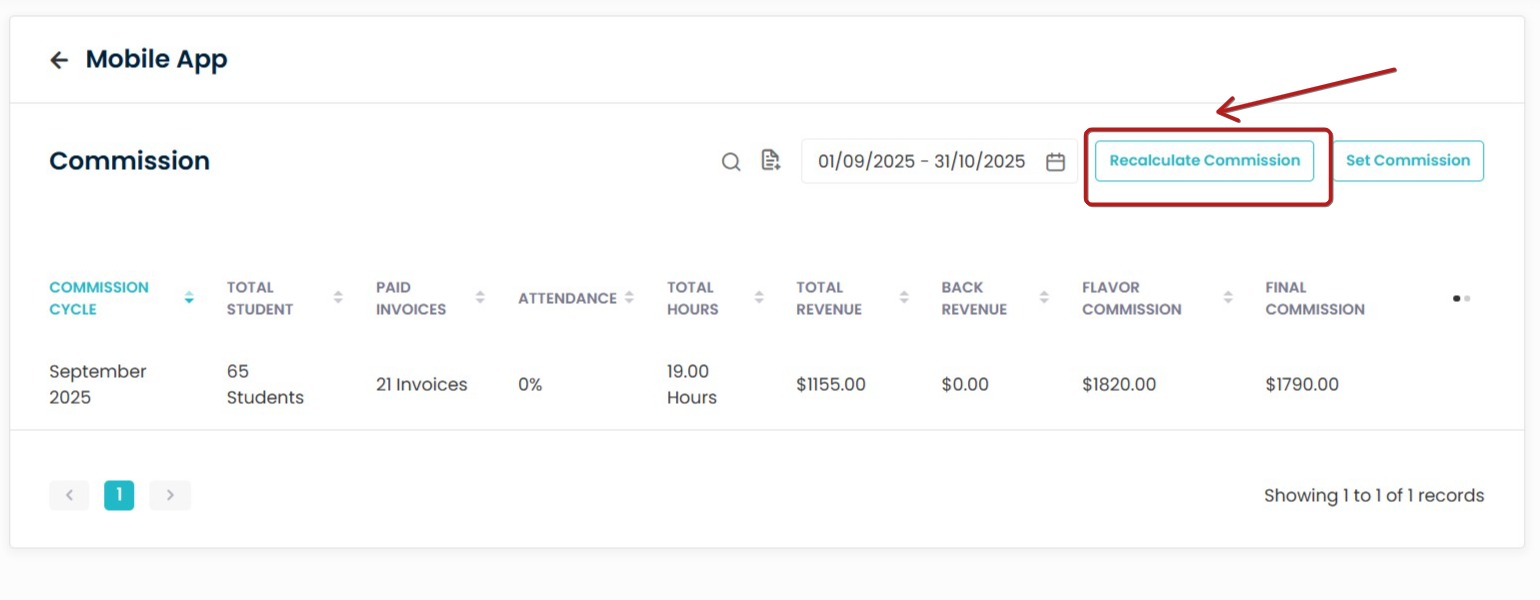
You can select the cut-off month to define the date or month from which the commission calculation should begin.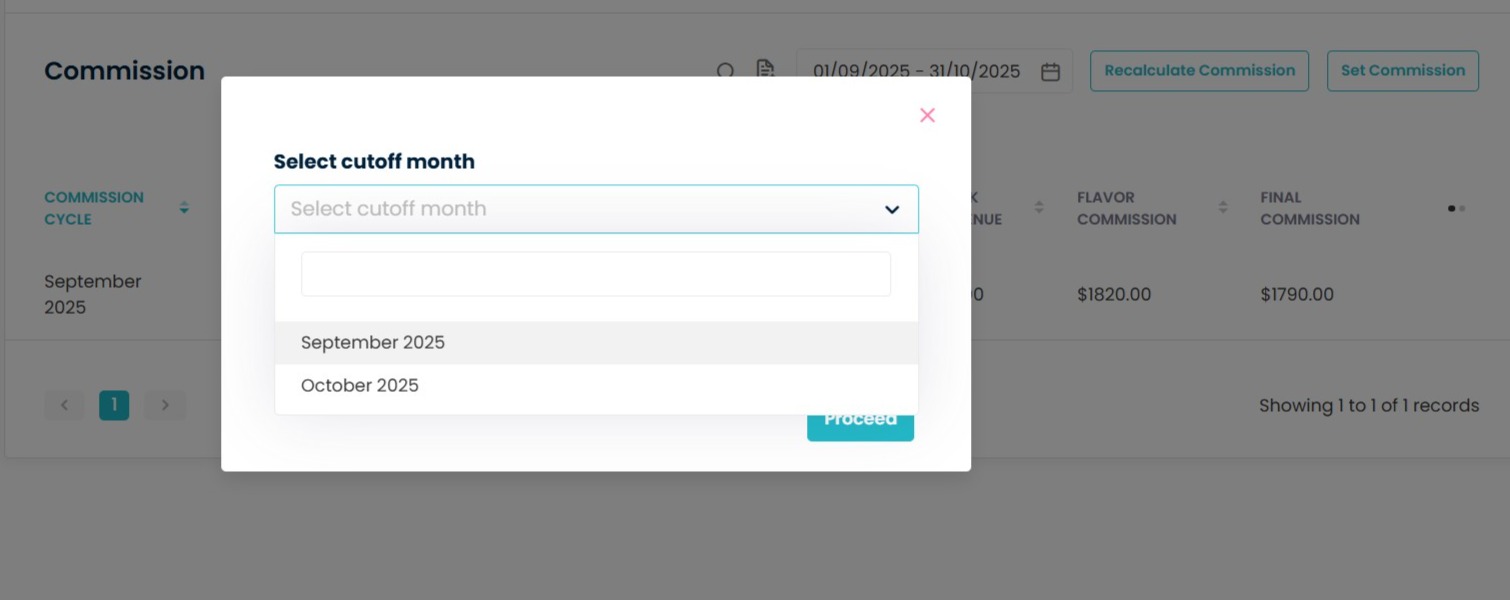
-
-
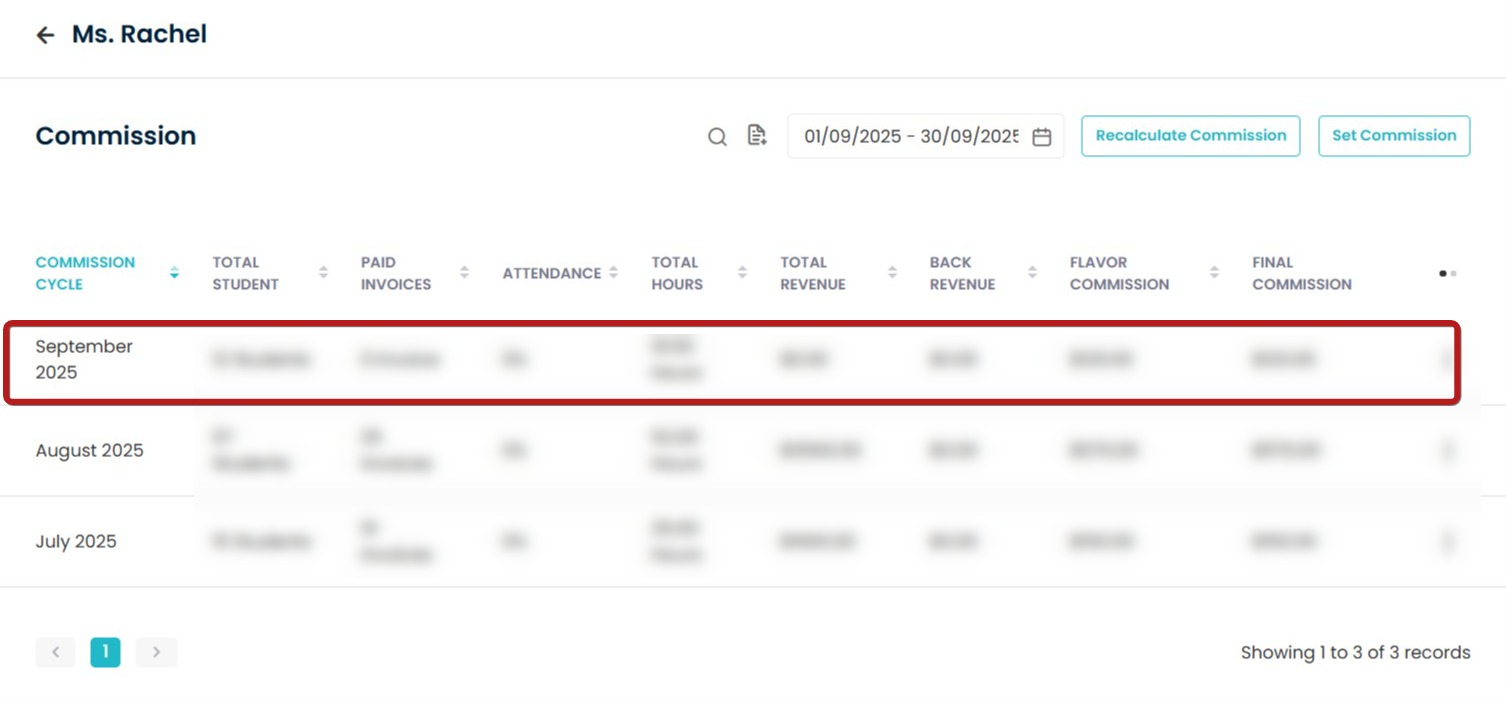
View Updated Results
-
The system will refresh and display the recalculated commission records for the staff member. Click the selected month and open it.
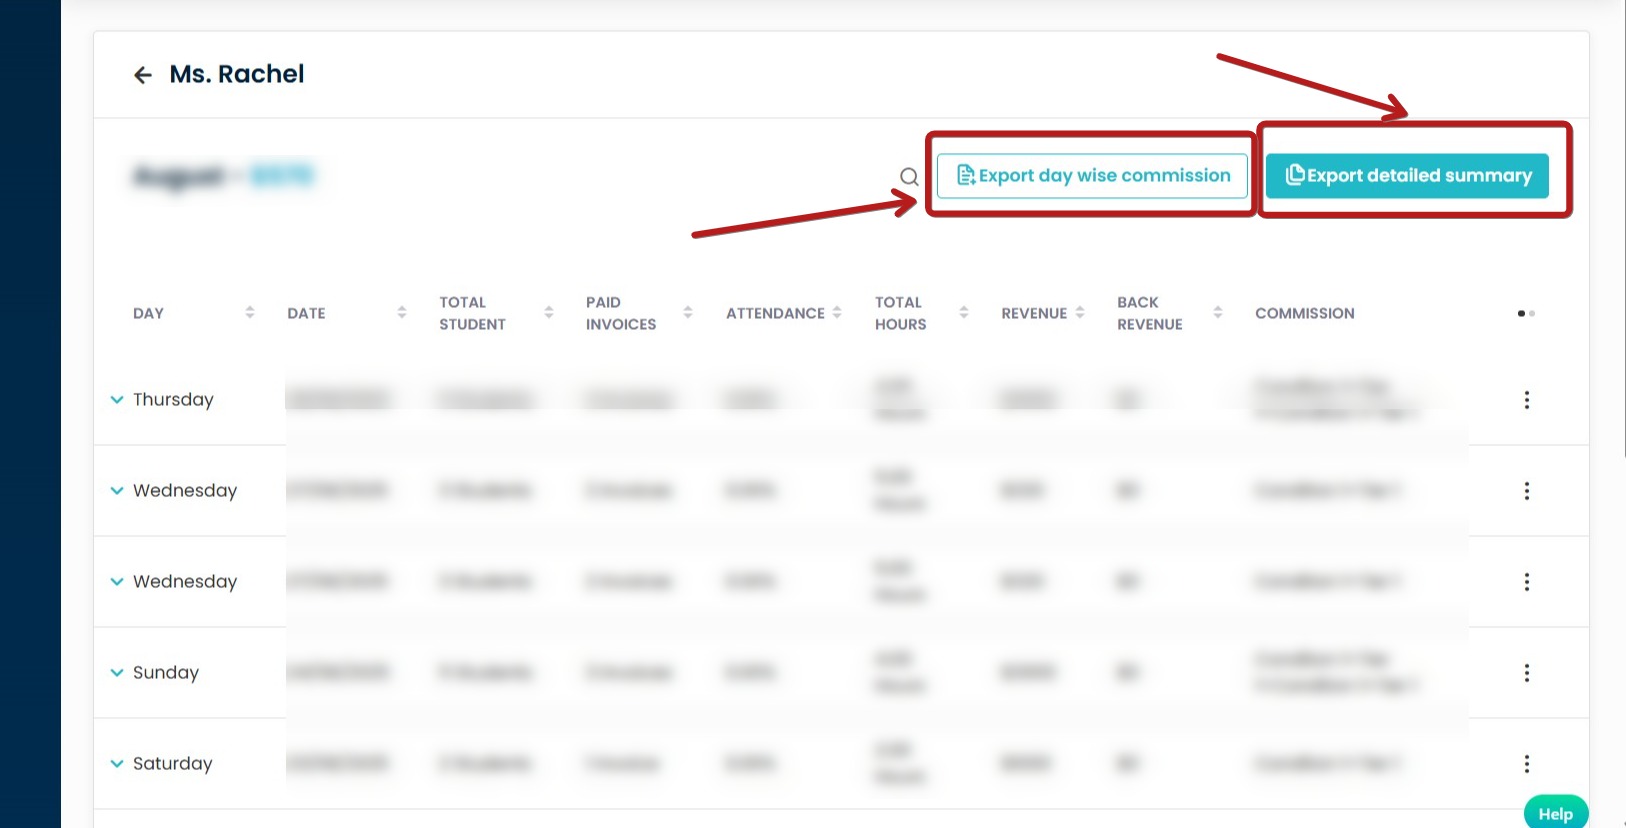
- Export options
As you will be able to see the commission and export the commission as well.- Use Export day wise commission to download a day-by-day CSV/Excel of the recalculated period for the selected staff member.
- Use ‘Export Detailed Summary’ to generate reports containing class name, schedule, timings, student information, invoice details, and attendance records.
-
When reviewing the commission summary, the grid displays the breakdown with the following differentiations:
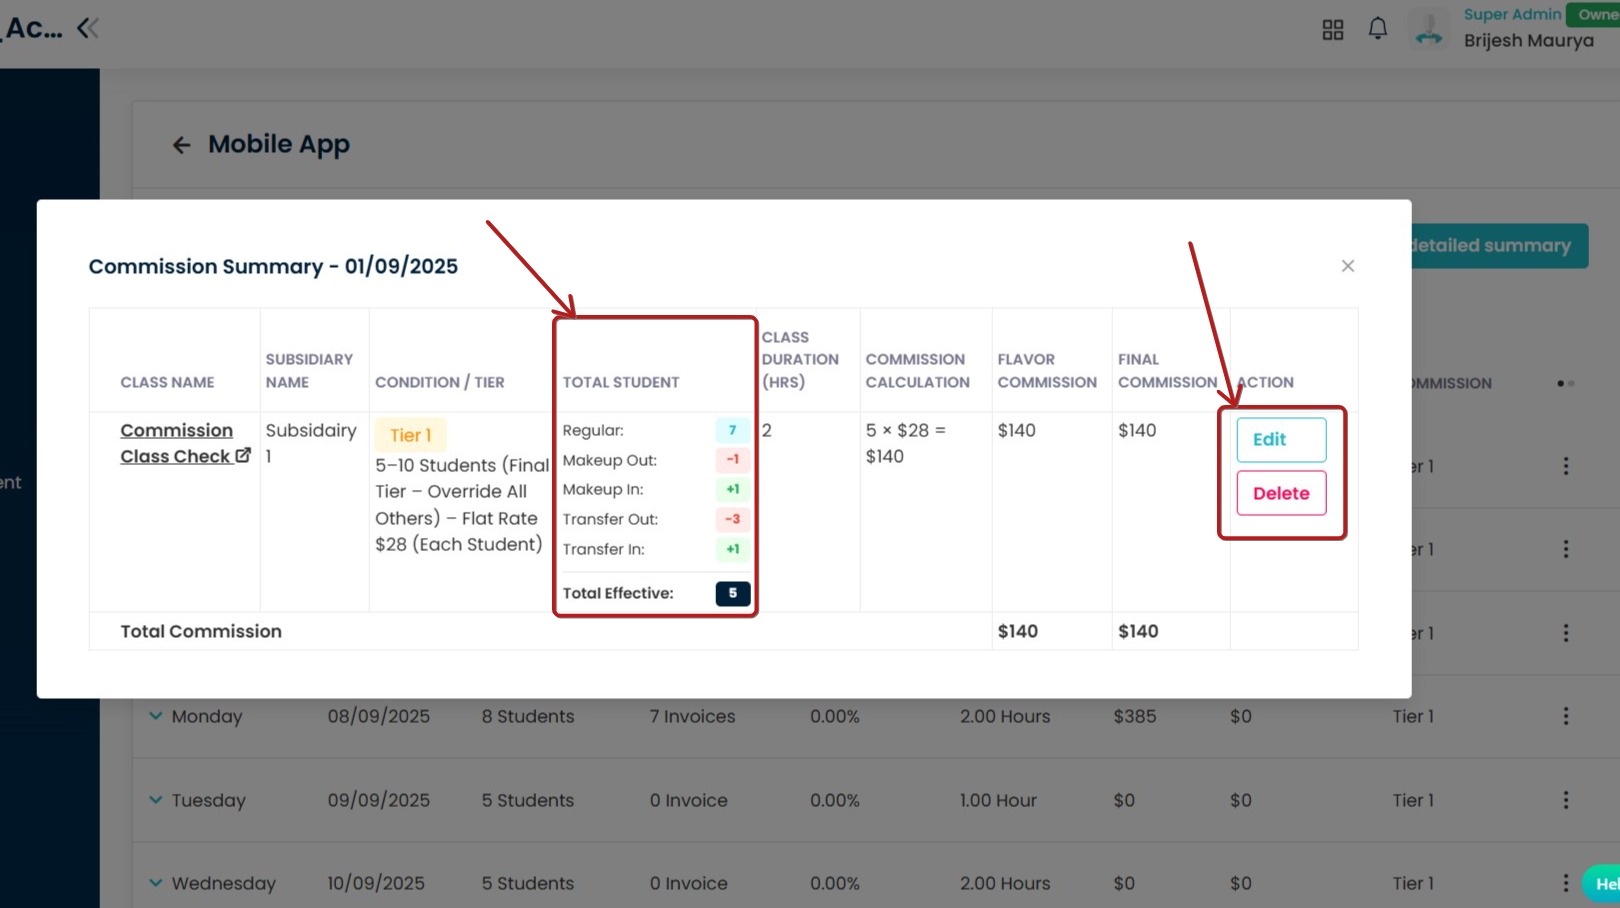
Regular: Number of enrolled students counted under this class.
Makeup Out (−): Students from this class who did makeup in another class; subtracted from the total.
Makeup In (+): Students from other classes who did makeup in the class; added to the total.
Transfer Out (−): Students who transferred out of this class; subtracted from the total.
Transfer In (+): Students who transferred into this class; added to the total.
Functionality of Edit and Delete:-
Delete: Removes the commission calculated for that specific day after confirmation.
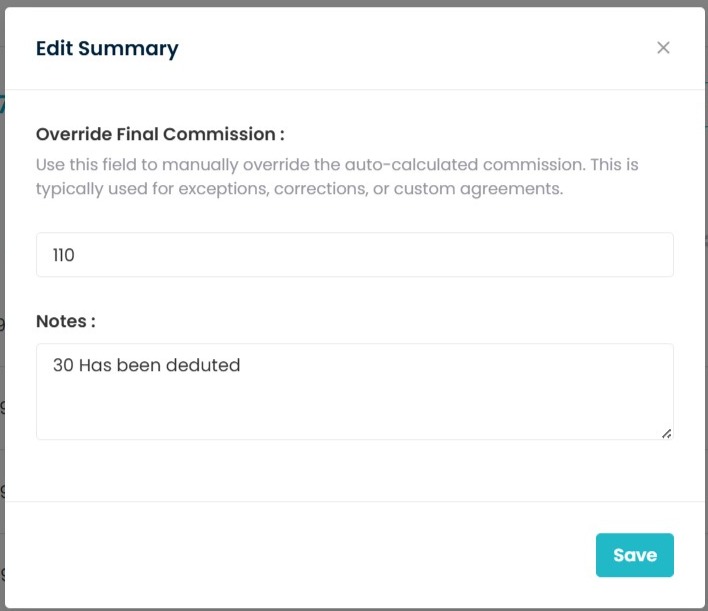
Edit: Allows you to modify the class commission line. You can change the amount and add an audit note explaining the change.
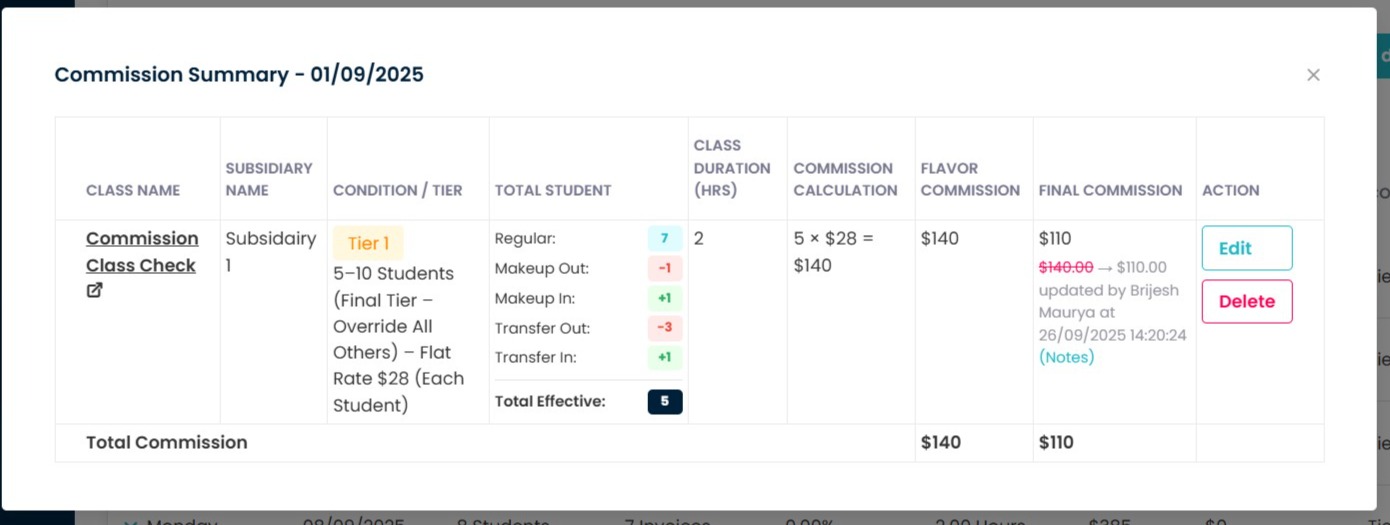
After editing, the changes will be displayed in this format in the Commission Review.
Need more help? Ask us a question
Please let us know more of your details and our team will reach out to you very shortly.