Communication Module
Communication module in Flavor CRM offers powerful email tools designed to help you connect with your customers and track all communications from a centralized location.
With features like scheduled messaging, draft and edit flexibility, smart audience segmentation, AI-generated subject lines and content, and a one-click EDM generator, you can create professional, targeted campaigns effortlessly and deliver them at the right time for maximum impact.
Compose Message
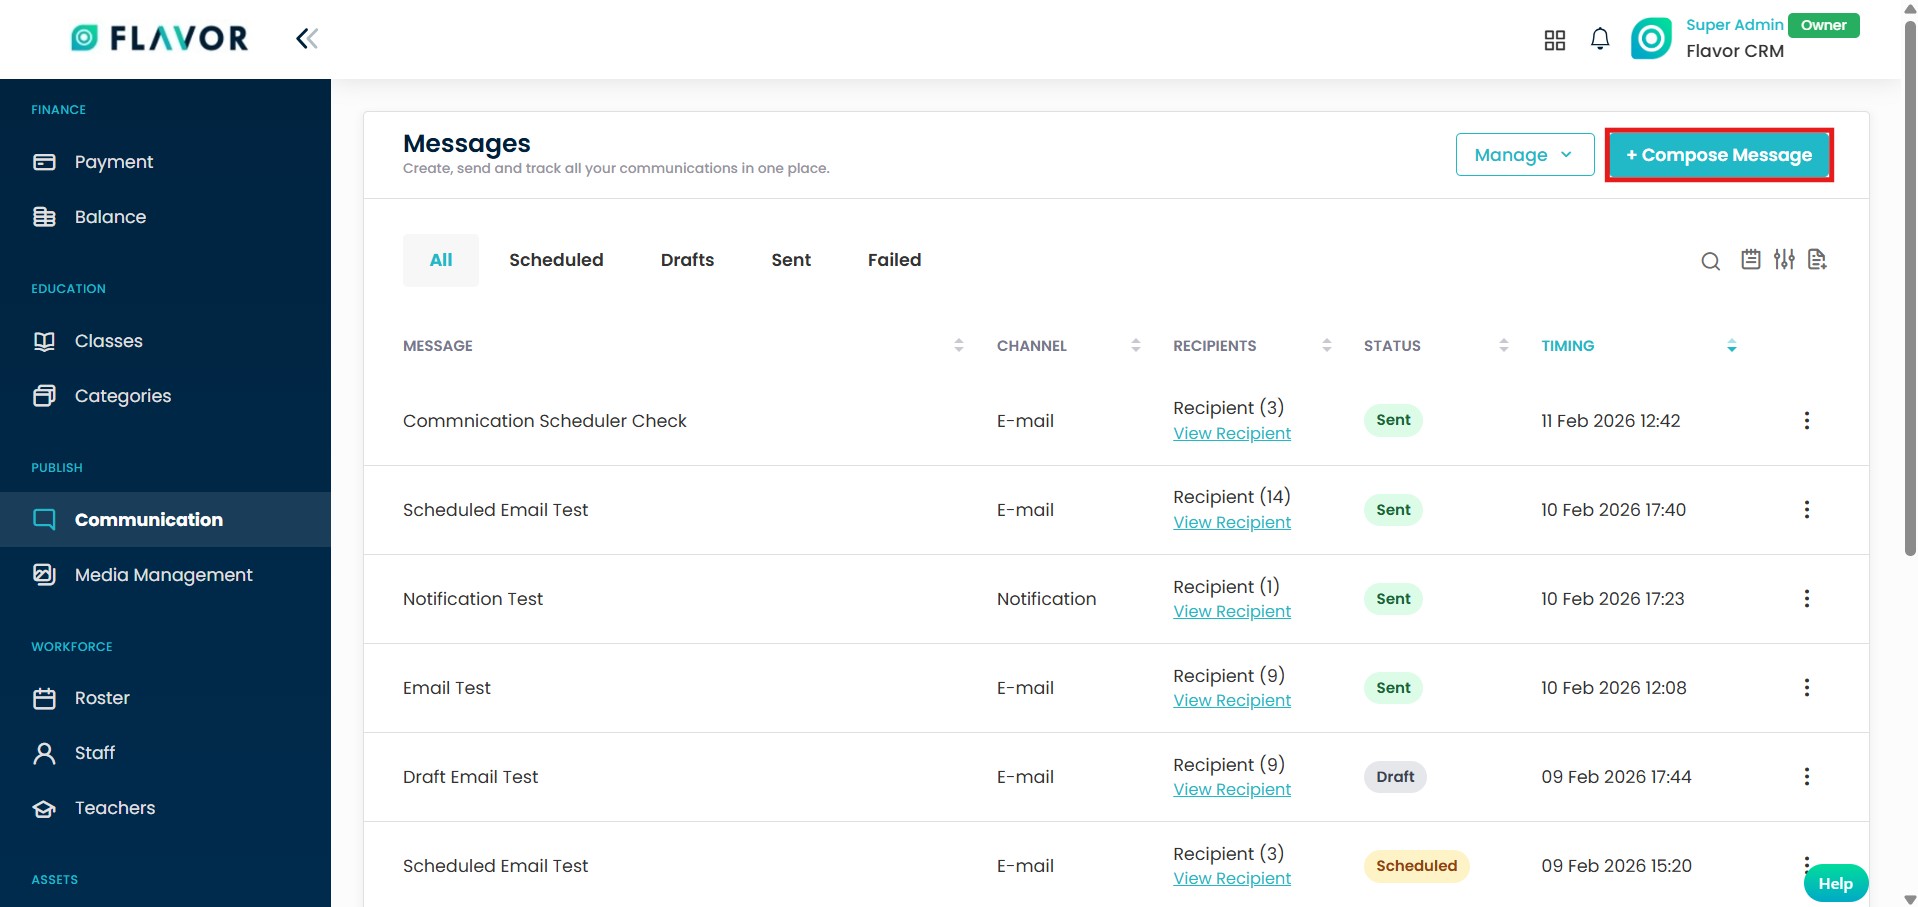
Step 1: Compose Message
- From the Dashboard, click on Communication.
- Click on + Compose Message button located at the top right.
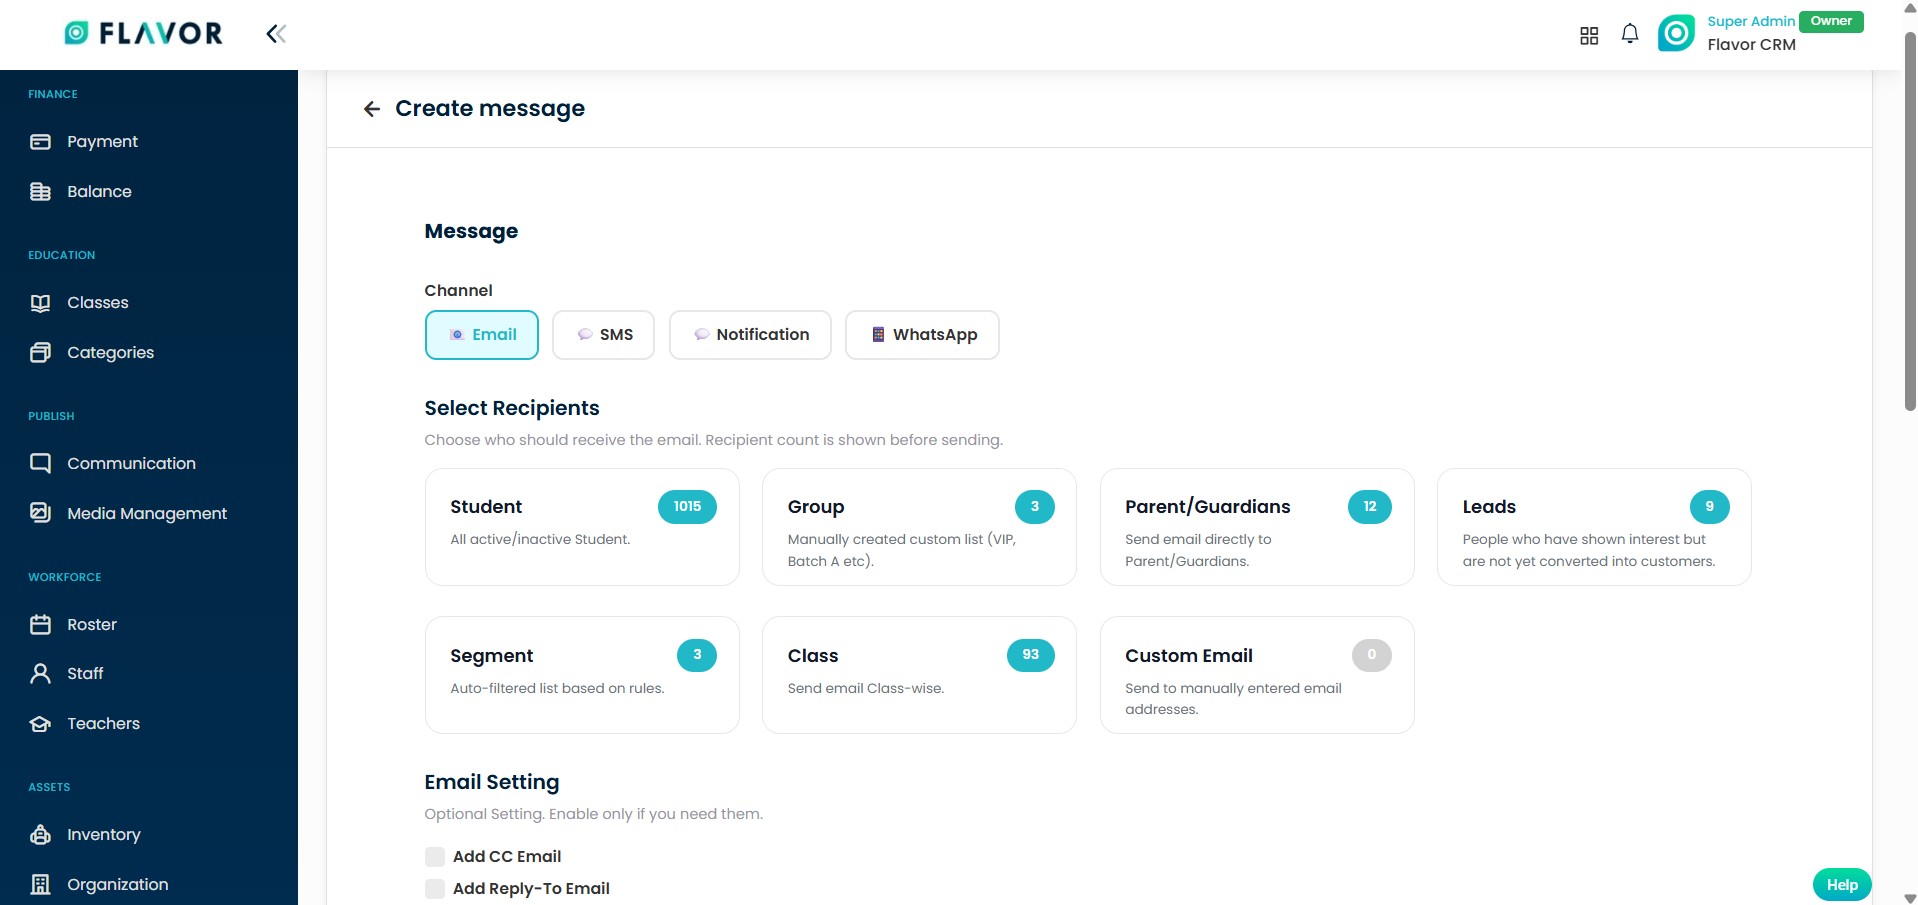
Step 2 : Select Channel & Recipients
- Select the preferred communication channel (Email, SMS, Notification, or WhatsApp).
- Next, select the Recipients based on your requirement.
- If required, you can also enable additional email options such as : Add CC Email or Add Reply-To Email
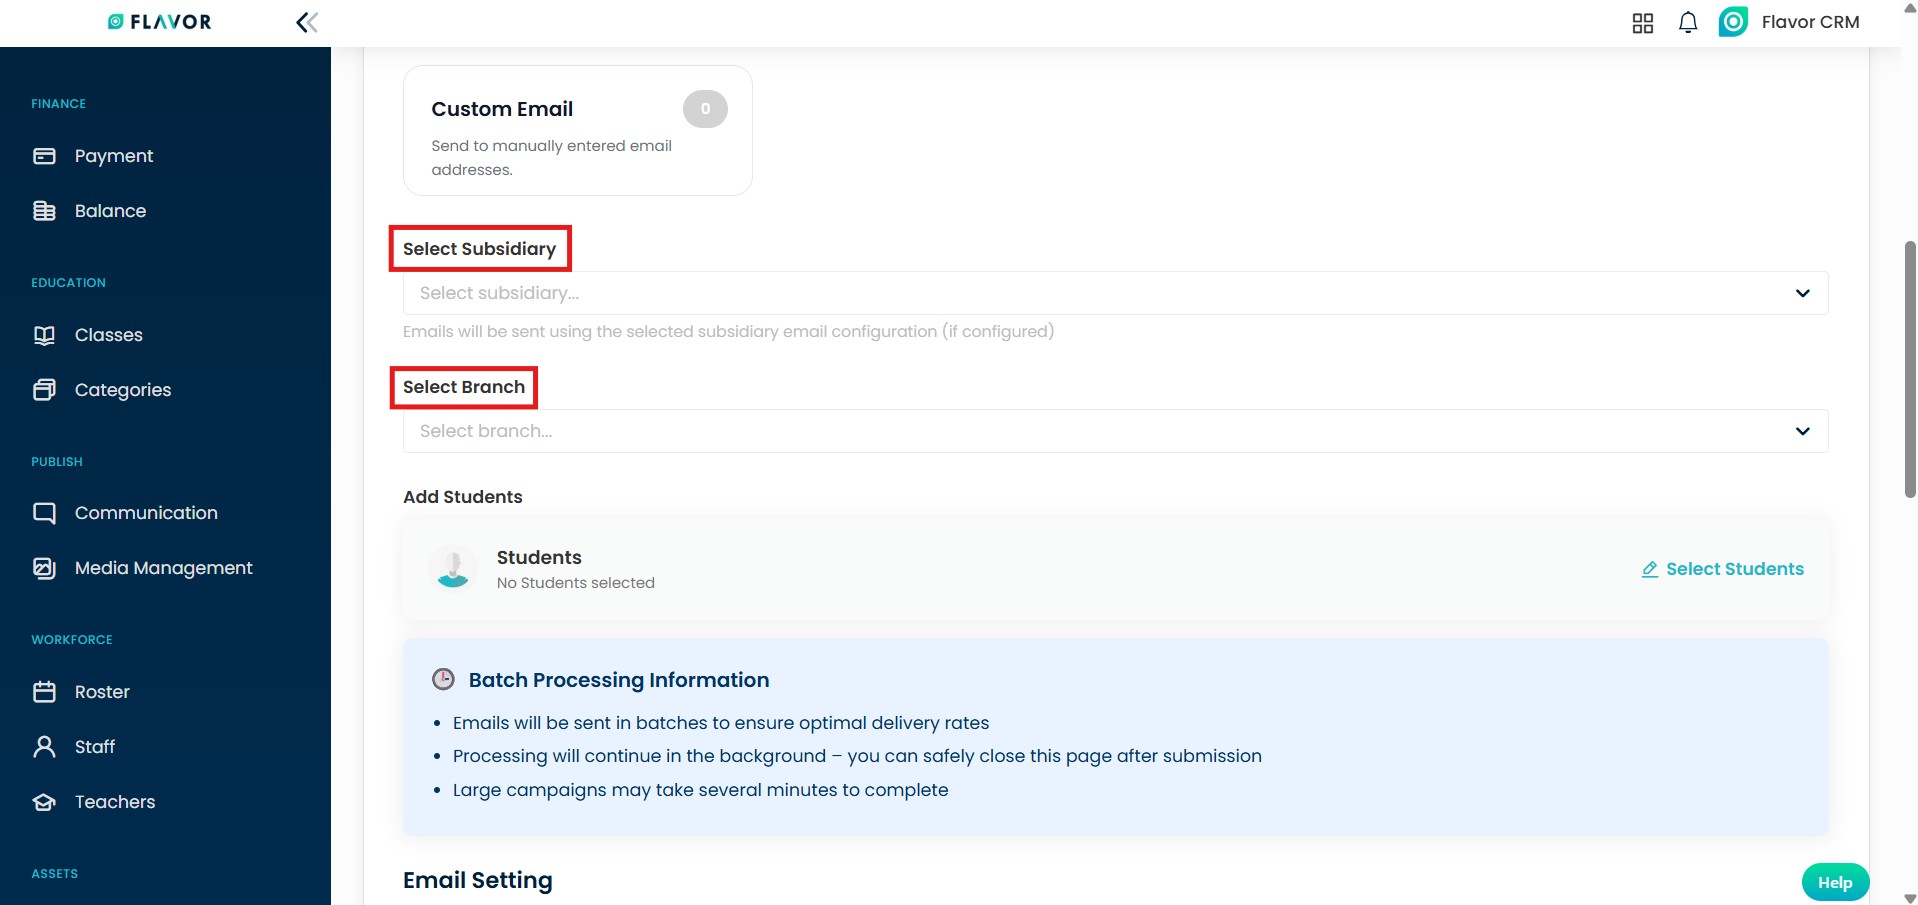
Step 3 : Select Subsidiary & Branch
- Select the required Subsidiary & Branch.
- Once selected, you can choose recipients based on the selected subsidiary & branch.
Note : Emails will be sent using the email configuration set for the selected subsidiary (if configured).
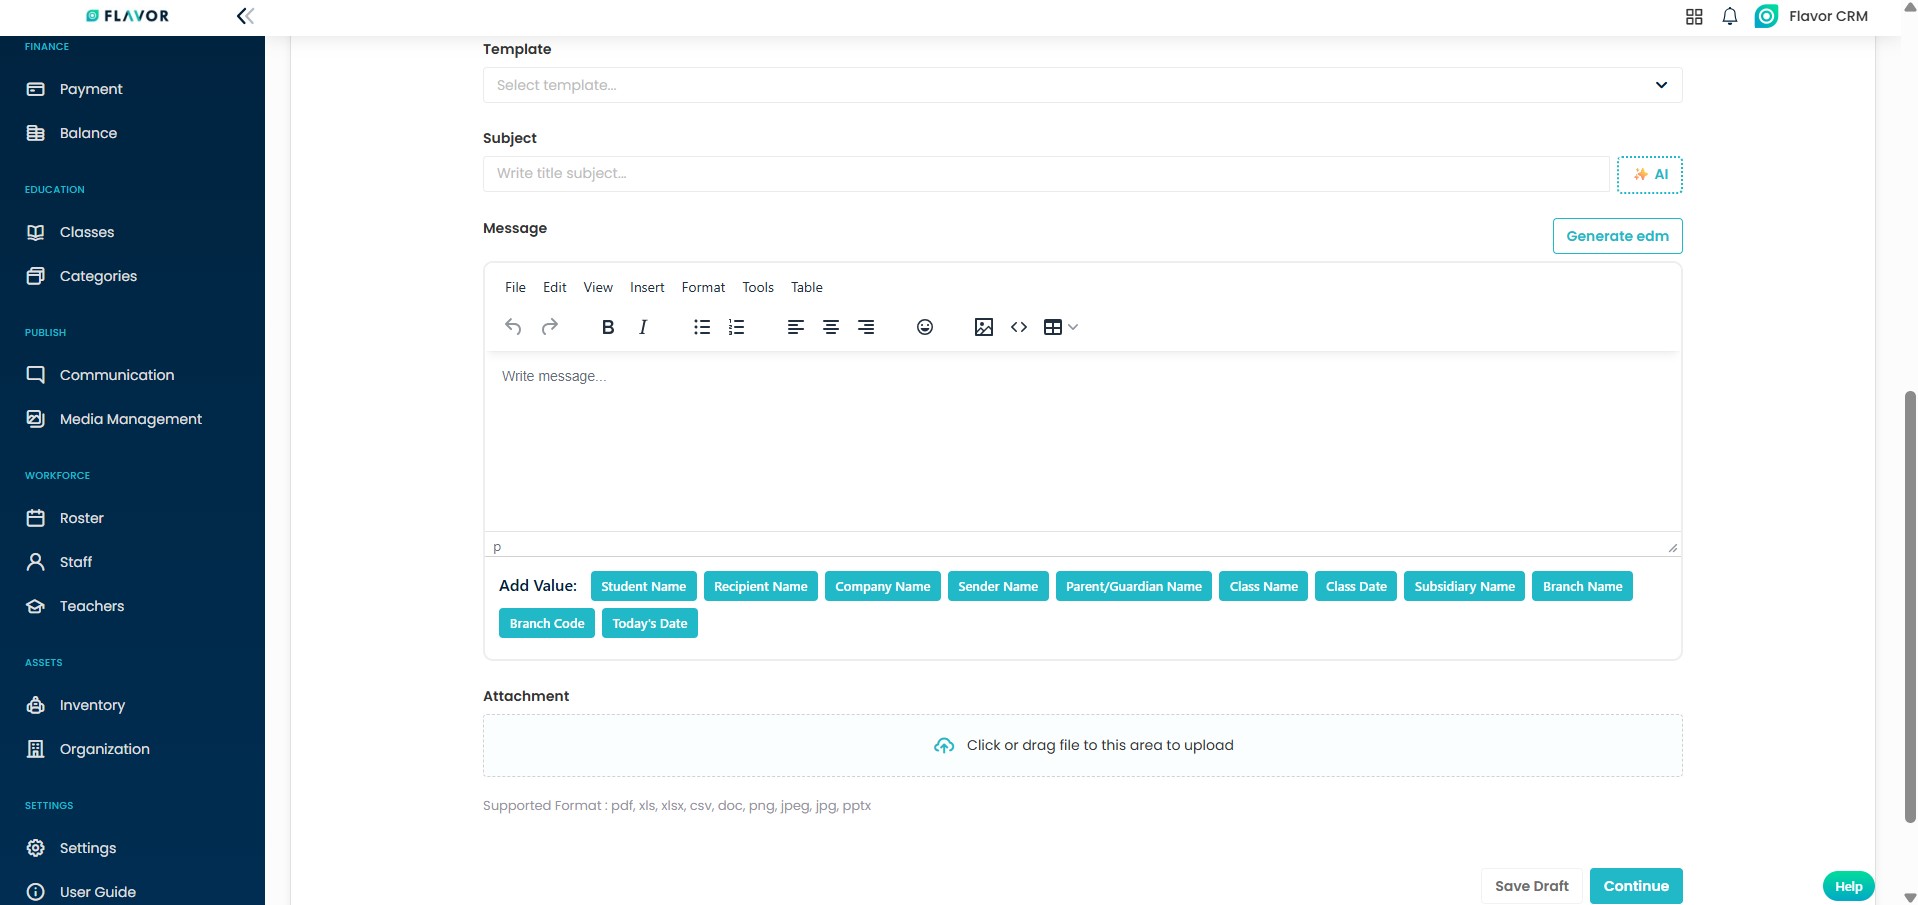
Step 4 : Add Template or Write Message
- Select a predefined Template or manually enter the Subject and compose your Message in the editor.
- You can also use the AI option to generate a subject line or click on Generate EDM to create a professional email design. Refer to this guide : Generate EDM
- Add attachments if required, the click on Save Draft or Continue.
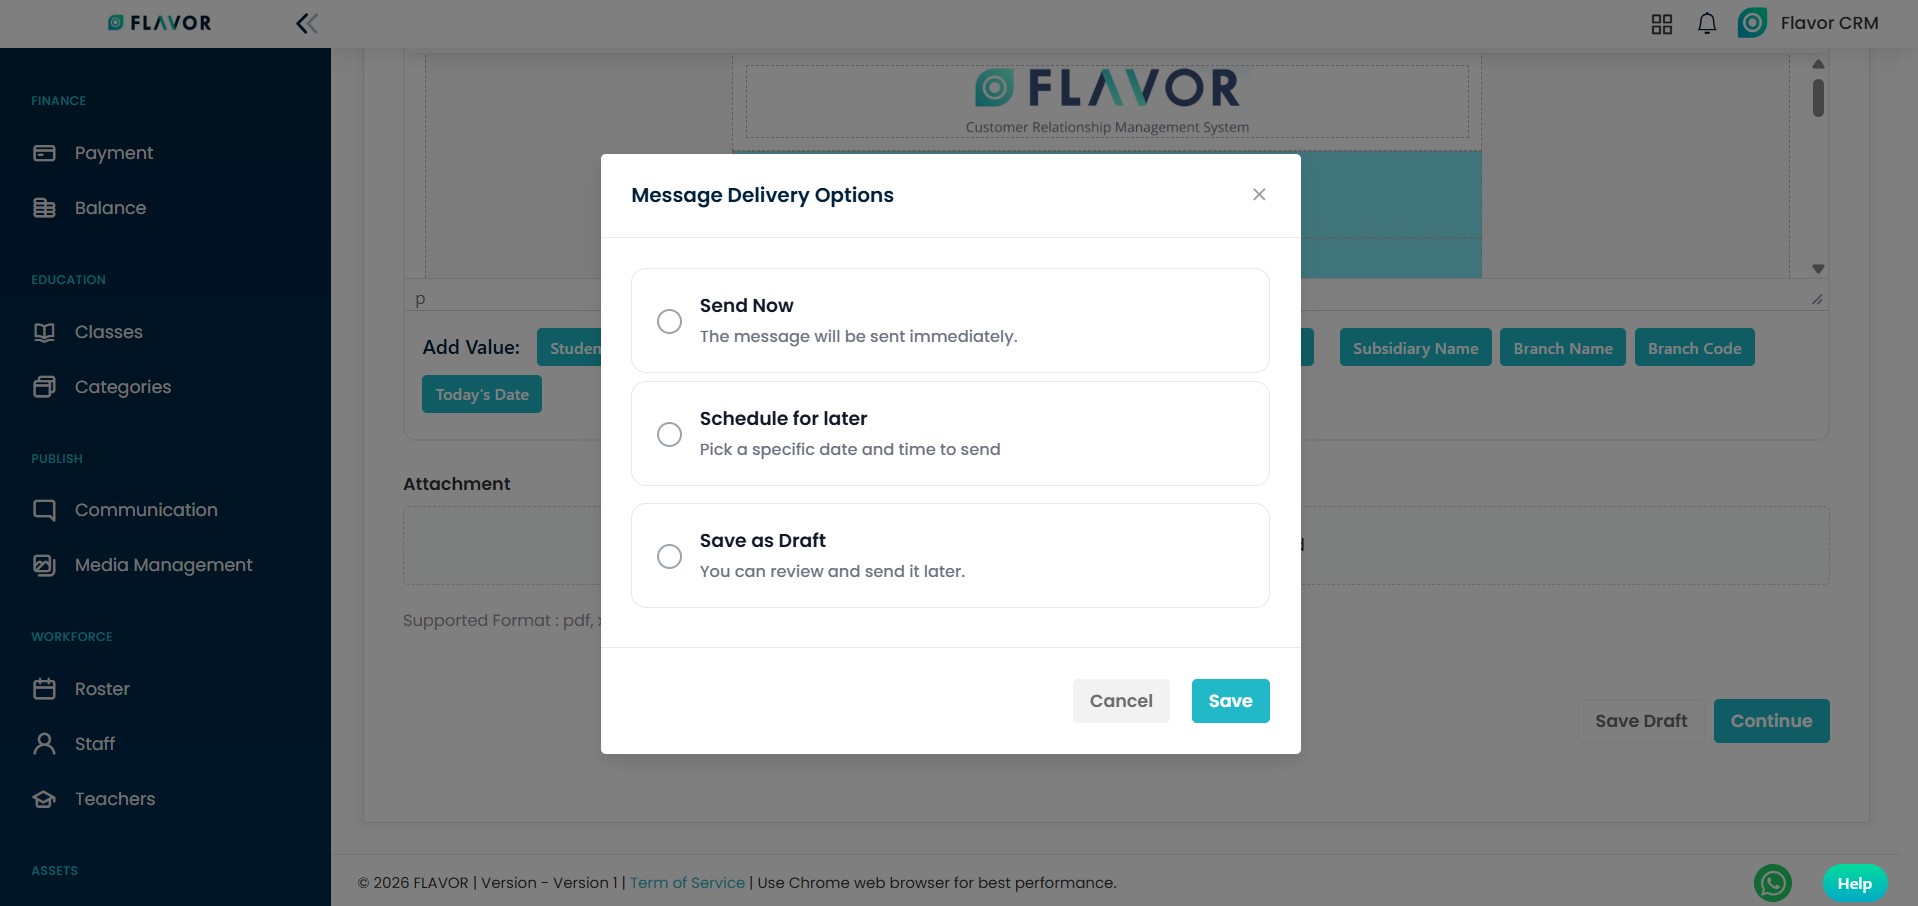
Step 5 : Message Delivery Option
After clicking on Continue, the Message Delivery Options pop up will appear. Select one of the following options :
- Send Now : The message will be sent immediately.
- Schedule for Later : Choose a specific date and time to send the message.
- Save as Draft : Save the message and send it at a later time.
After selecting the preferred option, click on Save.
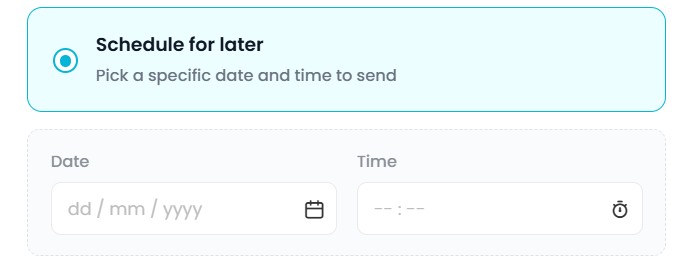
When you select Schedule for Later to send the message, you can choose the preferred Date and Time, then confirm, this will make sure the message is delivered automatically at the scheduled time.
View Recipient
Once a message is sent, the Recipients column displays the total number of users the message was sent to.
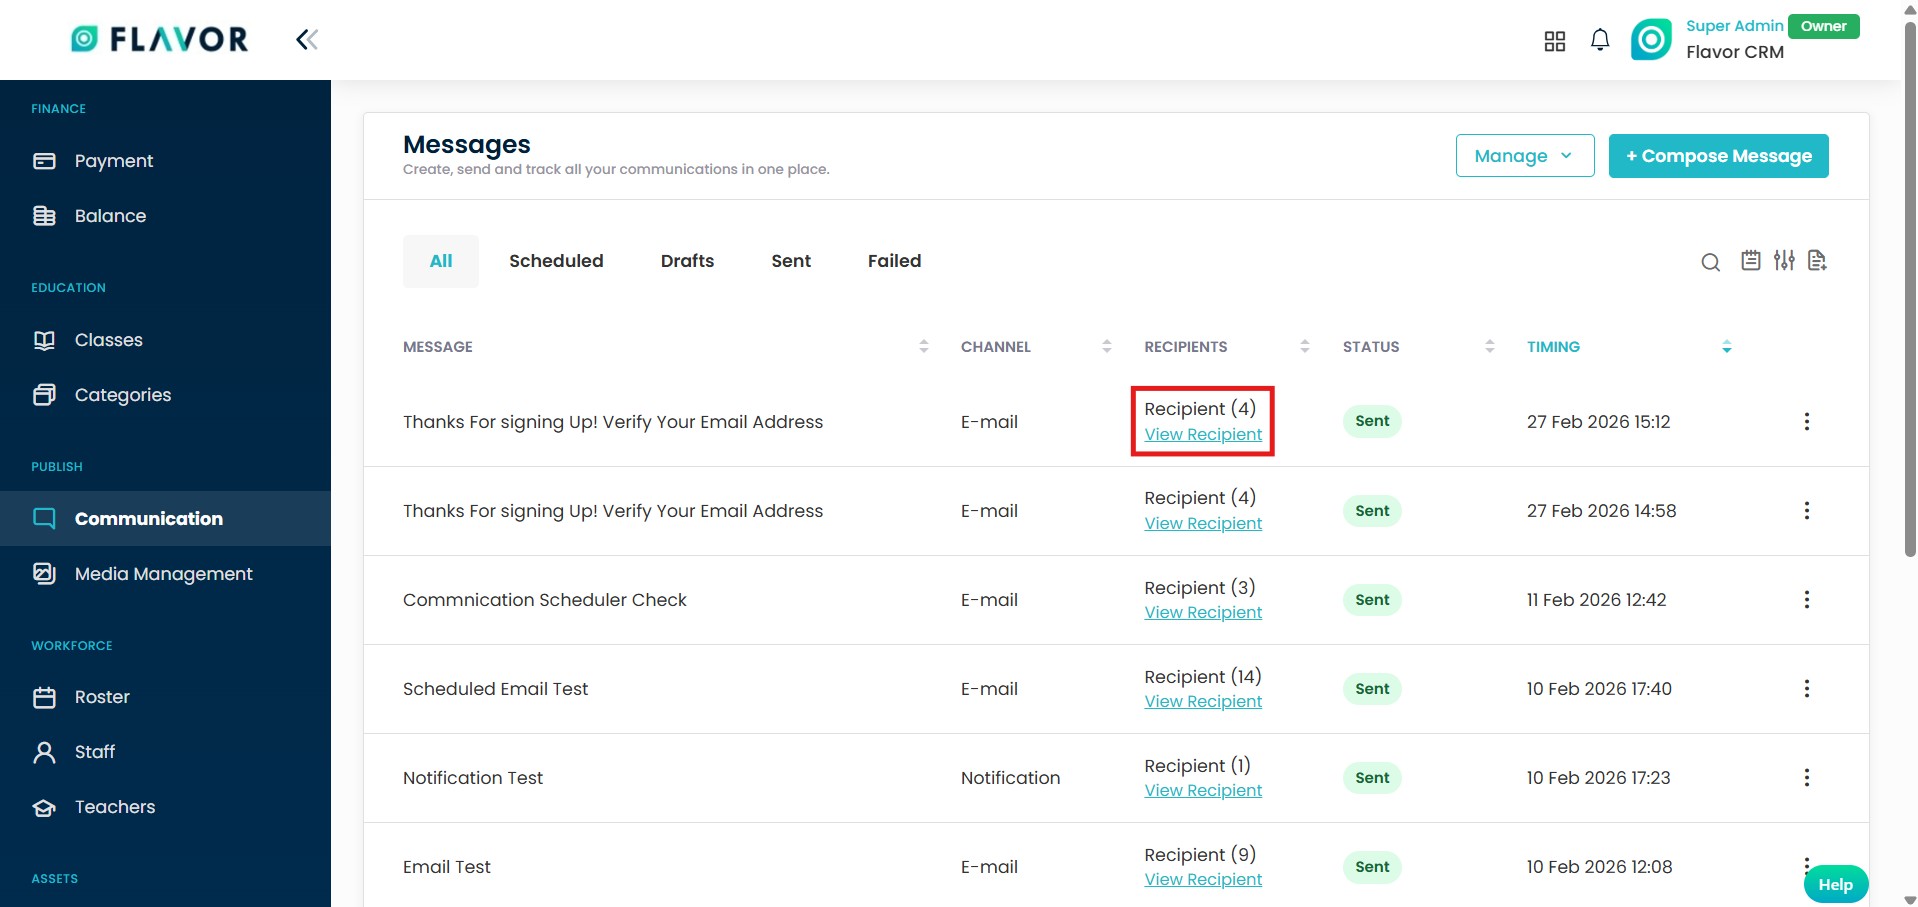
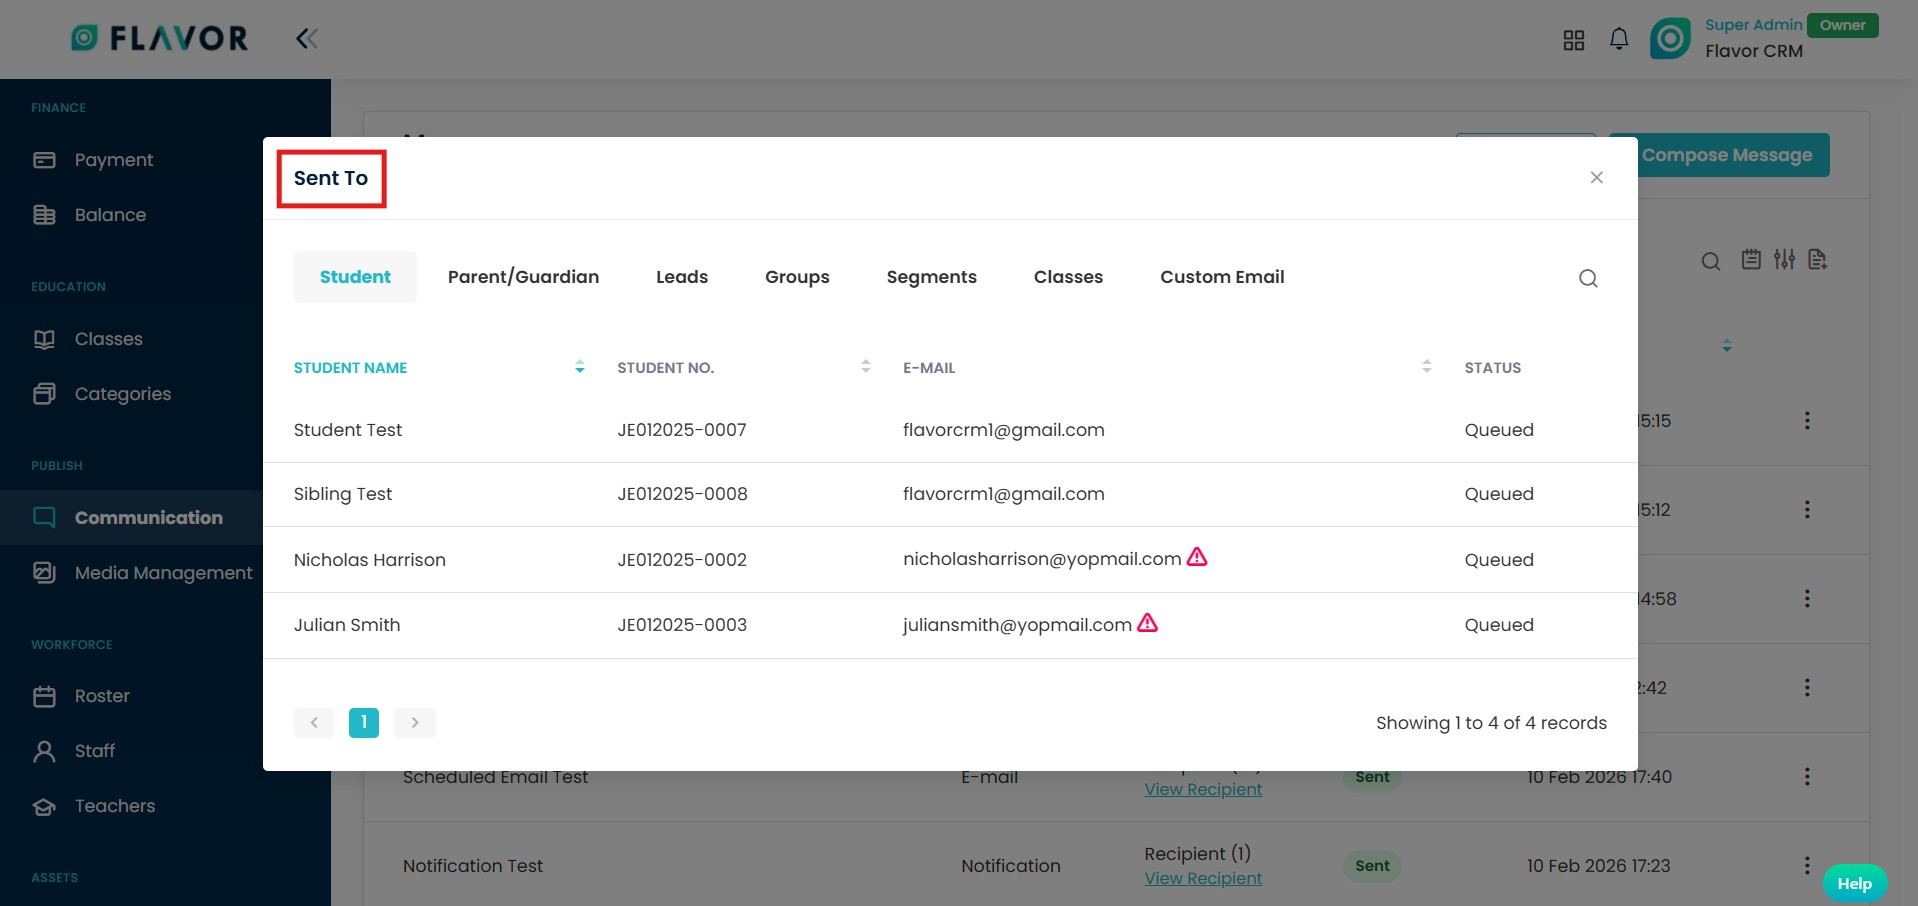
By clicking on View Recipient it opens the Sent To window. This shows the detailed list of recipients, including their name, email address, and delivery status.
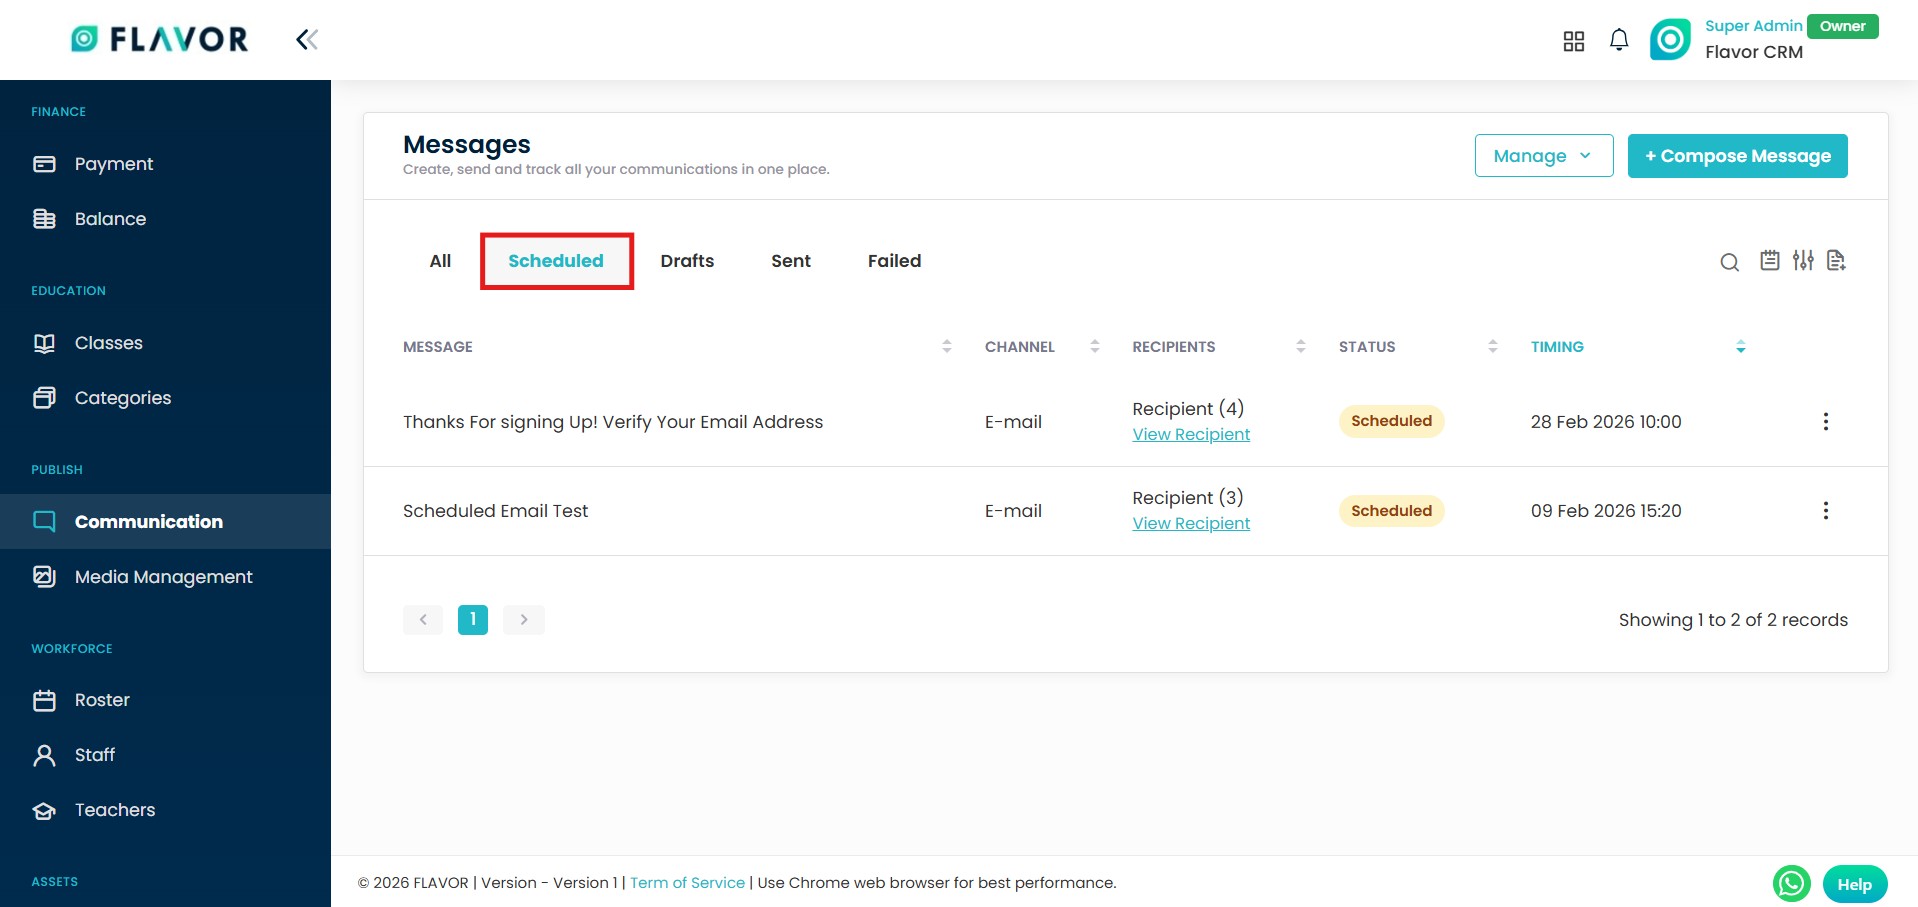
Scheduled Section
The Scheduled section in the Communication Module displays all messages that are planned to be sent at a later date and time.
This section helps you monitor upcoming communications and ensure messages are delivered as planned.
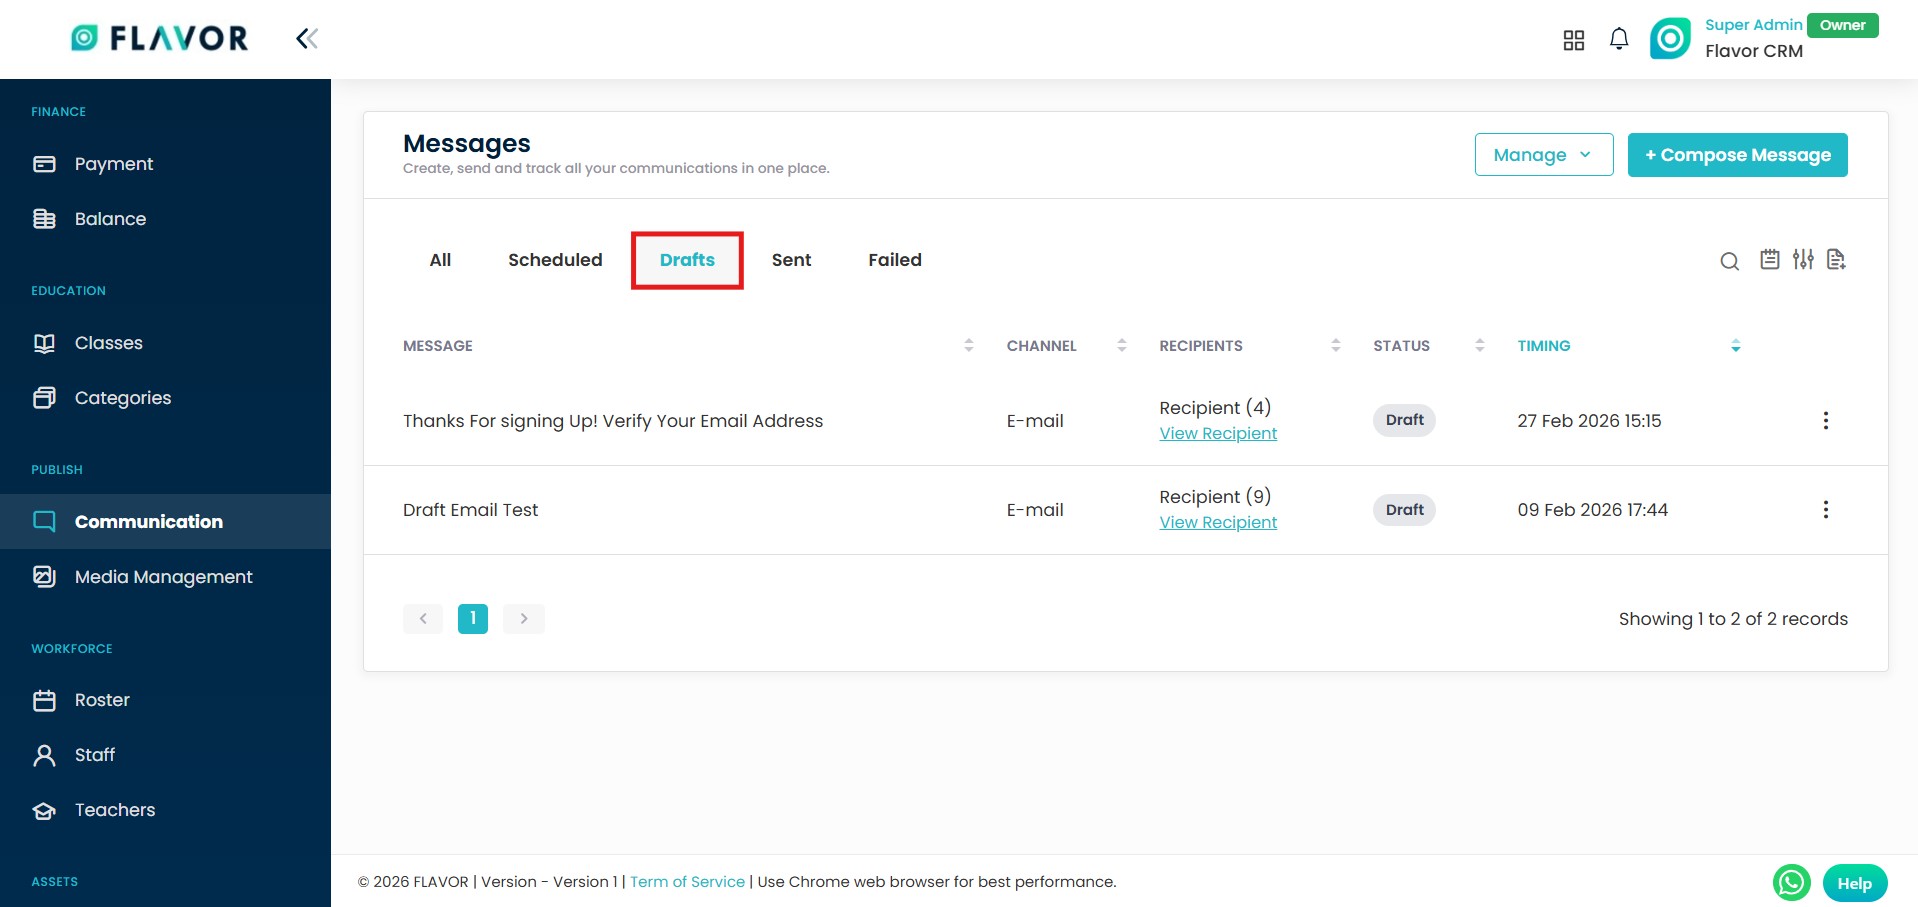
Drafts Section
The Drafts section in the Communication Module displays all messages that have been saved but not yet sent. Here you can, Edit, update, or send the message when ready
This section allows you to manage unfinished messages and complete them at your convenience before sending.
Sent Section
The Sent section displays all messages that have been successfully delivered to recipients.
This section helps you track completed communications and maintain a clear record of all sent messages.

The Failed section shows messages that were not successfully delivered.
If a message fails to send, it will appear in this section. You can review the details and take the necessary action.
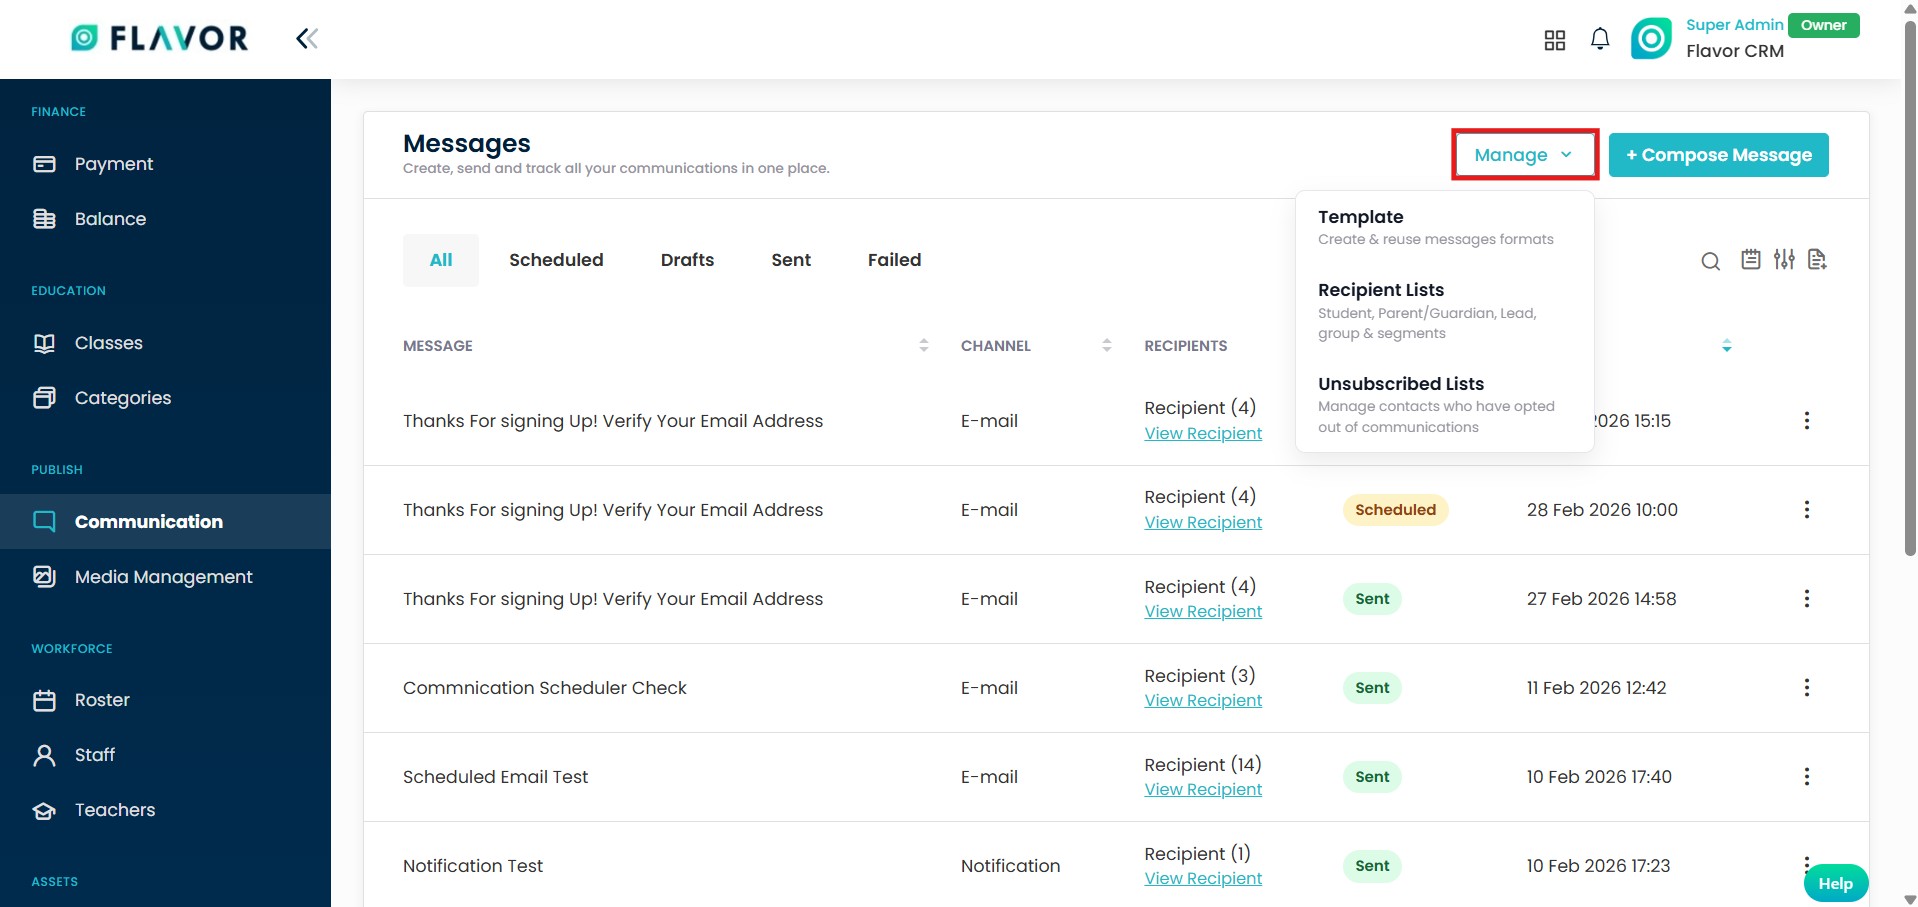
Manage Option
The Manage option located at the top right of the Communication Module provides additional configuration options like Templates, Recipient Lists, & Unsubscribed Lists.
Template
The Template section in Communication module displays a list of all previously created templates.
You can view, manage, and use these templates to maintain consistent communication and save time when creating new messages.
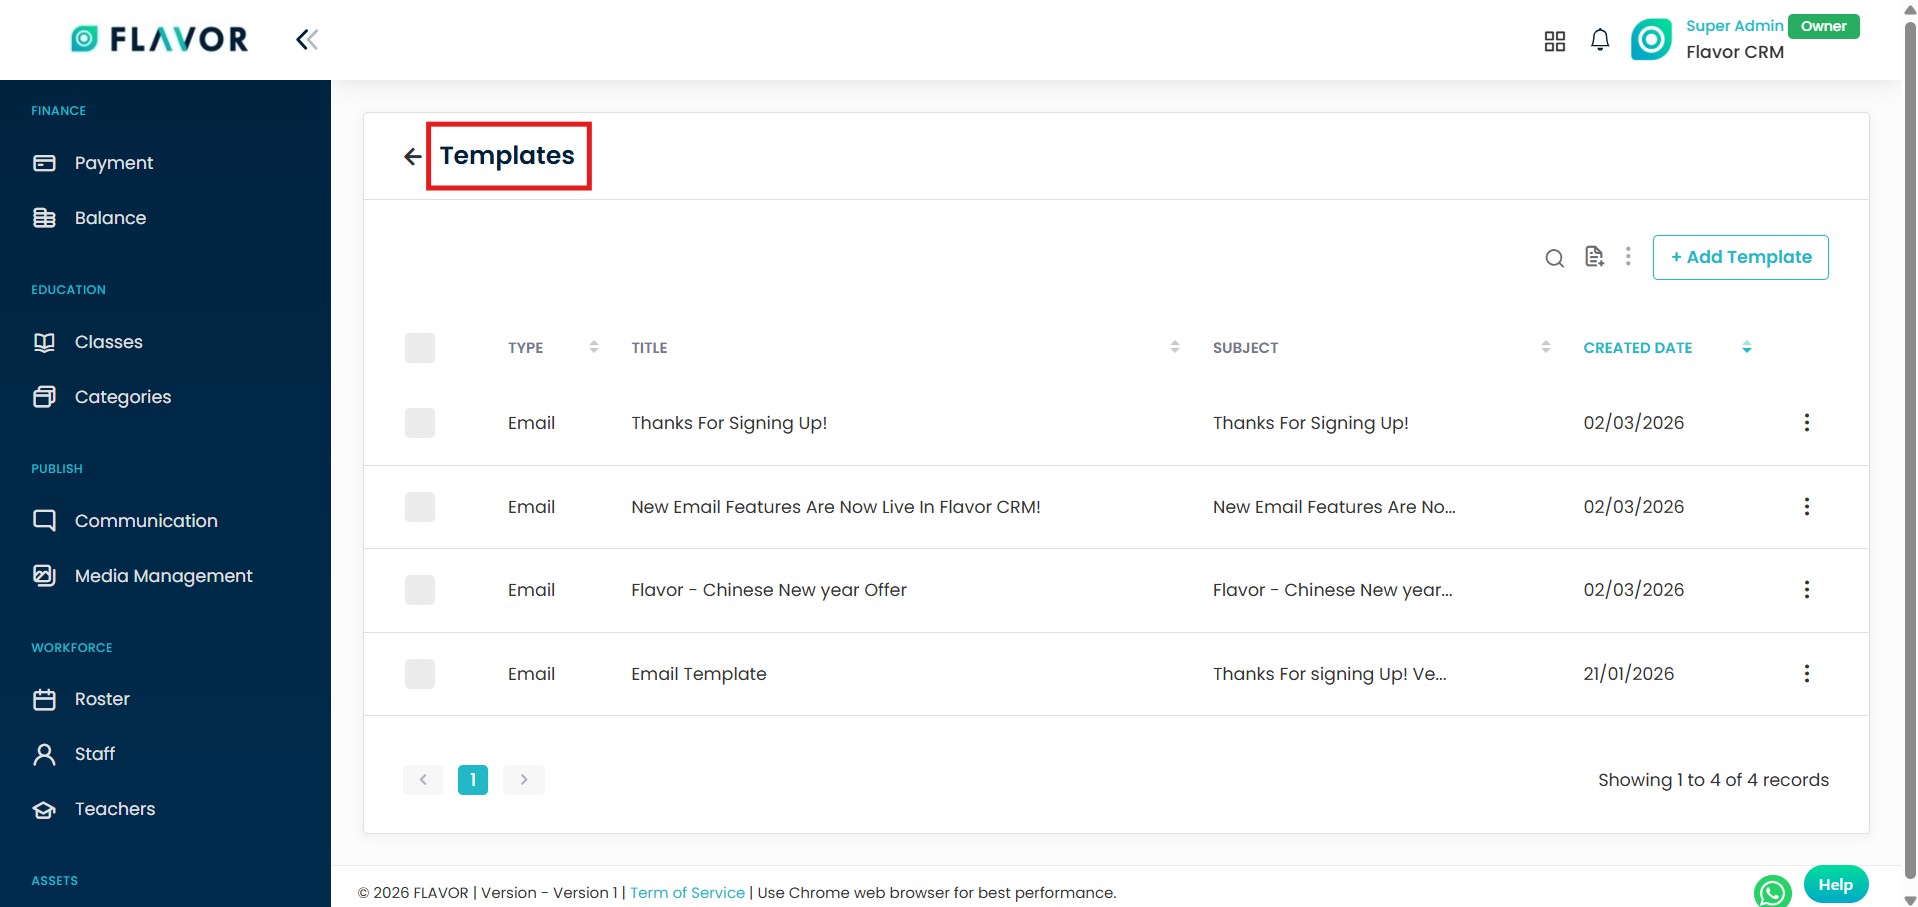
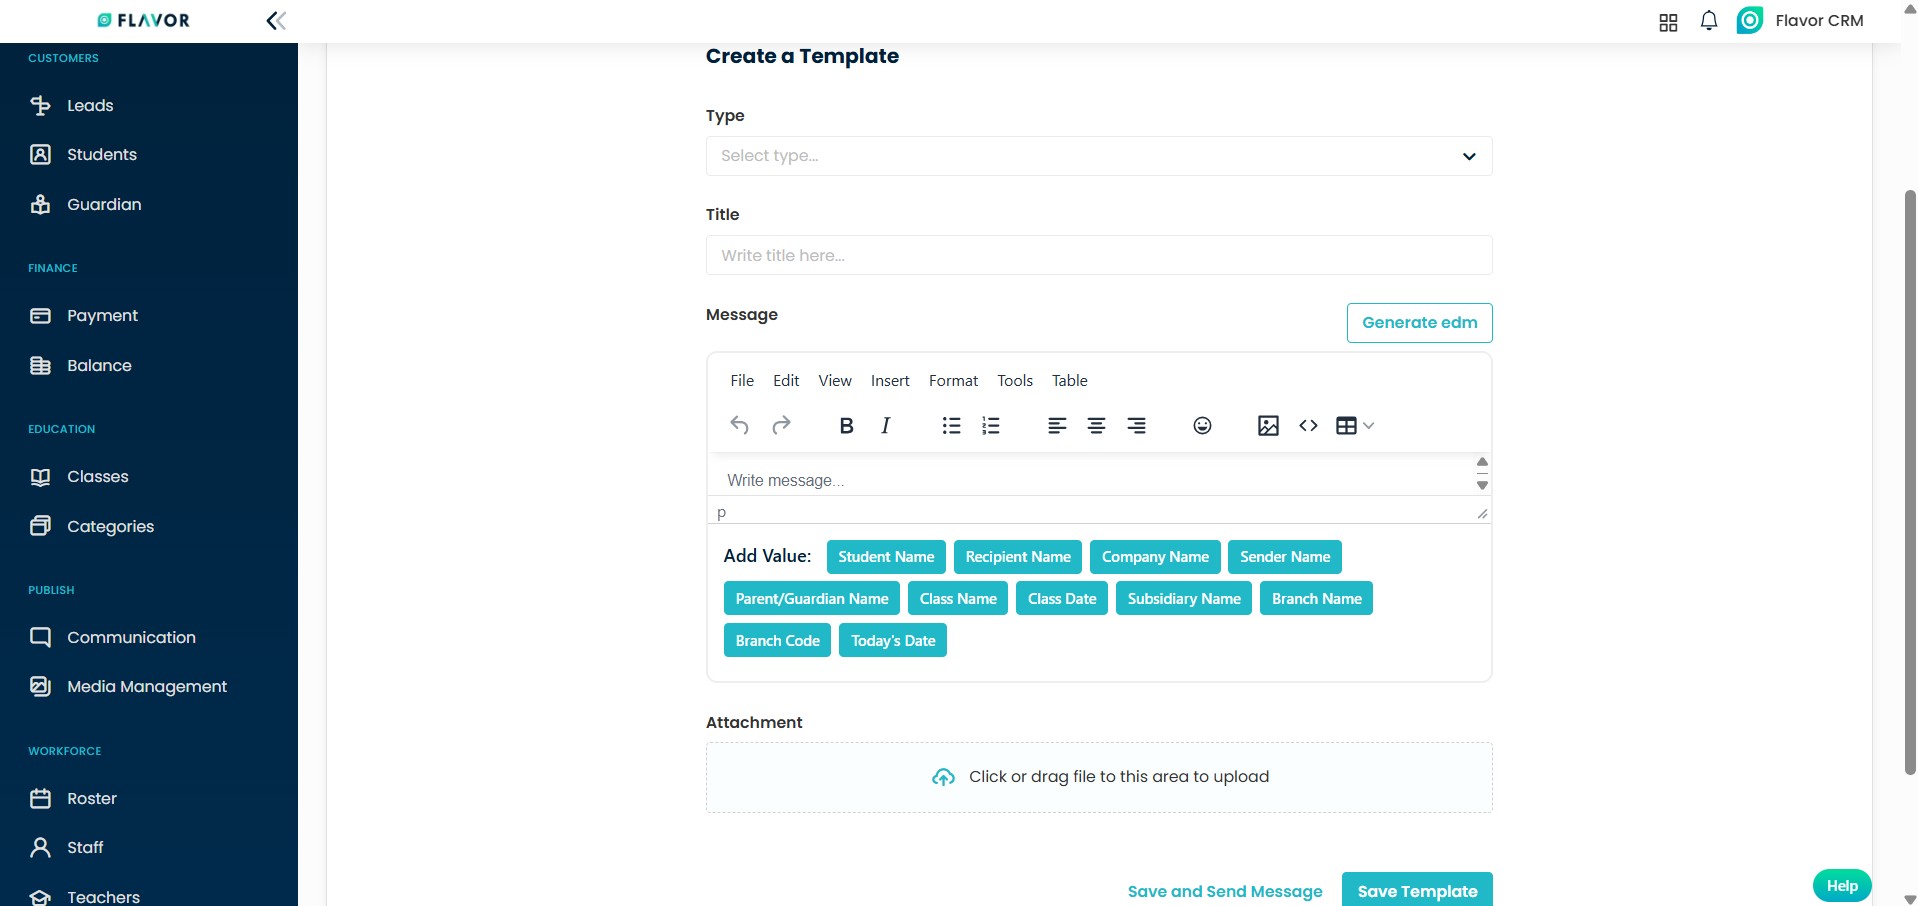
Create Custom Template
Click on + Add Template located at top right to create a new custom template. Select the Template Type, enter the Title, write the Message content and click on Save to store the template.
Recipient List
The Recipient List allows you to organize and manage your contacts for communication. You can view and manage recipients under the following categories : Leads, Students & Parents.
These categories help you easily select and target the right audience when sending messages.
Groups
The Groups section allows you to create and manage custom recipient groups for targeted communication.
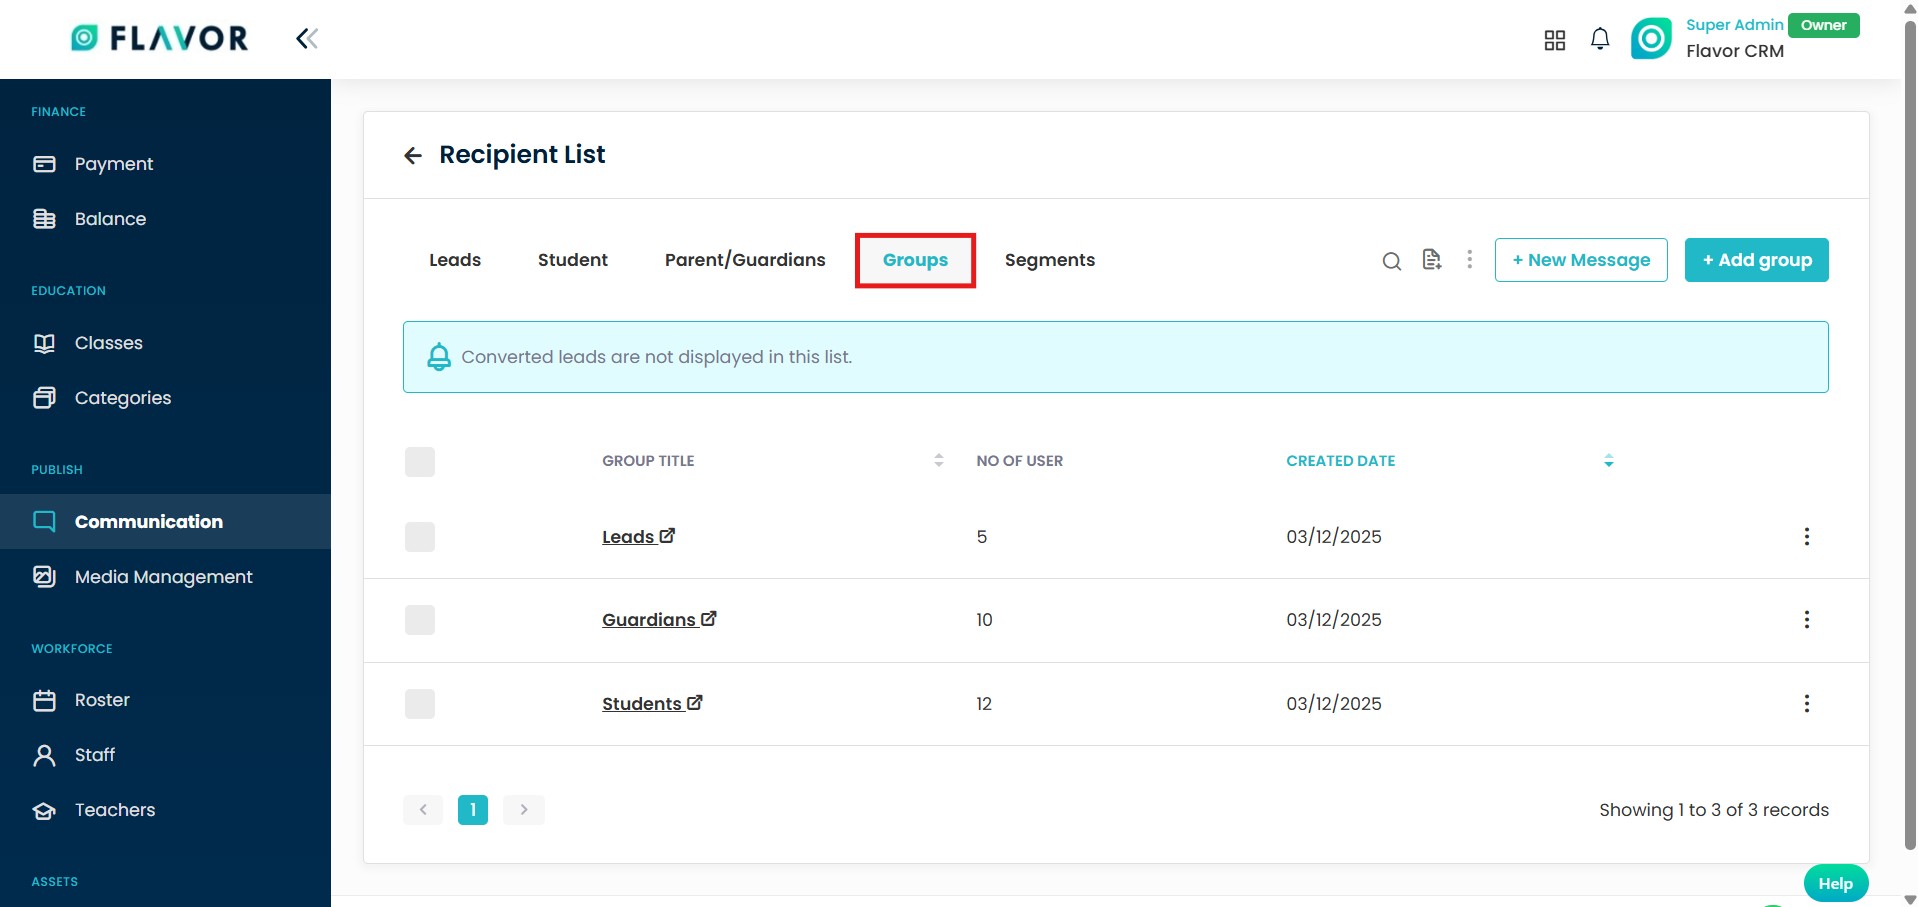
Add Group
To create a new group click on + Add Group, enter the Group Name, add a Description (optional), and select the recipients you want to include & Save.
Creating groups helps you organize contacts efficiently and send messages to a selected audience quickly and easily.

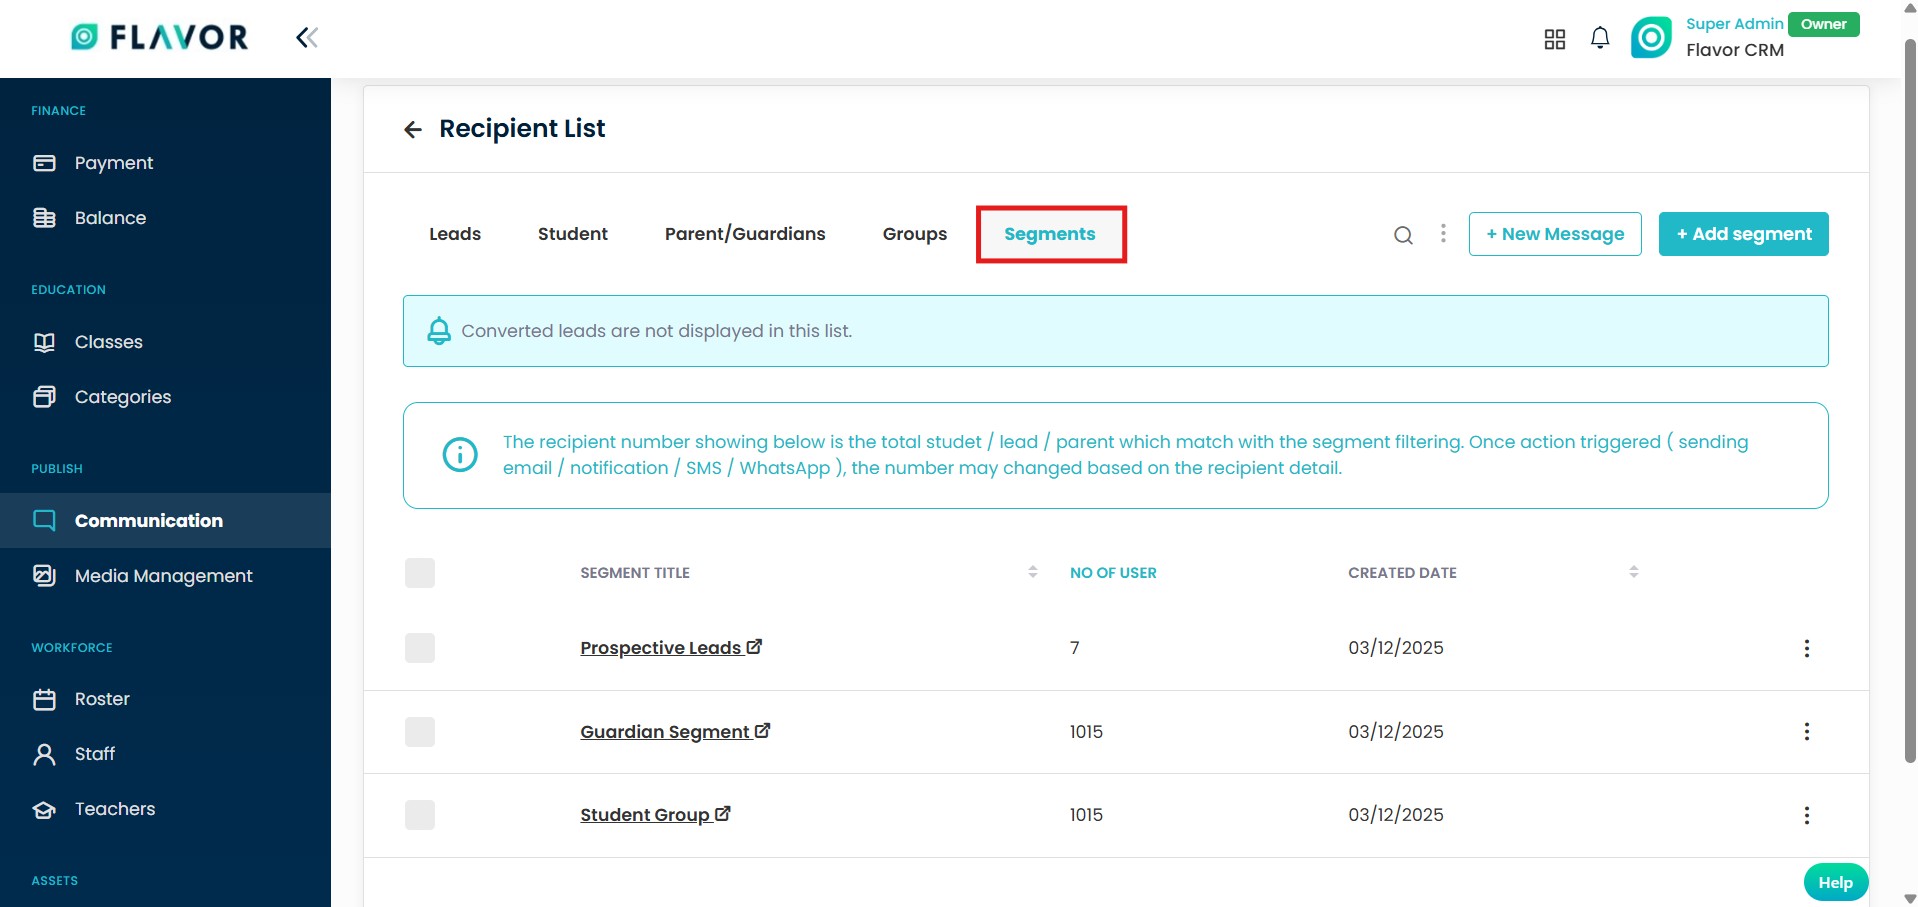
Segments
The Segments section allows you to create filtered recipient lists based on specific criteria.
Segments help you target a specific audience using defined conditions, ensuring more precise and effective communication.
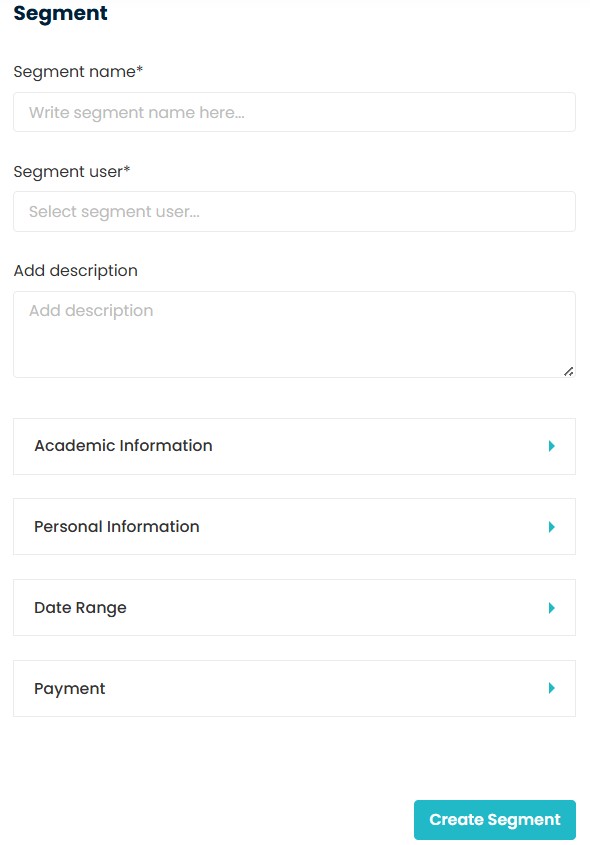
Add Segment
To create a new segment click on + Add Segment, enter the Segment Name. select the Segment User, add a Description (optional).
Apply filters based on available options such as : Academic Information, Personal Information, Date Range & Payment. Click on Create Segment to save.
You can also apply filters based on Custom fields. If Students / Leads have custom fields added to their profiles, it will be available as a filtering option. This allows you to create highly specific segments based on your organization’s unique data and requirements.
Unsubscribed Lists
The Unsubscribed List displays all email addresses that have opted out of receiving communications.
This section allows you to view and manage unsubscribed emails, ensuring that messages are not sent to recipients who have chosen to unsubscribe.
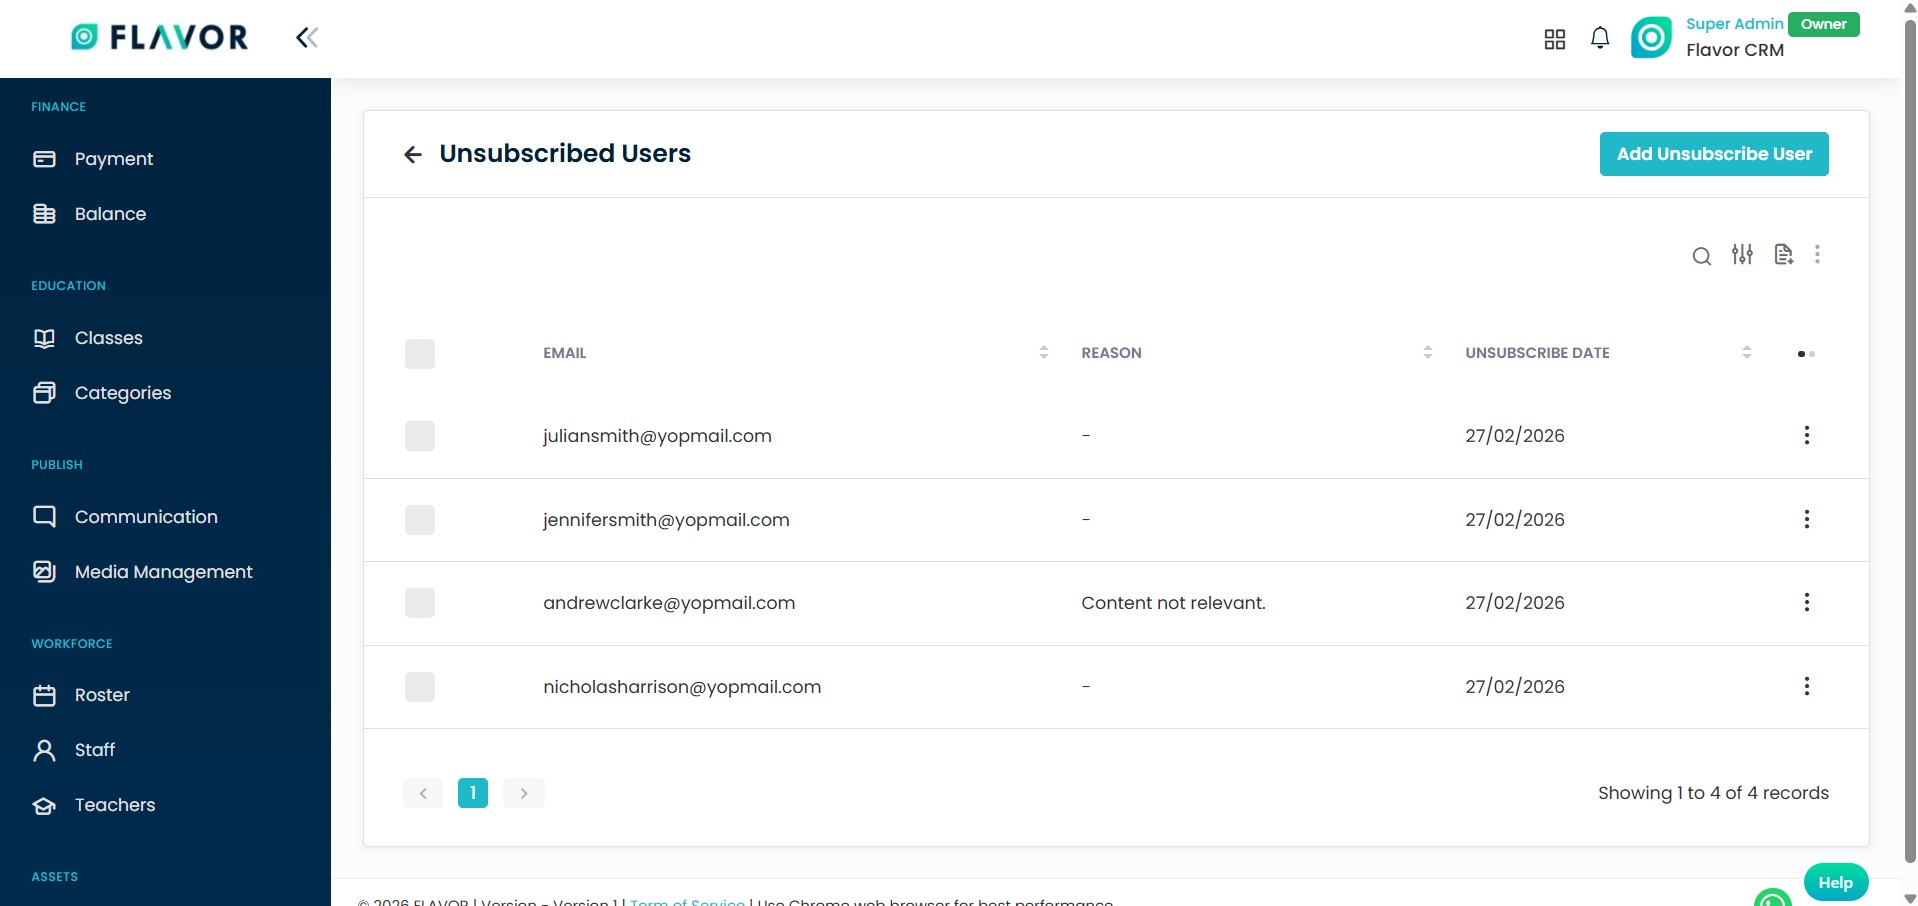
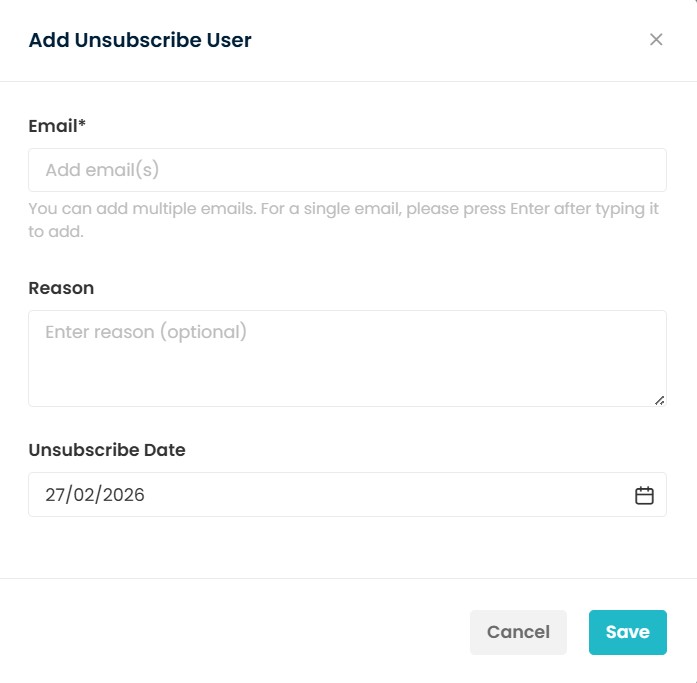
Add Unsubscribe User
To manually add an unsubscribed user, click on Add Unsubscribe User in the top right corner. Enter the following details : Email Address, Reason and Unsubscribe Date and click on Save.
Unsubscribed User's In Recipient List
In the Recipient List, unsubscribed users are indicated with icon (⚠️) displayed next to their email address.
When you hover over or view the icon, a message such as Email is Unsubscribed appears. This indicator helps you quickly recognize contacts who have opted out and ensures that communications are not sent to them.

