
Xero Integration And Subsidiary Connect
Step 1 : Xero Integration
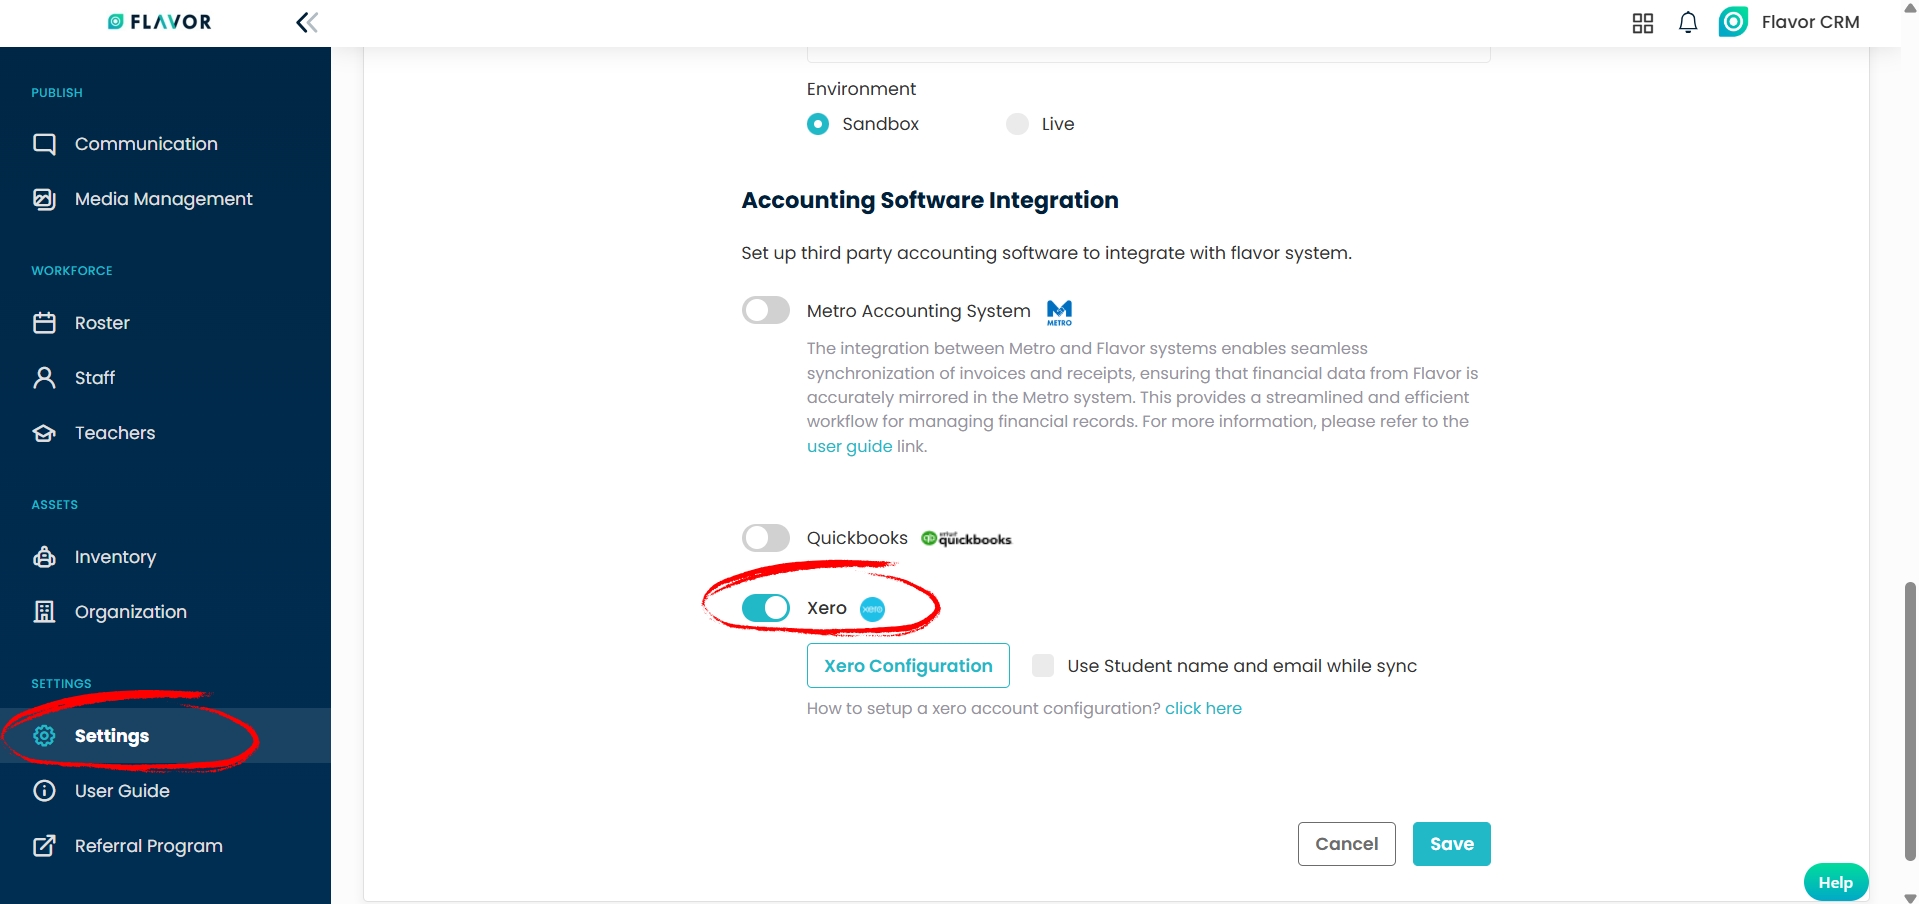
- From the Dashboard, click on Settings.
- Under System Settings, select Payment Integration.
- In the Accounting Software Integration section, you will see different third-party accounting options.
- Switch the Xero toggle On. Note : Also select Use Student name and email while sync if you want student details to be synced.
- Click on Save.
Step 2 : Connect Subsidiary to Xero
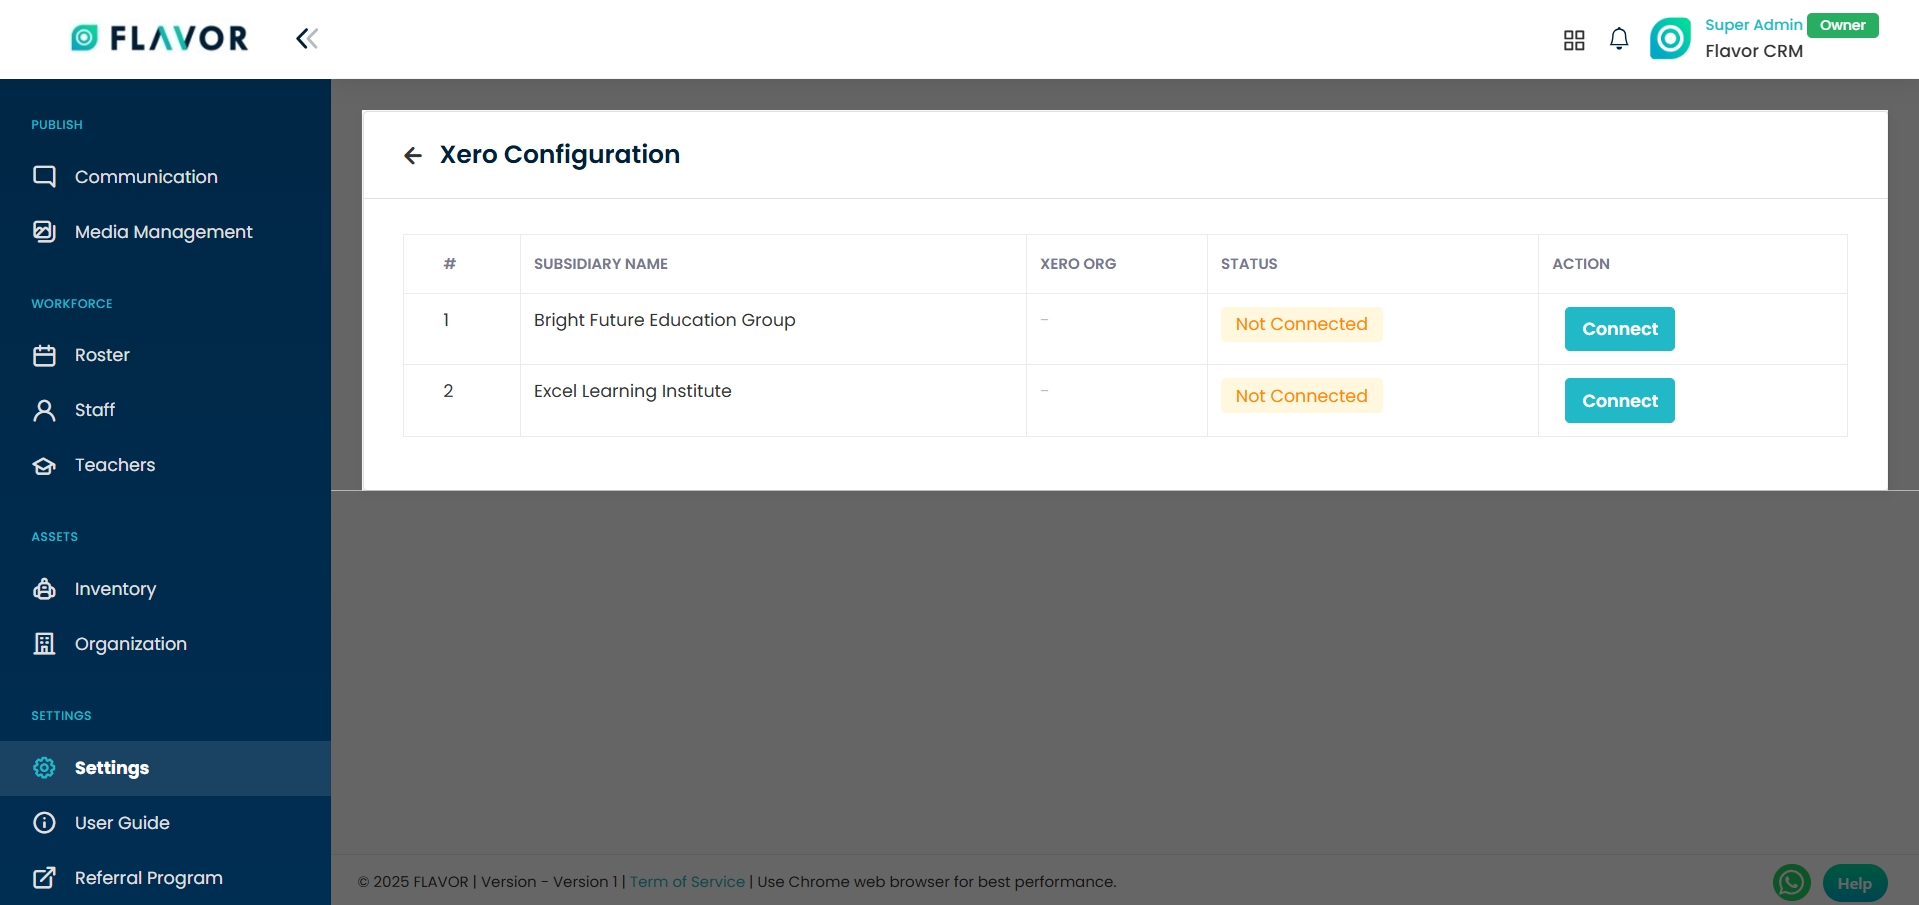
- After enabling Xero, click on the Xero Configuration button.
- This will open the Xero Configuration page, where you will see a list of your subsidiaries.
- Each subsidiary is displayed with its name, Xero organization, current status, and an action button.
- To link a subsidiary with Xero, click on Connect button.
Step 3 : Select Organization in Xero
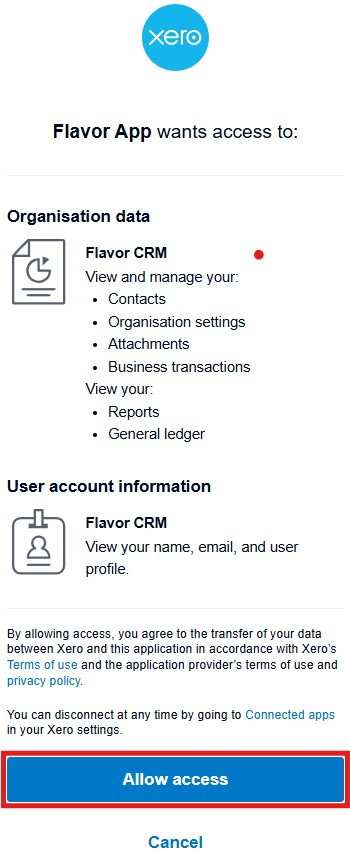
- When you click on Connect, you will be redirected to the Xero login and authorization page.
- Log in with Xero credentials.
- From the dropdown menu, select the Xero organization you want to connect with the Subsidiary.
- Click on Allow Access.
After granting access, you will be redirected to a page showing a list of available Xero organizations.
From this list, choose the correct organization and then click on Select to finalize.
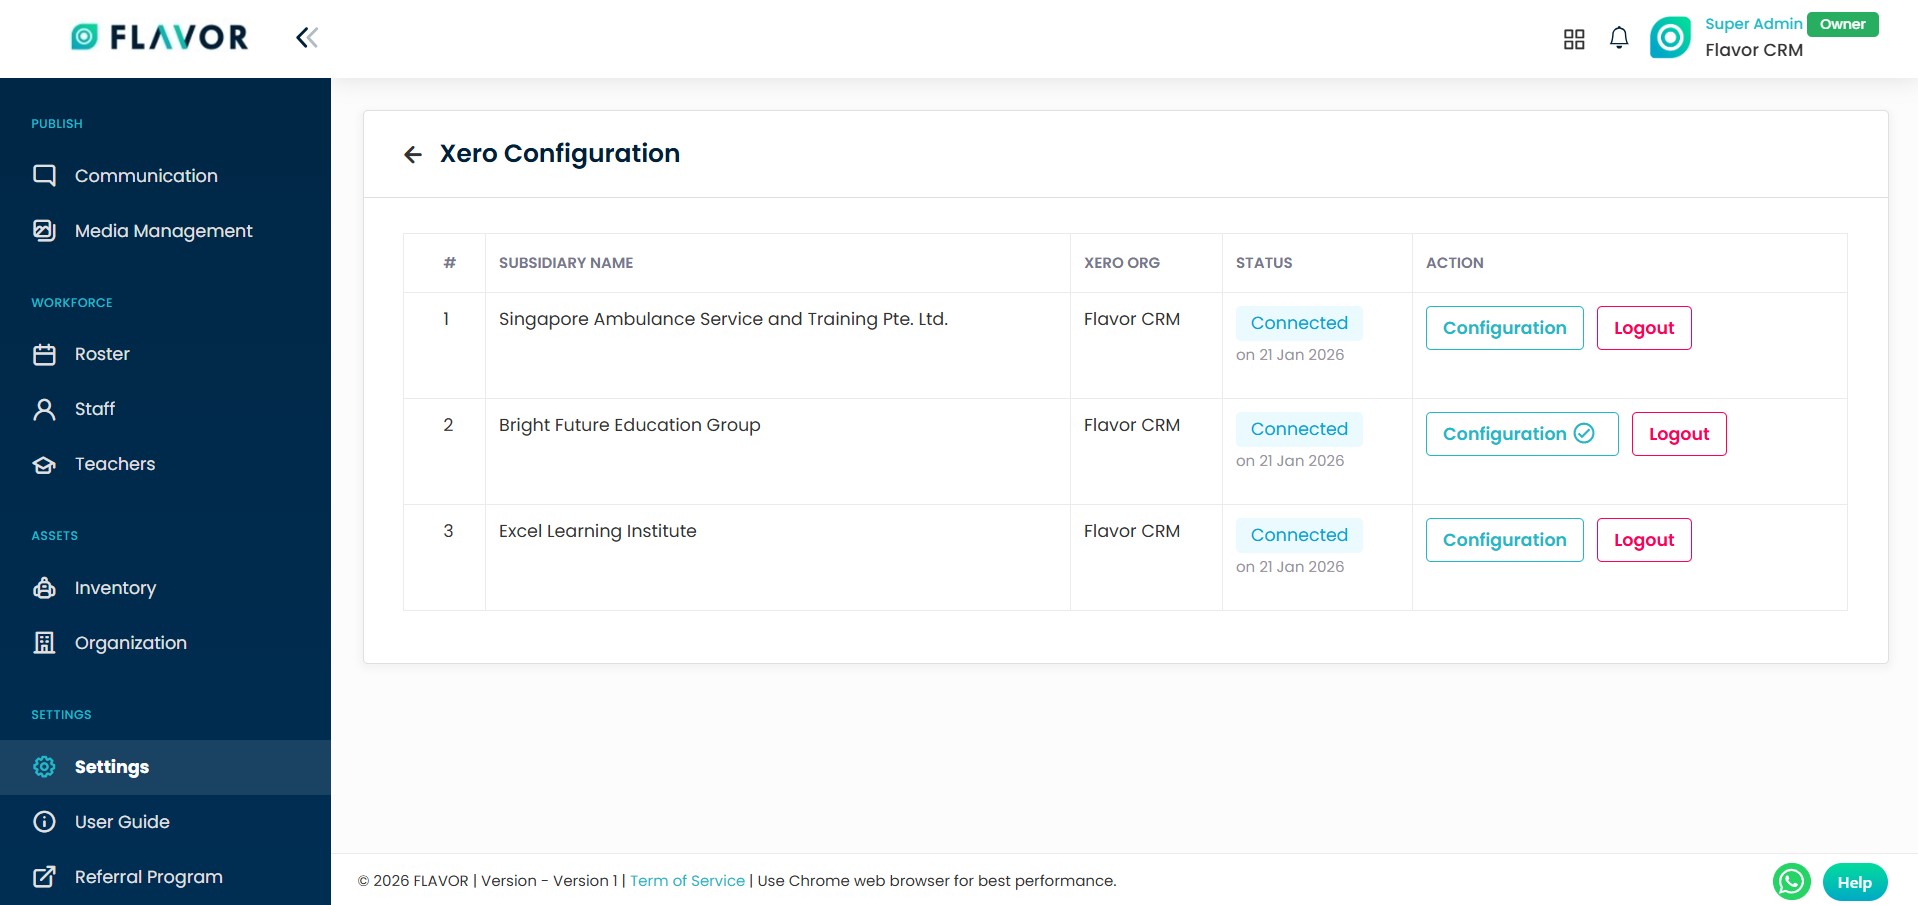
After successful authorization, you will be redirected to Flavor CRM where the Status for the Subsidiary will update to Connected with Date the Subsidiary was connected on.
In the Action column, there will now be two options : Configuration and Logout.
Xero Configuration In Flavor
Step 1 : Configuration
- From the Action column of the connected Subsidiary, click on Configuration.
- This will open the Xero Chart of Accounts Configuration screen within Flavor CRM.
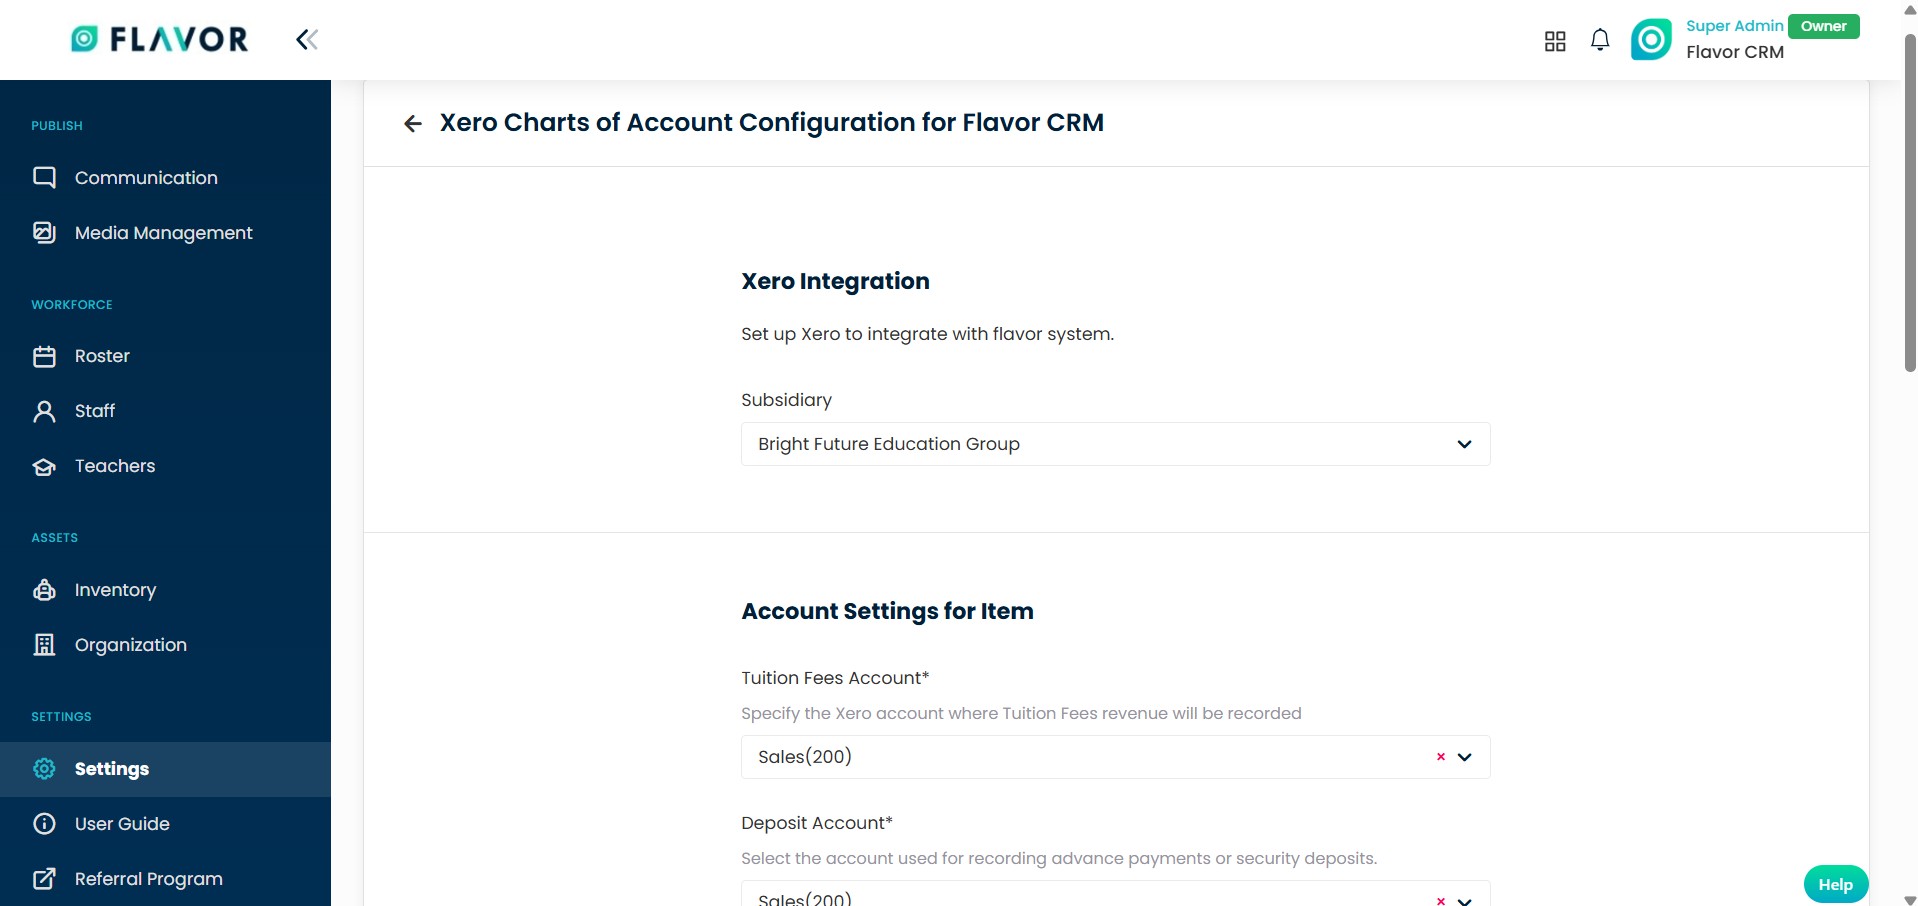
- At top, there is Xero Integration which shows the subsidiary currently connected.
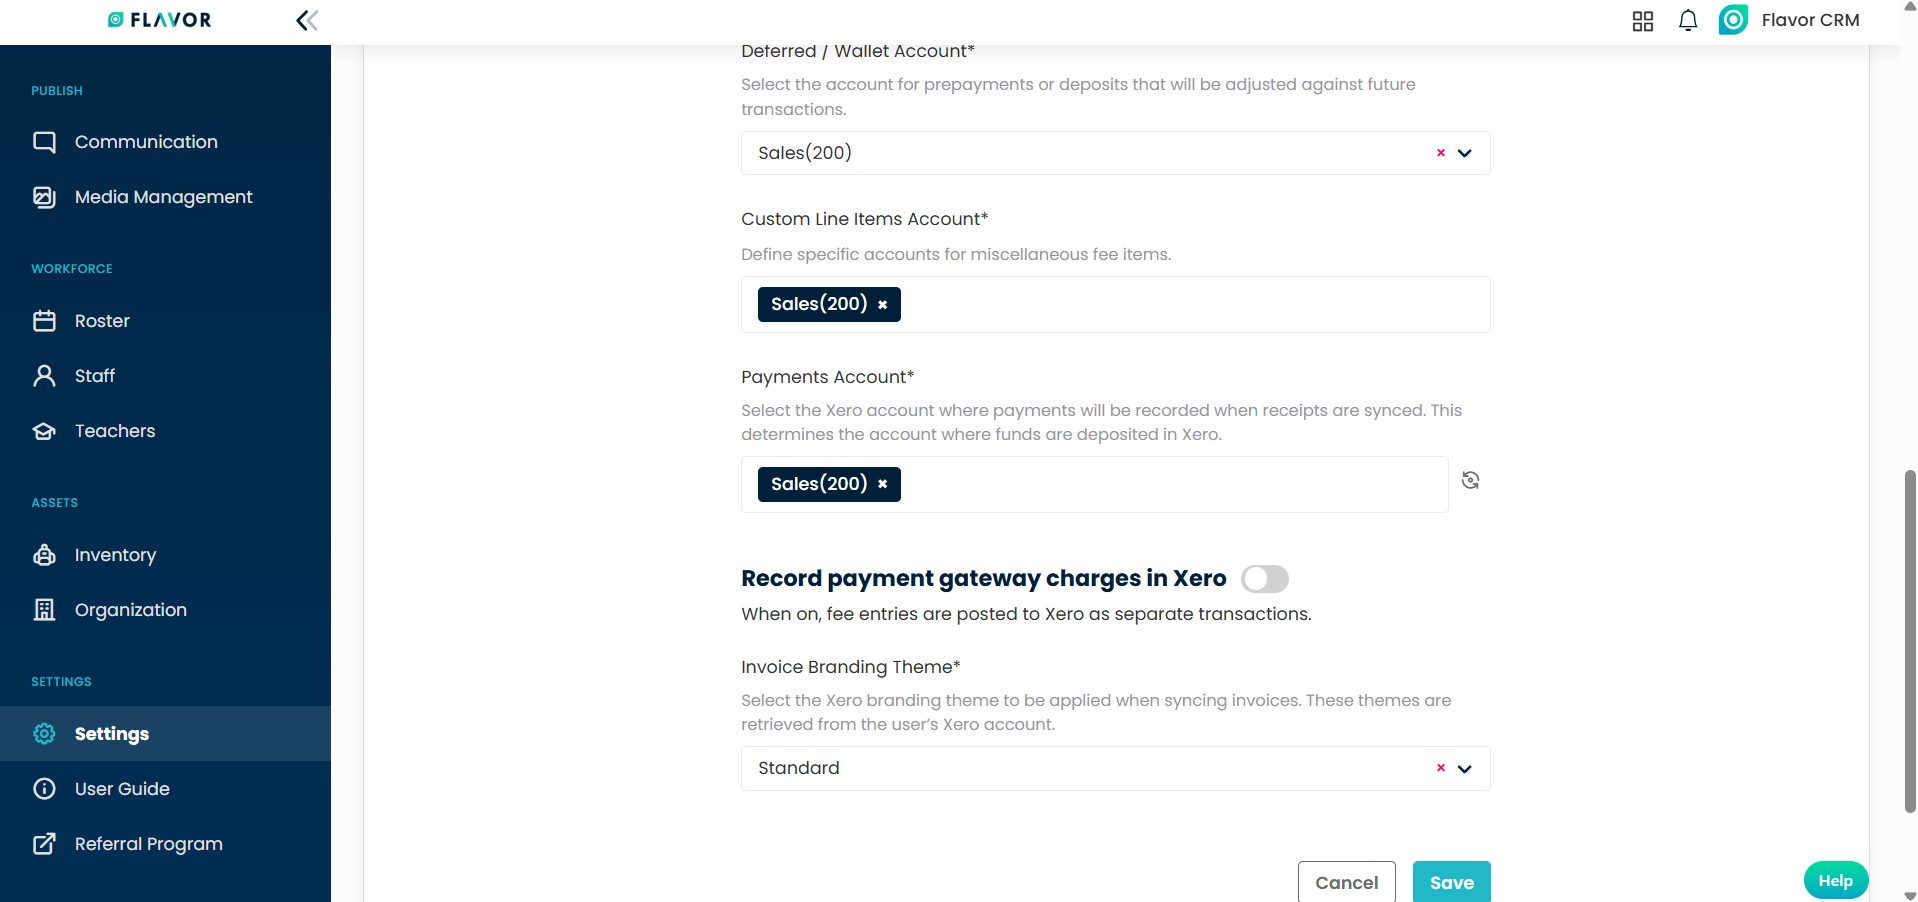
- Below this, there is Account Settings for Items, which lists all the financial accounts that need to be mapped with your Xero accounts. The list includes the following items : Tuition Fees Account, Deposit Account, Registration Fees Account, Material Fees Account, Deferred / Wallet Account, Custom Line Items Account, Payments Account.
- For each item in the list, select the appropriate Xero account from the dropdown.
Invoice Branding Theme : From the dropdown, select Standard. This ensures that your invoices maintain a consistent branding.
Once all configurations are complete, click on Save to apply the changes.
Configuration In Xero
Step 1 : Chart of Accounts
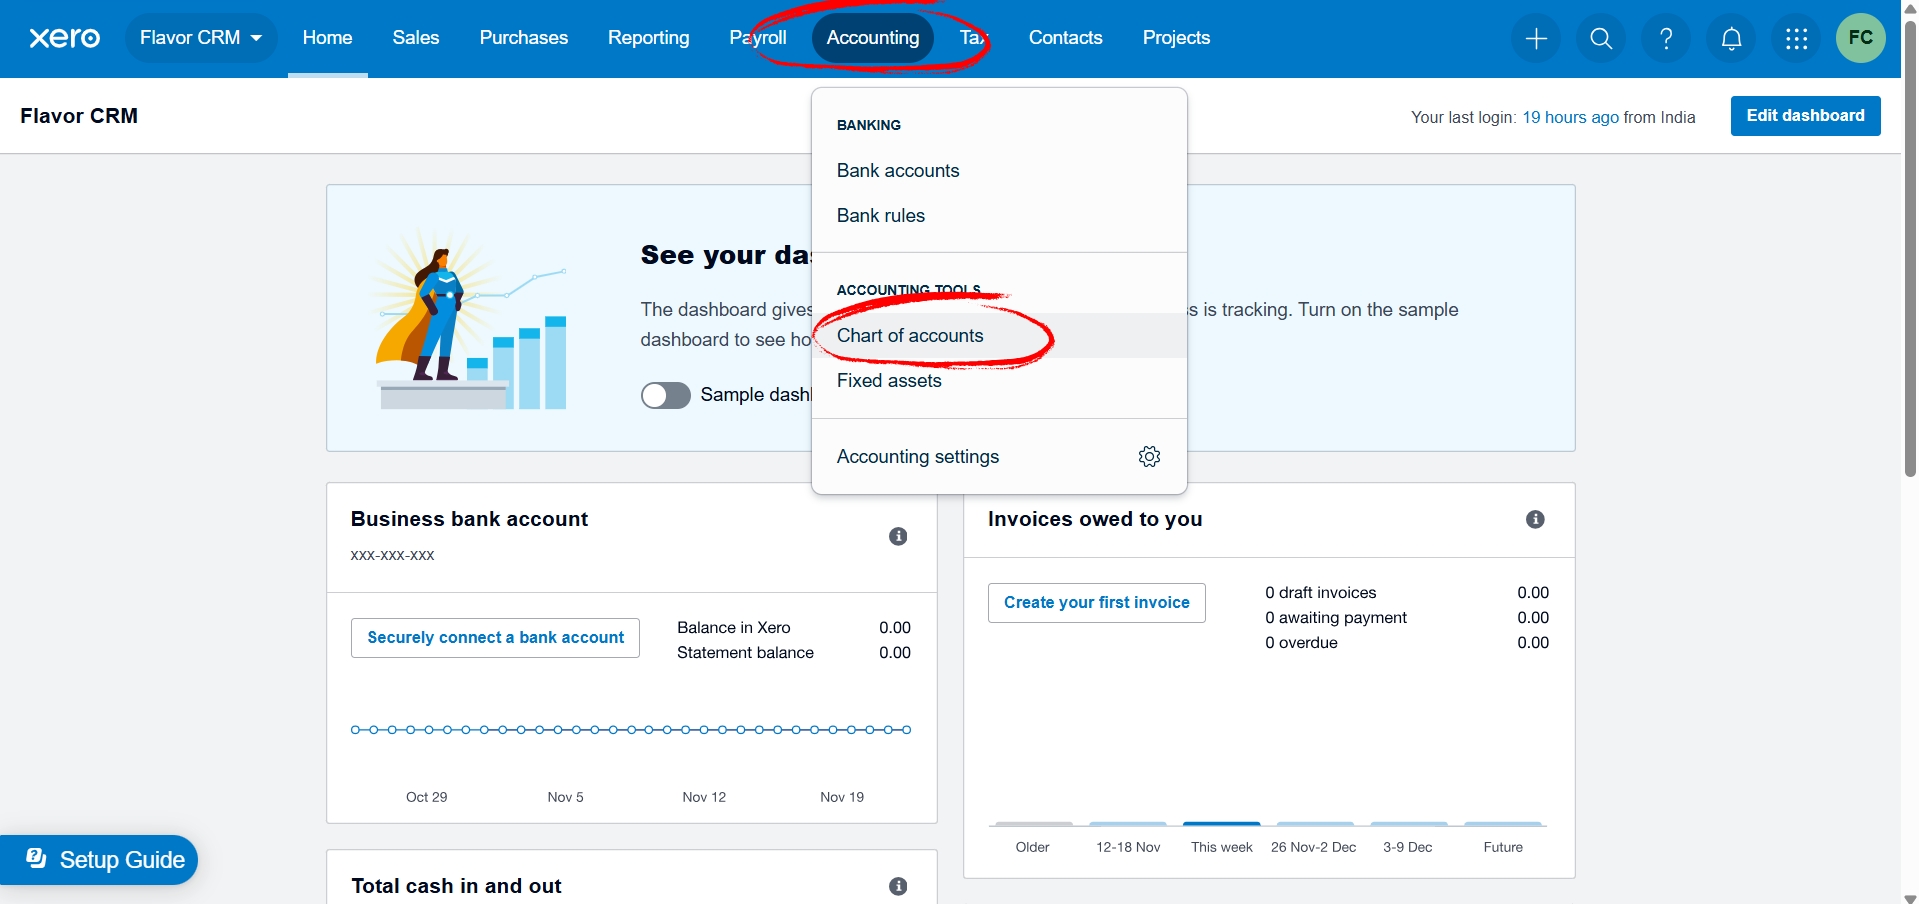
Open Organization in Xero, from the Accounting module, click on Chart of Accounts.
Step 2 : Sales
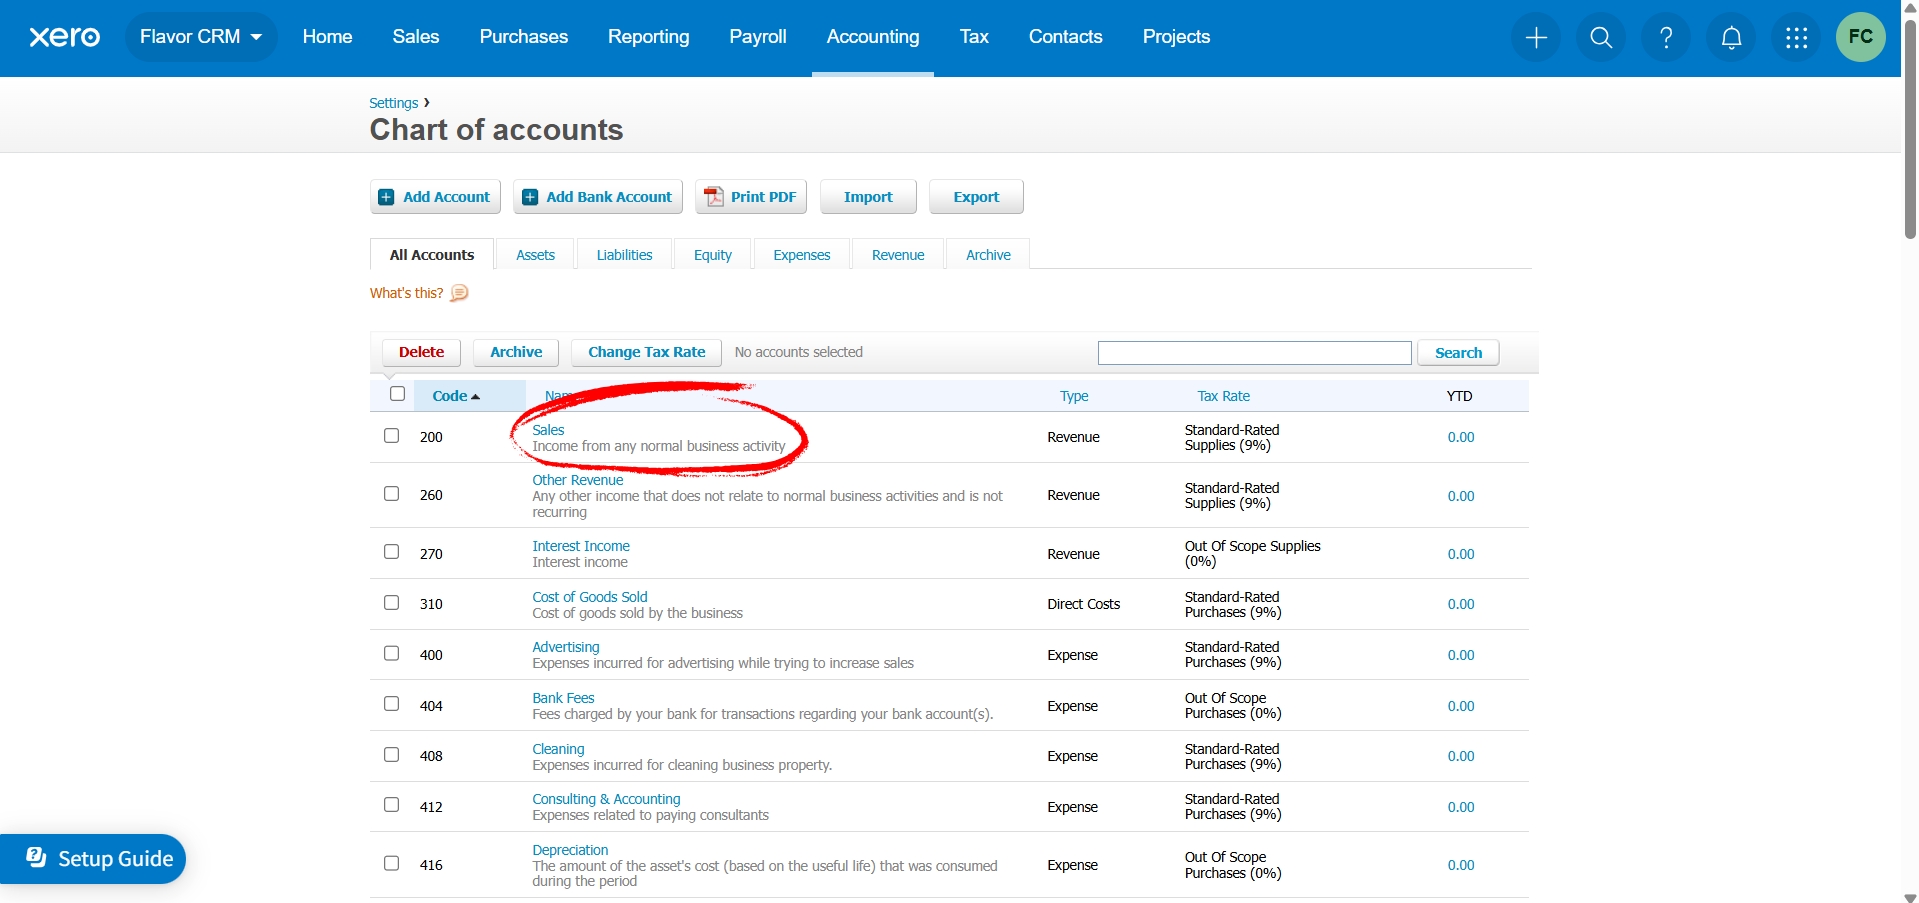
- When you open Chart of Accounts, it will show a list of all the financial accounts.
- From the list, select the one account that you have configured in Flavor.
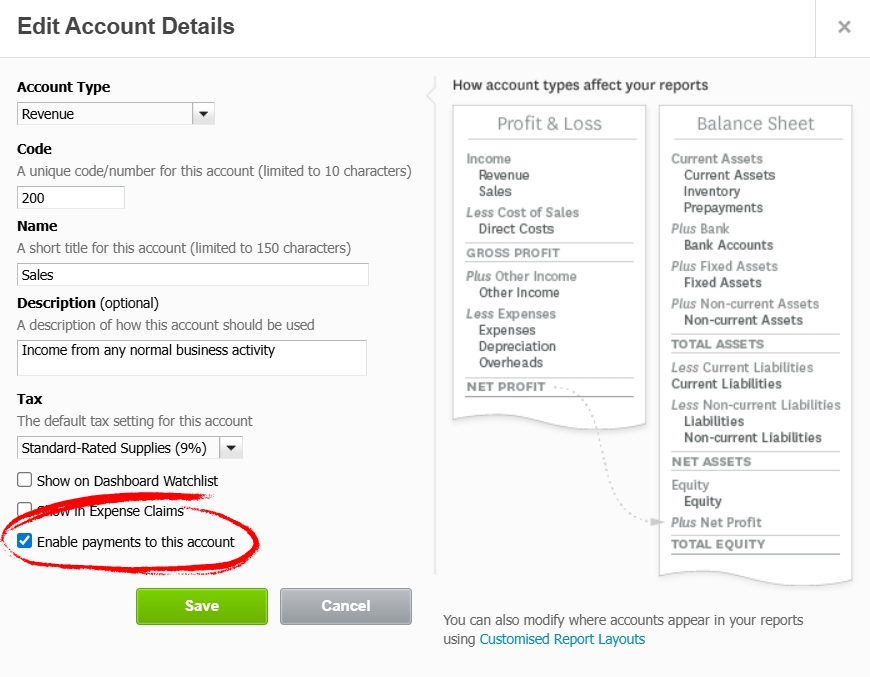
Step 3 : Enable Payments
- It will open Edit Account Details.
- From the Tax section, select the Enable payments to this account.
- Click on Save.
FAQs
Q1. Do I need to connect each subsidiary in Flavor CRM separately to Xero?
Yes. Each subsidiary in Flavor CRM must be individually connected to a Xero organization. This ensures that financial transactions for each subsidiary are correctly recorded in the respective Xero account, avoiding duplication or misallocation.
Q2. Can I disconnect a subsidiary from Xero without affecting others?
Yes. Each subsidiary is managed separately. You can click Logout under the Action column for a the subsidiary to disconnect it from Xero, without impacting the configuration of other subsidiaries.
Need more help? Ask us a question
Please let us know more of your details and our team will reach out to you very shortly.